Olympus D150 D-150/C-1 Zoom Reference Manual (2.7MB) - Page 61
Shooting a Close Subject (Macro Shooting
 |
View all Olympus D150 manuals
Add to My Manuals
Save this manual to your list of manuals |
Page 61 highlights
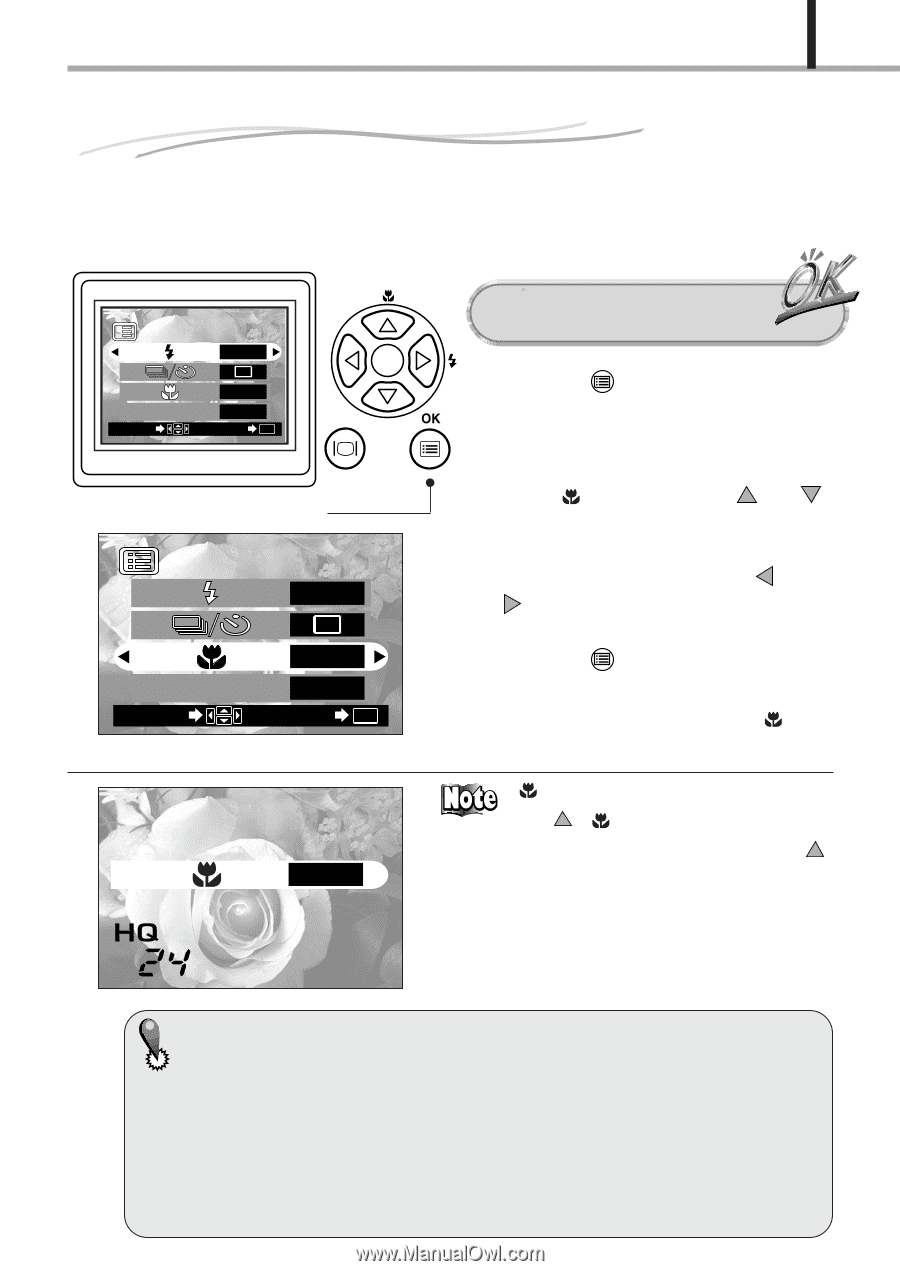
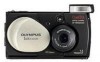
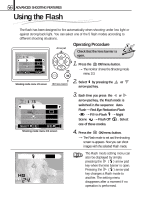
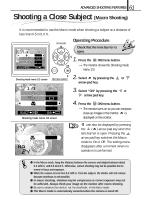
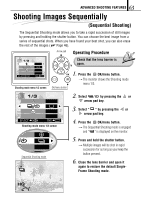
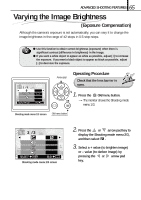
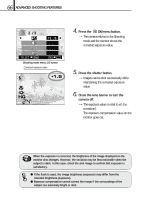
61 ADVANCED SHOOTING FEATURES Shooting a Close Subject (Macro Shooting) It is recommended to use the Macro mode when shooting a subject at a distance of less than 0.5 m/1.6 ft. 1/3 AUTO OFF DIGITAL ZOOM OFF SELECT END OK Arrow pad Operating Procedure Check that the lens barrier is open. 1. Press the OK/menu button. [The monitor shows the Shooting mode menu 1/3. Shooting mode menu 1/3 screen OK/menu button 1/3 AUTO 2. Select by pressing the or arrow pad key. 3. Select "ON" by pressing the or arrow pad key. OFF DIGITAL ZOOM OFF SELECT END OK Shooting mode menu 1/3 screen 4. Press the OK/menu button. [The monitor turns on so you can compose close-up images in the monitor. is displayed on the monitor. OFF can also be displayed by pressing the ( ) arrow pad key when the lens barrier is open. Pressing the arrow pad key switches the Macro mode to On or Off. The setting menu disappears after a moment when no operation is performed. ⅷ In the Macro mode, keep the distance between the camera and subject between about 0.2 m/8 in. and 0.5 m/1.6 ft. Otherwise, correct shooting may not be possible due to errors in focus and exposure. ⅷ When the camera is less than 0.2 m/8 in. from the subject, the shutter will not release because autofocus is not possible. ⅷ In macro shooting, shadows may be conspicuous or correct exposure may not be achieved. Always check your image on the monitor after macro shooting. ⅷ Be sure to observe the monitor, not the viewfinder, in the Macro mode. ⅷ The Macro mode is automaticaly canceled when the camera is tured off.
-
 1
1 -
2
-
3
-
4
-
5
-
6
-
7
-
8
-
9
-
10
-
11
-
12
-
13
-
14
-
15
-
16
-
17
-
18
-
19
-
20
-
21
-
22
-
23
-
24
-
25
-
26
-
27
-
28
-
29
-
30
-
31
-
32
-
33
-
34
-
35
-
36
-
37
-
38
-
39
-
40
-
41
-
42
-
43
-
44
-
45
-
46
-
47
-
48
-
49
-
50
-
51
-
52
-
53
-
54
-
55
-
 56
56 -
 57
57 -
 58
58 -
 59
59 -
 60
60 -
 61
61 -
 62
62 -
 63
63 -
 64
64 -
 65
65 -
 66
66 -
67
-
68
-
69
-
70
-
71
-
72
-
73
-
74
-
75
-
76
-
77
-
78
-
79
-
80
-
81
-
82
-
83
-
84
-
85
-
86
-
87
-
88
-
89
-
90
-
91
-
92
-
93
-
94
-
95
-
96
-
97
-
98
-
99
-
100
-
101
-
102
-
103
-
104
-
105
-
106
-
107
-
108
 |
 |