Pfaff performance 5.2 Manual - Page 22
Thread sensor
 |
View all Pfaff performance 5.2 manuals
Add to My Manuals
Save this manual to your list of manuals |
Page 22 highlights
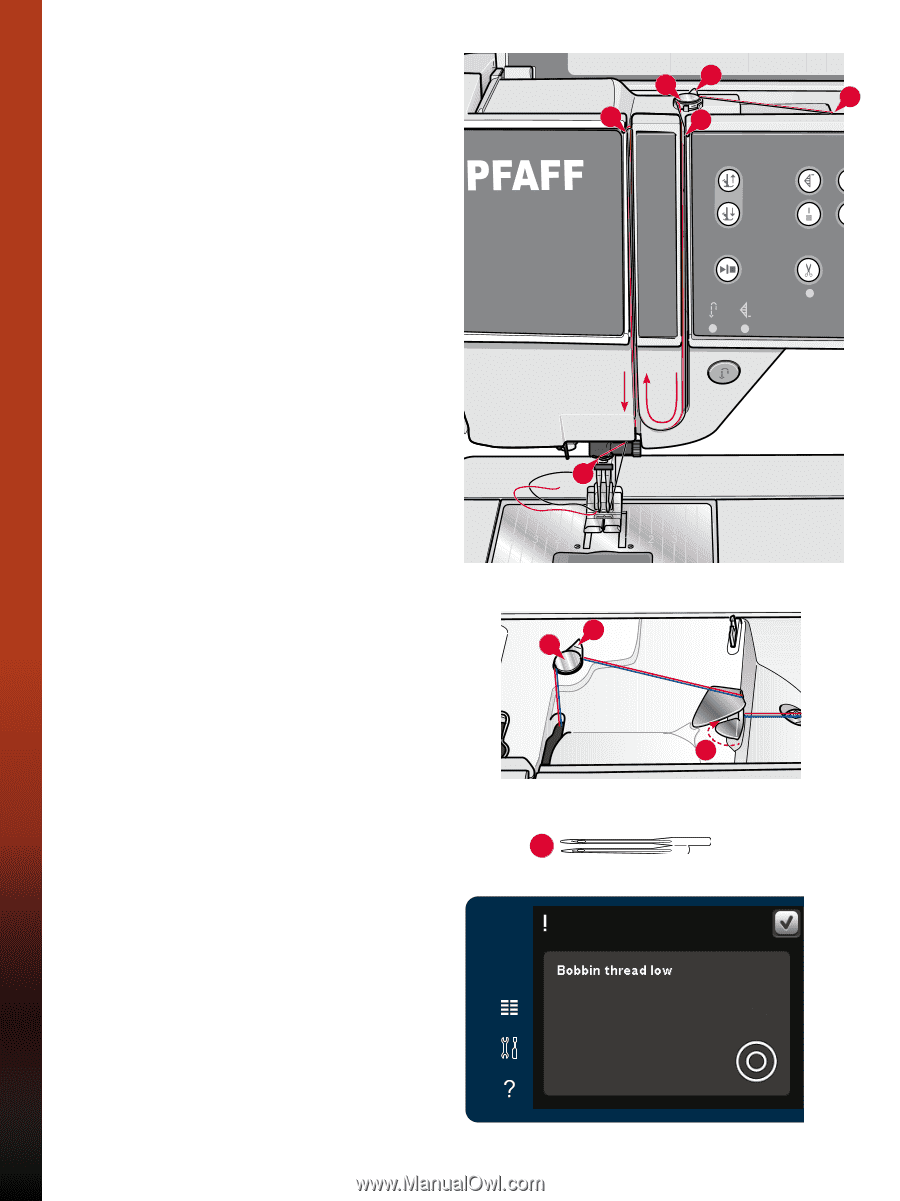
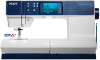
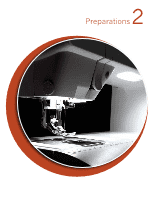
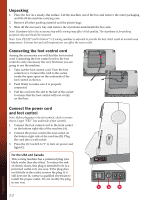
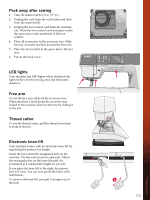
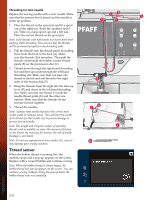
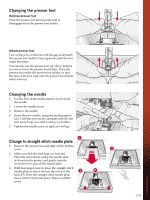
PFAFF Threading for twin needle Replace the sewing needle with a twin needle. Make sure that the presser foot is raised and the needle is in the up position. C B A D F 1. Place the thread on the spool pin and fit a spool cap of the right size. Raise the auxiliary spool pin. Slide on a large spool cap and a felt pad. Place the second thread on the spool pin. Note: Hold threads with both hands to prevent them from slacking while threading. This ensures that the threads will be positioned properly in the threading path. 2. Pull the threads into the thread guide by pulling them from the front to the back (A). Make sure the threads click into place. Then pull the threads underneath the bobbin winder thread guide (B) on the pre-tension disc (C). 3. Thread down through the right-hand threading slot and then upwards through the left-hand threading slot. Make sure that you pass one thread to the left and one thread to the right E sides of the tension disk (F). 4. Bring the threads from the right into the take-up lever (D) and down in the left-hand threading slot. Make sure that one thread is inside the needle thread guide (E) and the other one outside. Make sure that the threads do not become twisted together. 5. Thread the needles. B C Note: Activate twin needle and select the correct twin needle width in Settings menu. This will limit the width of all stitches for that needle size to prevent damage to presser foot and needle. Note: The weight and irregular surface of specialty A threads such as metallic increases the amount of friction on the thread. By reducing the tension, the risk of needle breakage is prevented. Note: Do not use asymmetrical twin needles (G), since it G may damage your sewing machine. Thread sensor When the bobbin thread is running low, the machine stops and a pop-up appears on the screen. Replace with a wound bobbin and continue sewing. Note: When the bobbin thread is almost empty, the bobbin thread low pop-up appears on the screen. You can continue sewing without closing the pop-up before the bobbin thread runs out completly. Preparations 2:6
-
 1
1 -
2
-
3
-
4
-
5
-
6
-
7
-
8
-
9
-
10
-
11
-
12
-
13
-
14
-
15
-
16
-
 17
17 -
 18
18 -
 19
19 -
 20
20 -
 21
21 -
 22
22 -
 23
23 -
 24
24 -
 25
25 -
 26
26 -
 27
27 -
28
-
29
-
30
-
31
-
32
-
33
-
34
-
35
-
36
-
37
-
38
-
39
-
40
-
41
-
42
-
43
-
44
-
45
-
46
-
47
-
48
-
49
-
50
-
51
-
52
-
53
-
54
-
55
-
56
-
57
-
58
-
59
-
60
-
61
-
62
-
63
-
64
-
65
-
66
-
67
-
68
-
69
-
70
-
71
-
72
-
73
-
74
-
75
-
76
-
77
-
78
-
79
-
80
-
81
-
82
-
83
-
84
 |
 |