Philips PXG30 User Manual - Page 26
Manual PC Adjustment
 |
UPC - 037849938089
View all Philips PXG30 manuals
Add to My Manuals
Save this manual to your list of manuals |
Page 26 highlights
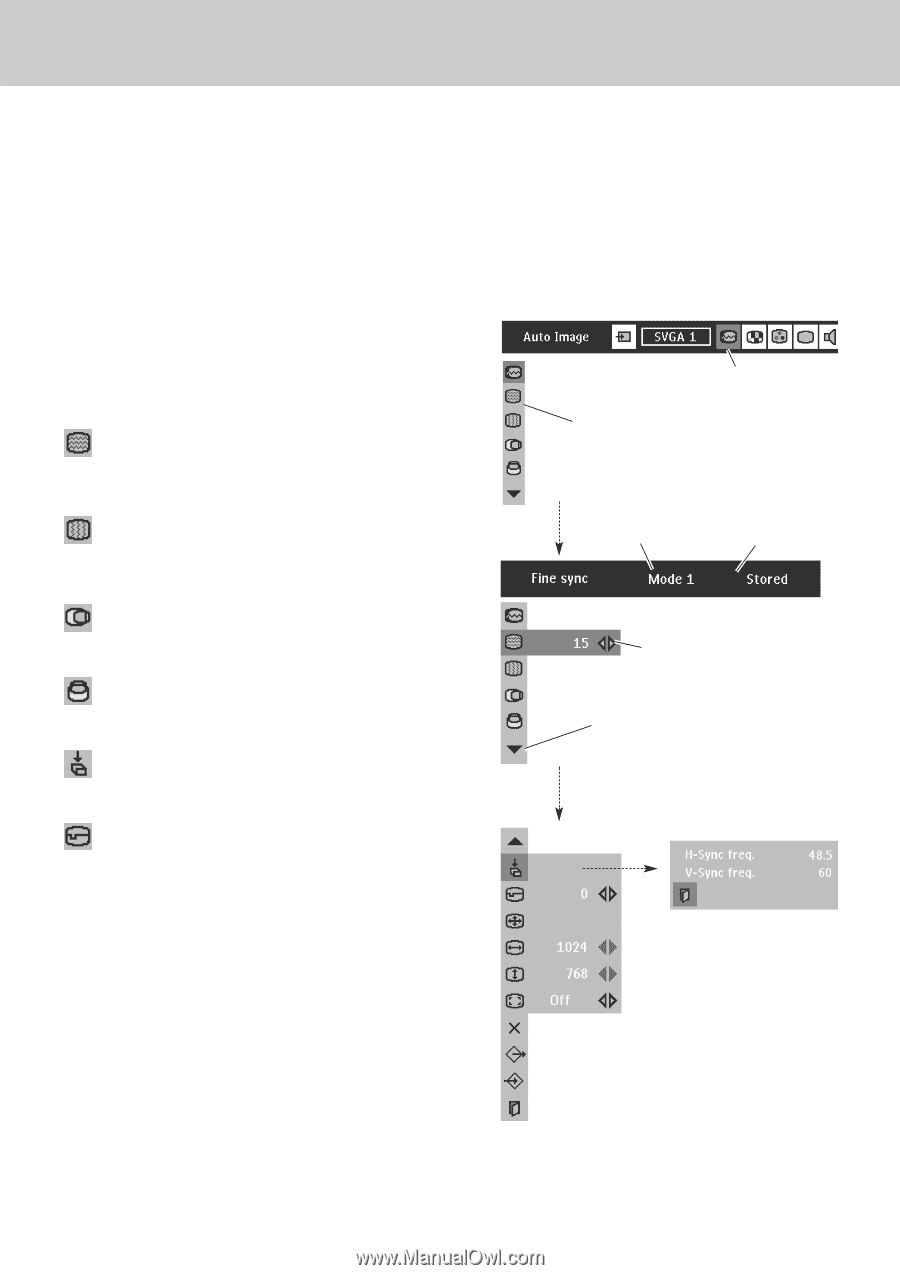
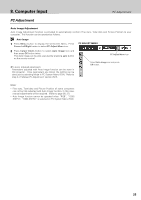
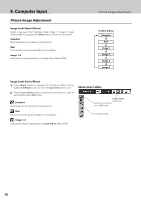
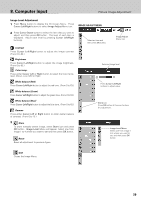
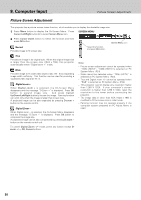
8. Computer Input PC Adjustment Manual PC Adjustment This projector can automatically tune the display signals from the most of personal computers currently distributed. However, some computers employ the special signal formats which may not be tuned by SmartSet of this projector. In this case, the image may be recognized as a flickering picture, a non-synchronized picture, a non-centered picture or a skewed picture, and projected improperly. The Manual PC Adjustment function allows you to manually adjust several parameters to match these special signal formats. Also, you can store these adjusted parameters in the 5 independent memory areas, enabling you to call up whenever you need. 1 Press Menu button to display the On-Screen Menu. Press Cursor Left/Right button to select PC Adjust Menu icon. 2 Press Cursor Down button to select the item to adjust and then press OK button. Adjustment dialog box will appear. Press Cursor Left/Right button to adjust the value. PC ADJUST MENU PC Adjust Menu icon Fine sync Adjusts an image as necessary to eliminate flicker from the display. Press Cursor Left/Right button to adjust value.(From 0 to 31.) Total dots Adjusts the number of total dots in one horizontal period. Press Cursor Left/Right button(s) to adjust the number to match your PC image. Horizontal Adjusts horizontal picture position. Press Cursor Left/Right button(s) to adjust the position. Vertical Adjusts vertical picture position. Press Cursor Left/Right button(s) to adjust the position. Current mode Press OK button to show the information of the selected computer . Clamp Adjusts clamp level. When the image has a dark bar(s), try this adjustment. Select the item and press OK button. Selected Mode Shows status (Stored / Free) of the selected Mode. Press Cursor Left/Right button to adjust the value. Press OK button at this icon to adjust "Clamp," "Display area (H/V)" or set "Full screen." Current mode Press OK button at Current mode icon to show the information of the connected computer 26
-
 1
1 -
2
-
3
-
4
-
5
-
6
-
7
-
8
-
9
-
10
-
11
-
12
-
13
-
14
-
15
-
16
-
17
-
18
-
19
-
20
-
 21
21 -
 22
22 -
 23
23 -
 24
24 -
 25
25 -
 26
26 -
 27
27 -
 28
28 -
 29
29 -
 30
30 -
 31
31 -
32
-
33
-
34
-
35
-
36
-
37
-
38
-
39
-
40
-
41
-
42
-
43
-
44
-
45
-
46
-
47
-
48
-
49
-
50
-
51
-
52
 |
 |