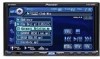
Pioneer AVH-P6800DVD Owner's Manual - Page 101
Introduction of setup, adjustments, Setting the AV input, Setting for rear view, camera back up
 |
UPC - 012562803548
View all Pioneer AVH-P6800DVD manuals
Add to My Manuals
Save this manual to your list of manuals |
Page 101 highlights
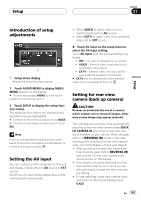
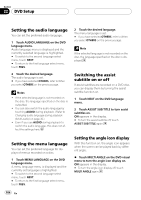
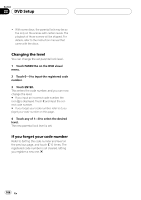
Setup Section 21 Setup Introduction of setup adjustments 1 1 Setup menu display Shows the setup function names. 1 Touch AUDIO MENU to display MENU. MENU appears on the display. # You can also display MENU by clicking the joystick on the remote control. 2 Touch SETUP to display the setup function names. The setup function names are displayed and operable ones are highlighted. # To return to the previous display, touch BACK. # To return to the display of each source, touch ESC. Note If you do not operate the setup function within about 30 seconds, the display is automatically returned to the source display. Setting the AV input You can connect an AV component to this unit and display videos either on AV source or EXT source. Switch the AV input setting depending on the connected AV components. ! Select VIDEO to watch video of a connected component as AV source. ! Select EXT-V to watch video of a connected video unit as EXT source. % Touch AV input on the setup menu to select the AV input setting. Touch AV input until the desired setting is selected. ! OFF - No video component is connected ! VIDEO - External video component (such as portable video player) ! EXT-V - External video unit (such as Pio- neer products available in the future) # EXT-V can be selected only when external video unit is connected to this unit. Setting for rear view camera (back up camera) CAUTION Pioneer recommends the use of a camera which outputs mirror reversed images, otherwise screen image may appear reversed. This unit features a function that automatically switches to the rear view camera video (BACK UP CAMERA IN jack) when a rear view camera is installed on your vehicle. When the gear shift is in REVERSE (R) position, the video automatically switches to a rear view camera video. (For more details, consult your dealer.) ! After you set up the rear view camera set- ting, move the gear shift in REVERSE (R) and confirm if a rear view camera video can be shown on the display. ! If the display should be switched to a rear view camera video by error while you are driving forward, change the rear view camera setting. ! To end watching a rear view camera video and return to the source display, press V.ADJ. En 101
-
 1
1 -
2
-
3
-
4
-
5
-
6
-
7
-
8
-
9
-
10
-
11
-
12
-
13
-
14
-
15
-
16
-
17
-
18
-
19
-
20
-
21
-
22
-
23
-
24
-
25
-
26
-
27
-
28
-
29
-
30
-
31
-
32
-
33
-
34
-
35
-
36
-
37
-
38
-
39
-
40
-
41
-
42
-
43
-
44
-
45
-
46
-
47
-
48
-
49
-
50
-
51
-
52
-
53
-
54
-
55
-
56
-
57
-
58
-
59
-
60
-
61
-
62
-
63
-
64
-
65
-
66
-
67
-
68
-
69
-
70
-
71
-
72
-
73
-
74
-
75
-
76
-
77
-
78
-
79
-
80
-
81
-
82
-
83
-
84
-
85
-
86
-
87
-
88
-
89
-
90
-
91
-
92
-
93
-
94
-
95
-
 96
96 -
 97
97 -
 98
98 -
 99
99 -
 100
100 -
 101
101 -
 102
102 -
 103
103 -
 104
104 -
 105
105 -
 106
106 -
107
-
108
-
109
-
110
-
111
-
112
-
113
-
114
-
115
-
116
-
117
-
118
-
119
-
120
-
121
-
122
-
123
-
124
-
125
-
126
-
127
-
128
-
129
-
130
-
131
-
132
-
133
 |
 |
