Pioneer AVH-P6800DVD Owner's Manual - Page 102
Setting the clock, Selecting video on rear display, Setup
 |
UPC - 012562803548
View all Pioneer AVH-P6800DVD manuals
Add to My Manuals
Save this manual to your list of manuals |
Page 102 highlights
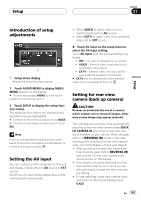
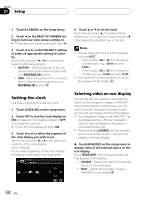
Section 21 Setup 1 Touch B.CAMERA on the setup menu. 2 Touch c on the BACK UP CAMERA setting to turn rear view camera setting on. # To turn rear view camera setting off, touch d. 3 Touch c or d on the POLARITY setting to select an appropriate setting for polarity. Each time you touch c or d it switches between the following polarity: ! BATTERY - When the polarity of the connected lead is positive while the gear shift is in REVERSE (R) position ! GND - When the polarity of the connected lead is negative while the gear shift is in REVERSE (R) position Setting the clock Use these instructions to set the clock. 1 Touch CLOCK ADJ on the setup menu. 2 Touch OFF to turn the clock display on. ON will appear in the display instead of OFF. Clock display is now on. # To turn the clock display off, touch ON. 3 Touch c or d to select the segment of the clock display you wish to set. Each time you touch c or d it will select one segment of the clock display: Hour-Minute As you select segments of the clock display the segment selected will be highlighted. 4 Touch a or b to set the clock. Each time you touch a it increases the selected hour or minute. Each time you touch b it decreases the selected hour or minute. Notes ! You can match the clock to a time signal by touching JUST. - If the minute is 00 to 29, the minutes are rounded down. (e.g., 10:18 becomes 10:00.) - If the minute is 30 to 59, the minutes are rounded up. (e.g., 10:36 becomes 11:00.) ! Even when the sources are off, the clock display appears on the display. Selecting video on rear display You can set the rear display to automatically switch to the navigation image or AVG-VDP1 with the front display. Alternatively, you can set it to remain showing the selected video source and not change with the front display. ! The navigation image or the AVG-VDP1 can be displayed when a Pioneer navigation unit or a Vehicle Dynamics Processor is connected to this unit. ! When selecting SOURCE and the selected source is an audio source, nothing is displayed on the rear display. % Touch REAR DISP on the setup menu to display video of the selected source on the rear display. Touch REAR DISP until the desired video setting appears in the display. ! SOURCE - Display the video of the selected source on the rear display ! NAVI - Display the navigation image or AVG-VDP1 on rear display 102 En
-
 1
1 -
2
-
3
-
4
-
5
-
6
-
7
-
8
-
9
-
10
-
11
-
12
-
13
-
14
-
15
-
16
-
17
-
18
-
19
-
20
-
21
-
22
-
23
-
24
-
25
-
26
-
27
-
28
-
29
-
30
-
31
-
32
-
33
-
34
-
35
-
36
-
37
-
38
-
39
-
40
-
41
-
42
-
43
-
44
-
45
-
46
-
47
-
48
-
49
-
50
-
51
-
52
-
53
-
54
-
55
-
56
-
57
-
58
-
59
-
60
-
61
-
62
-
63
-
64
-
65
-
66
-
67
-
68
-
69
-
70
-
71
-
72
-
73
-
74
-
75
-
76
-
77
-
78
-
79
-
80
-
81
-
82
-
83
-
84
-
85
-
86
-
87
-
88
-
89
-
90
-
91
-
92
-
93
-
94
-
95
-
96
-
 97
97 -
 98
98 -
 99
99 -
 100
100 -
 101
101 -
 102
102 -
 103
103 -
 104
104 -
 105
105 -
 106
106 -
 107
107 -
108
-
109
-
110
-
111
-
112
-
113
-
114
-
115
-
116
-
117
-
118
-
119
-
120
-
121
-
122
-
123
-
124
-
125
-
126
-
127
-
128
-
129
-
130
-
131
-
132
-
133
 |
 |