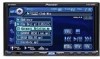
Pioneer AVH-P6800DVD Owner's Manual - Page 112
Selecting the background, display, Other Functions
 |
UPC - 012562803548
View all Pioneer AVH-P6800DVD manuals
Add to My Manuals
Save this manual to your list of manuals |
Page 112 highlights
Section 24 Other Functions ! BRIGHT - Adjust the black intensity ! CONTRAST - Adjust the contrast ! COLOR - Adjust the color saturation ! HUE - Adjust the tone of color (red is em- phasized or green is emphasized) ! BACK-CAMERA/SOURCE - Switch the pic- ture adjustment modes # You can adjust the picture adjustment for rear view camera only when B. CAMERA is selected for B.CAMERA. (Refer to Setting for rear view camera (back up camera) on page 101.) # If you are viewing image from the rear view camera, you cannot touch SOURCE to adjust picture adjustment for the selected source. # With some rear view cameras, picture adjustment may not be possible. 3 Touch c or d to adjust the selected item. Each time you touch c or d it increases or decreases the level of selected item. +24 to -24 is displayed as the level is increased or decreased. 4 Touch ESC to hide the touch panel keys. Dimmer The adjustment of DIMMER is stored separately for each ambient light; daytime, evening and nighttime. 1 Press V.ADJ and hold to display PICTURE ADJUST. Press V.ADJ and hold until PICTURE ADJUST appears in the display. 2 Touch DIMMER. 3 Touch c or d to adjust the brightness. Each time you touch c or d moves the key towards the left or the right. The level indicates the brightness of the screen being adjusted. The farther the key moves to the right, the brighter the screen. 4 Touch ESC to hide the touch panel keys. Note The icons indicating the current ambient brightness used for adjusting BRIGHT and CONTRAST may differ from DIMMER slightly. Selecting the background display You can display the thumbnails of available background pictures/movies and select one to set your background display. The selection can be made each for the audio source group (playing CD, listening to Tuner, using telephone source, etc.) and the movie source group (watching DVD, AV, etc.). 1 Press ENTERTAINMENT (ENT). Thumbnails of background pictures/movies appear on the display. # To go to the next group of thumbnails, touch NEXT. # To return to the previous group of thumbnails, touch PREV. 2 Touch one of the thumbnails that you want to display in the background. The selected picture/movie is displayed at the background. Note In the following cases, background images from that source cannot be selected: ! When the AV input setting is not set to VIDEO (refer to page 101). ! When a Pioneer navigation unit or the AVG- VDP1 is not connected to this unit. 112 En
-
 1
1 -
2
-
3
-
4
-
5
-
6
-
7
-
8
-
9
-
10
-
11
-
12
-
13
-
14
-
15
-
16
-
17
-
18
-
19
-
20
-
21
-
22
-
23
-
24
-
25
-
26
-
27
-
28
-
29
-
30
-
31
-
32
-
33
-
34
-
35
-
36
-
37
-
38
-
39
-
40
-
41
-
42
-
43
-
44
-
45
-
46
-
47
-
48
-
49
-
50
-
51
-
52
-
53
-
54
-
55
-
56
-
57
-
58
-
59
-
60
-
61
-
62
-
63
-
64
-
65
-
66
-
67
-
68
-
69
-
70
-
71
-
72
-
73
-
74
-
75
-
76
-
77
-
78
-
79
-
80
-
81
-
82
-
83
-
84
-
85
-
86
-
87
-
88
-
89
-
90
-
91
-
92
-
93
-
94
-
95
-
96
-
97
-
98
-
99
-
100
-
101
-
102
-
103
-
104
-
105
-
106
-
 107
107 -
 108
108 -
 109
109 -
 110
110 -
 111
111 -
 112
112 -
 113
113 -
 114
114 -
 115
115 -
 116
116 -
 117
117 -
118
-
119
-
120
-
121
-
122
-
123
-
124
-
125
-
126
-
127
-
128
-
129
-
130
-
131
-
132
-
133
 |
 |
