Pioneer AVH-P6800DVD Owner's Manual - Page 94
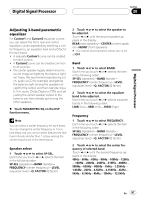
Selecting a cross-over, frequency, Adjusting the speaker output, levels using a test tone, Digital
 |
UPC - 012562803548
View all Pioneer AVH-P6800DVD manuals
Add to My Manuals
Save this manual to your list of manuals |
Page 94 highlights
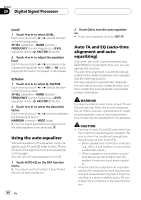
Section 20 Digital Signal Processor FRONT-L (front speaker left)-CENTER (center speaker)-FRONT-R (front speaker right)- REAR-R (rear speaker right)-REAR-L (rear speaker left)-SUB WOOFER (subwoofer) # You cannot select speakers whose size is set to OFF at the SPEAKER SETTING menu. 3 Touch c or d to adjust the speaker output level. Each time you touch c or d increases or decreases the speaker output level. +10 to -10 is displayed as the level is increased or decreased. Note To adjust the speaker output levels in this mode is the same as making the speaker output levels at TEST TONE. Both provide the same results. Selecting a cross-over frequency You can select a frequency, under which sounds are reproduced through the subwoofer. If the installed speakers include one whose size has been set to SMALL, you can select a frequency, under which sounds are reproduced through a LARGE speaker or subwoofer. 1 Touch CROSS OVER on the DSP function menu. 2 Touch c or d to select the speaker to be adjusted. Each time you touch c or d selects the speaker in the following order: FRONT (front speakers)-CENTER (center speaker)-REAR (rear speakers)- SUB WOOFER (subwoofer) 3 Touch c or d to select cross-over frequency. Each time you touch c or d selects cut-off frequencies in the following order: 63-80-100-125-160-200 (Hz) Note Selecting a cross-over frequency is to set a crossover frequency of the subwoofer's L.P.F. (low-pass filter) and that of the SMALL speaker H.P.F. (highpass filter). The cross-over frequency setting has no effect if the subwoofer is set to OFF and other speakers are set to LARGE or OFF. Adjusting the speaker output levels using a test tone This function allows you to easily get the overall balance right among the speakers. 1 Touch TEST TONE on the DSP function menu. 2 Touch START to start the test tone output. The test tone is outputted. It rotates from speaker to speaker in the following sequence at intervals of about two seconds. The current settings for the speaker over which you hear the test tone are shown in the display. FRONT-L (front speaker left)-CENTER (center speaker)-FRONT-R (front speaker right)- REAR-R (rear speaker right)-REAR-L (rear speaker left)-SUB WOOFER (subwoofer) Check each speaker output level. If no adjustments are needed, perform step 5 to stop the test tone. # The settings do not appear for speakers whose size is set OFF. 94 En
-
 1
1 -
2
-
3
-
4
-
5
-
6
-
7
-
8
-
9
-
10
-
11
-
12
-
13
-
14
-
15
-
16
-
17
-
18
-
19
-
20
-
21
-
22
-
23
-
24
-
25
-
26
-
27
-
28
-
29
-
30
-
31
-
32
-
33
-
34
-
35
-
36
-
37
-
38
-
39
-
40
-
41
-
42
-
43
-
44
-
45
-
46
-
47
-
48
-
49
-
50
-
51
-
52
-
53
-
54
-
55
-
56
-
57
-
58
-
59
-
60
-
61
-
62
-
63
-
64
-
65
-
66
-
67
-
68
-
69
-
70
-
71
-
72
-
73
-
74
-
75
-
76
-
77
-
78
-
79
-
80
-
81
-
82
-
83
-
84
-
85
-
86
-
87
-
88
-
 89
89 -
 90
90 -
 91
91 -
 92
92 -
 93
93 -
 94
94 -
 95
95 -
 96
96 -
 97
97 -
 98
98 -
 99
99 -
100
-
101
-
102
-
103
-
104
-
105
-
106
-
107
-
108
-
109
-
110
-
111
-
112
-
113
-
114
-
115
-
116
-
117
-
118
-
119
-
120
-
121
-
122
-
123
-
124
-
125
-
126
-
127
-
128
-
129
-
130
-
131
-
132
-
133
 |
 |
