Pioneer DEH-P800PRS Owner's Manual - Page 54
Operation modes, way network mode, Standard mode, Audio Adjustments
 |
UPC - 012562883724
View all Pioneer DEH-P800PRS manuals
Add to My Manuals
Save this manual to your list of manuals |
Page 54 highlights
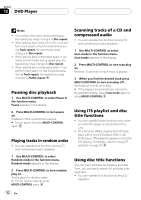
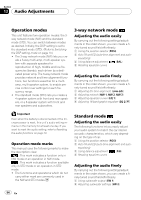
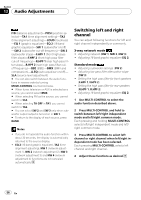
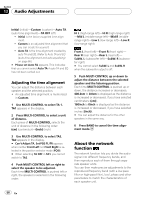
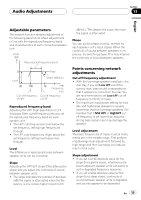
Section 13 Audio Adjustments Operation modes This unit features two operation modes: the 3way network mode (NW) and the standard mode (STD). You can switch between modes as desired. Initially, the DSP setting is set to the standard mode (STD). (Refer to Switching the DSP setting mode on page 10.) ! The 3-way network mode (NW) lets you cre- ate a 3-way multi-amp, multi-speaker system with separate speakers for reproduction of high, middle and low frequencies (bands), each driven by a dedicated power amp. The 3-way network mode provides network and time alignment functions, two functions essential for a multiamp, multi-speaker system, to enable precise control over settings for each frequency range. ! The standard mode (STD) lets you create a 4-speaker system with front and rear speakers, or a 6-speaker system with front and rear speakers and subwoofers. 3-way network mode Adjusting the audio easily By carrying out the following settings/adjust- ments in the order shown, you can create a fi- nely-tuned sound field effortlessly. 1 Using the position selector (POSI) 2 Auto TA and EQ (auto-time alignment and auto- equalizing) 3 Using balance adjustment (BAL) 4 Recalling equalizer curves Adjusting the audio finely By carrying out the following settings/adjustments in the order shown, you can create a finely-tuned sound field effortlessly. 1 Adjusting the time alignment (Low-Lch) 2 Adjusting network (NW 1, NW 2, NW 3) 3 Adjusting equalizer curves (EQ 1) 4 Adjusting 16-band graphic equalizer (EQ 2) Important Even when the battery is disconnected or the microprocessor is reset, this unit's audio setting remains in the memory for at least one day. If you want to reset the audio setting, refer to Resetting the audio functions on page 72. Operation mode marks This manual uses the following marks to make the description clear. : This mark indicates a function only in NW mode or an operation in NW mode. : This mark indicates a function available only in STD mode or an operation in STD mode. ! The functions and operations which do not carry either mark are commonly used in the NW and STD modes. Standard mode Adjusting the audio easily The following functions let you easily adjust your audio system to match the car interior acoustic characteristics, which vary depending on the type of car. 1 Using the position selector (POSI) 2 Auto TA and EQ (auto-time alignment and auto- equalizing) 3 Using balance adjustment 4 Recalling equalizer curves (F/B) Adjusting the audio finely By carrying out the following settings/adjustments in the order shown, you can create a finely-tuned sound field effortlessly. 1 Using subwoofer output (SW 1) 2 Adjusting subwoofer settings (SW 2) 54 En
-
 1
1 -
2
-
3
-
4
-
5
-
6
-
7
-
8
-
9
-
10
-
11
-
12
-
13
-
14
-
15
-
16
-
17
-
18
-
19
-
20
-
21
-
22
-
23
-
24
-
25
-
26
-
27
-
28
-
29
-
30
-
31
-
32
-
33
-
34
-
35
-
36
-
37
-
38
-
39
-
40
-
41
-
42
-
43
-
44
-
45
-
46
-
47
-
48
-
 49
49 -
 50
50 -
 51
51 -
 52
52 -
 53
53 -
 54
54 -
 55
55 -
 56
56 -
 57
57 -
 58
58 -
 59
59 -
60
-
61
-
62
-
63
-
64
-
65
-
66
-
67
-
68
-
69
-
70
-
71
-
72
-
73
-
74
-
75
-
76
-
77
-
78
-
79
-
80
-
81
-
82
-
83
-
84
-
85
-
86
-
87
-
88
-
89
-
90
-
91
-
92
-
93
-
94
-
95
-
96
-
97
-
98
-
99
-
100
-
101
-
102
-
103
-
104
-
105
-
106
-
107
-
108
-
109
-
110
-
111
-
112
-
113
-
114
-
115
-
116
-
117
-
118
-
119
-
120
-
121
-
122
-
123
-
124
-
125
-
126
-
127
-
128
-
129
-
130
-
131
-
132
-
133
-
134
-
135
-
136
-
137
-
138
-
139
-
140
-
141
-
142
-
143
-
144
-
145
-
146
-
147
-
148
-
149
-
150
-
151
-
152
-
153
-
154
-
155
-
156
-
157
-
158
-
159
-
160
-
161
-
162
-
163
-
164
-
165
-
166
-
167
-
168
-
169
-
170
-
171
-
172
-
173
-
174
-
175
-
176
-
177
-
178
-
179
-
180
-
181
-
182
-
183
-
184
-
185
 |
 |