Pioneer DEH-P800PRS Owner's Manual - Page 68
Carrying out auto TA and EQ - parts
 |
UPC - 012562883724
View all Pioneer DEH-P800PRS manuals
Add to My Manuals
Save this manual to your list of manuals |
Page 68 highlights
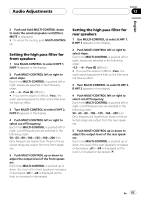
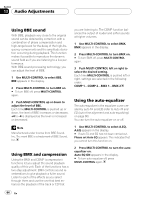
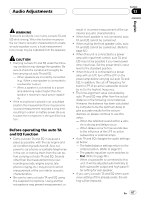
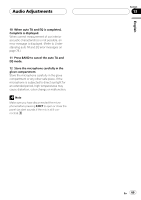
Section 13 Audio Adjustments ! When connecting tweeters, please confirm the tweeter's usable frequency range. When you set the cut-off frequency, set higher than the lowest usable frequency of the tweeter. ! Auto TA uses higher range than 10 kHz for measurement. Therefore, using the tweeter that cannot reproduce 10 kHz frequency range may damage the tweeter. When Auto TA&EQ is operated, be sure to set the appropriate cut-off frequency. Also, use the tweeter that can reproduce 10 kHz at the lowest usable frequency. Carrying out auto TA and EQ 1 Stop the car in a place that is as quiet as possible, close all doors, windows and the sun roof, and then turn the engine off. # If the engine is left running, engine noise may prevent correct auto TA and EQ. 2 Fix the supplied microphone in the center of the headrest of the driver's seat, facing forward, using the belt (sold separately). tioner or heater may prevent correct auto TA and EQ. # Press SOURCE to turn the source on if this unit is turned off. 4 Select the position for the seat on which the microphone is placed. Refer to Using the position selector on page 57. # If no position is selected before you start auto TA and EQ, Front Left is selected automatically. 5 Press SOURCE and hold until the unit turns off. 6 Press and hold EQ to enter the auto TA and EQ measurement mode. The front panel opens automatically. 7 Plug the microphone into the microphone input jack on this unit. # The auto TA and EQ may differ depending on where you place the microphone. If desired, place the microphone on the front passenger seat to carry out auto TA and EQ. 3 Turn the ignition switch to ON or ACC. # If the car's air conditioner or heater is turned on, turn it off. Noise from the fan in the air condi- 8 Press MULTI-CONTROL to start the auto TA and EQ. 9 Get out of the car and close the door within 10 seconds when the 10-second count-down starts. The measurement tone (noise) is outputted from the speakers, and auto TA and EQ begins. # When all speakers are connected, auto TA and EQ is completed in about six minutes. # To stop auto TA and EQ, press MULTI-CONTROL again. # To cancel auto TA and EQ part way through, press BAND. 68 En
-
 1
1 -
2
-
3
-
4
-
5
-
6
-
7
-
8
-
9
-
10
-
11
-
12
-
13
-
14
-
15
-
16
-
17
-
18
-
19
-
20
-
21
-
22
-
23
-
24
-
25
-
26
-
27
-
28
-
29
-
30
-
31
-
32
-
33
-
34
-
35
-
36
-
37
-
38
-
39
-
40
-
41
-
42
-
43
-
44
-
45
-
46
-
47
-
48
-
49
-
50
-
51
-
52
-
53
-
54
-
55
-
56
-
57
-
58
-
59
-
60
-
61
-
62
-
 63
63 -
 64
64 -
 65
65 -
 66
66 -
 67
67 -
 68
68 -
 69
69 -
 70
70 -
 71
71 -
 72
72 -
 73
73 -
74
-
75
-
76
-
77
-
78
-
79
-
80
-
81
-
82
-
83
-
84
-
85
-
86
-
87
-
88
-
89
-
90
-
91
-
92
-
93
-
94
-
95
-
96
-
97
-
98
-
99
-
100
-
101
-
102
-
103
-
104
-
105
-
106
-
107
-
108
-
109
-
110
-
111
-
112
-
113
-
114
-
115
-
116
-
117
-
118
-
119
-
120
-
121
-
122
-
123
-
124
-
125
-
126
-
127
-
128
-
129
-
130
-
131
-
132
-
133
-
134
-
135
-
136
-
137
-
138
-
139
-
140
-
141
-
142
-
143
-
144
-
145
-
146
-
147
-
148
-
149
-
150
-
151
-
152
-
153
-
154
-
155
-
156
-
157
-
158
-
159
-
160
-
161
-
162
-
163
-
164
-
165
-
166
-
167
-
168
-
169
-
170
-
171
-
172
-
173
-
174
-
175
-
176
-
177
-
178
-
179
-
180
-
181
-
182
-
183
-
184
-
185
 |
 |