Pioneer SC-LX904 11.2 Channel AV Receiver Owners Manual-English - Page 78
To ARC/eARC TV
 |
View all Pioneer SC-LX904 11.2 Channel AV Receiver manuals
Add to My Manuals
Save this manual to your list of manuals |
Page 78 highlights
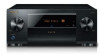
To ARC/eARC TV HDMI OUT 4K HDR ARC eARC 5 V 500 mA USB a IN(ARC) a HDMI cable Contents ≫ Connections ≫ Playback ≫ Setup ≫ If the TV supports the ARC (Audio Return Channel) function (*), use only the HDMI cable to connect with the TV. Use the ARC-compatible HDMI IN jack of the TV for connection. You connect the HDMI cable to the port labeled OUT on the receiver side. • Another TV or projector can be connected to the HDMI OUT SUB jack. Switch between MAIN and SUB using the HDMI MAIN/SUB button ( p15) on the remote controller or "AV Adjust" ( p198). Note that this jack is not ARCcompatible. • If devices with different resolutions are connected to HDMI OUT MAIN jack and SUB jack, images are output with the lower resolution. • If a 4K high-quality video is played, use a Premium High Speed HDMI Cable or Premium High Speed HDMI Cable with Ethernet whose package has a "PREMIUM Certified Cable" label. Furthermore, in Home, displayed by pressing on the remote controller, set "System Setup" - "Input/Output Assign" - "TV Out/OSD" - "HDMI 4K Signal Format" ( p153) to "Enhanced". Setup • Settings are required to use the ARC function. Select "Yes" for "4. ARC Setup" in Initial Setup ( p202). If "No, Skip" is selected, settings are required in the System Setup menu after Initial Setup is completed. Press the button on the remote controller to display the Home screen, then set "System Setup" - "Hardware" - "HDMI" - "Audio Return Channel (eARC supported)" to "On". ( p168) TV • For detailed settings for TV connection, CEC function and audio output, refer to the instruction manual of the TV. (*) ARC function: This function transmits the audio signals of the TV via an HDMI cable, and plays the audio of the TV on this unit. Connection to an ARCcompatible TV is complete with one HDMI cable. To check if the TV supports the ARC function, refer to the instruction manual of the TV, etc. 78 Front Panel≫ Rear Panel≫ Remote≫
-
 1
1 -
2
-
3
-
4
-
5
-
6
-
7
-
8
-
9
-
10
-
11
-
12
-
13
-
14
-
15
-
16
-
17
-
18
-
19
-
20
-
21
-
22
-
23
-
24
-
25
-
26
-
27
-
28
-
29
-
30
-
31
-
32
-
33
-
34
-
35
-
36
-
37
-
38
-
39
-
40
-
41
-
42
-
43
-
44
-
45
-
46
-
47
-
48
-
49
-
50
-
51
-
52
-
53
-
54
-
55
-
56
-
57
-
58
-
59
-
60
-
61
-
62
-
63
-
64
-
65
-
66
-
67
-
68
-
69
-
70
-
71
-
72
-
 73
73 -
 74
74 -
 75
75 -
 76
76 -
 77
77 -
 78
78 -
 79
79 -
 80
80 -
 81
81 -
 82
82 -
 83
83 -
84
-
85
-
86
-
87
-
88
-
89
-
90
-
91
-
92
-
93
-
94
-
95
-
96
-
97
-
98
-
99
-
100
-
101
-
102
-
103
-
104
-
105
-
106
-
107
-
108
-
109
-
110
-
111
-
112
-
113
-
114
-
115
-
116
-
117
-
118
-
119
-
120
-
121
-
122
-
123
-
124
-
125
-
126
-
127
-
128
-
129
-
130
-
131
-
132
-
133
-
134
-
135
-
136
-
137
-
138
-
139
-
140
-
141
-
142
-
143
-
144
-
145
-
146
-
147
-
148
-
149
-
150
-
151
-
152
-
153
-
154
-
155
-
156
-
157
-
158
-
159
-
160
-
161
-
162
-
163
-
164
-
165
-
166
-
167
-
168
-
169
-
170
-
171
-
172
-
173
-
174
-
175
-
176
-
177
-
178
-
179
-
180
-
181
-
182
-
183
-
184
-
185
-
186
-
187
-
188
-
189
-
190
-
191
-
192
-
193
-
194
-
195
-
196
-
197
-
198
-
199
-
200
-
201
-
202
-
203
-
204
-
205
-
206
-
207
-
208
-
209
-
210
-
211
-
212
-
213
-
214
-
215
-
216
-
217
-
218
-
219
-
220
-
221
-
222
-
223
-
224
-
225
 |
 |
