Ricoh Aficio SP 4310N Manuals - Page 62
Installing the SDRAM Module, For details on printing the configuration see p.45 Test Printing.
 |
View all Ricoh Aficio SP 4310N manuals
Add to My Manuals
Save this manual to your list of manuals |
Page 62 highlights
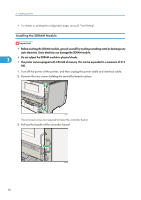
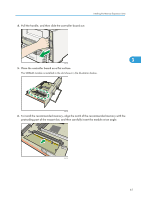
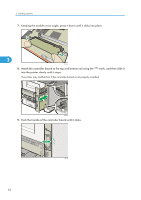
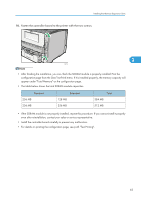
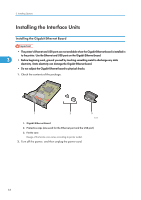
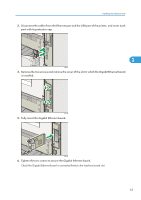
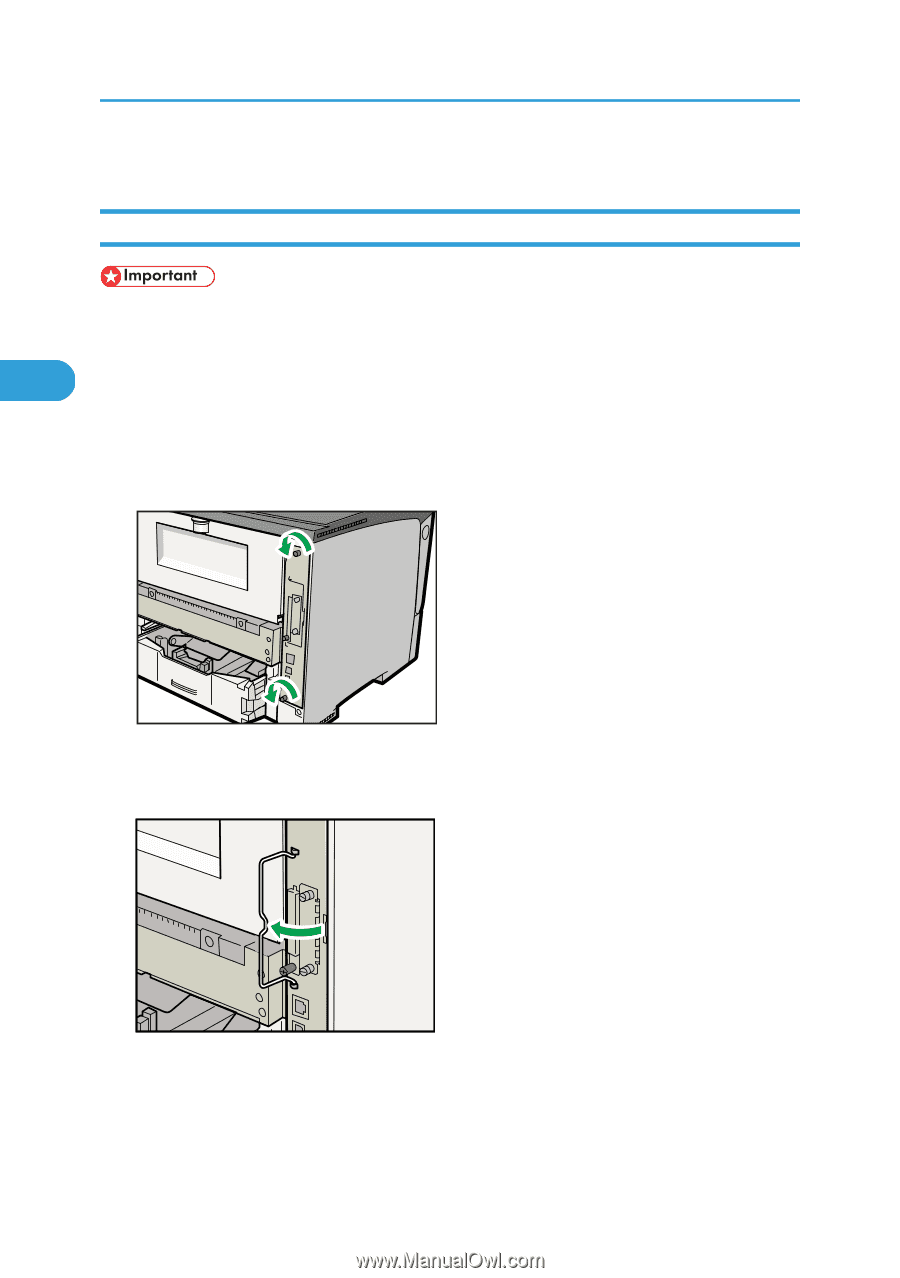
3. Installing Options • For details on printing the configuration page, see p.45 "Test Printing". Installing the SDRAM Module • Before touching the SDRAM module, ground yourself by touching something metal to discharge any static electricity. Static electricity can damage the SDRAM module. 3 • Do not subject the SDRAM module to physical shocks. • The printer comes equipped with 256 MB of memory. This can be expanded to a maximum of 512 MB. 1. Turn off the power of the printer, and then unplug the power cable and interface cable. 2. Remove the two screws holding the controller board in place. CEE137 The removed screws are required to fasten the controller board. 3. Pull out the handle of the controller board. 60 CEE078
-
 1
1 -
2
-
3
-
4
-
5
-
6
-
7
-
8
-
9
-
10
-
11
-
12
-
13
-
14
-
15
-
16
-
17
-
18
-
19
-
20
-
21
-
22
-
23
-
24
-
25
-
26
-
27
-
28
-
29
-
30
-
31
-
32
-
33
-
34
-
35
-
36
-
37
-
38
-
39
-
40
-
41
-
42
-
43
-
44
-
45
-
46
-
47
-
48
-
49
-
50
-
51
-
52
-
53
-
54
-
55
-
56
-
 57
57 -
 58
58 -
 59
59 -
 60
60 -
 61
61 -
 62
62 -
 63
63 -
 64
64 -
 65
65 -
 66
66 -
 67
67 -
68
-
69
-
70
-
71
-
72
-
73
-
74
-
75
-
76
-
77
-
78
-
79
-
80
-
81
-
82
-
83
-
84
-
85
-
86
-
87
-
88
-
89
-
90
-
91
-
92
-
93
-
94
-
95
-
96
-
97
-
98
-
99
-
100
-
101
-
102
-
103
-
104
-
105
-
106
-
107
-
108
-
109
-
110
-
111
-
112
-
113
-
114
-
115
-
116
-
117
-
118
-
119
-
120
-
121
-
122
-
123
-
124
-
125
-
126
-
127
-
128
-
129
-
130
-
131
-
132
-
133
-
134
-
135
-
136
-
137
-
138
-
139
-
140
-
141
-
142
-
143
-
144
-
145
-
146
-
147
-
148
-
149
-
150
-
151
-
152
-
153
-
154
-
155
-
156
-
157
-
158
-
159
-
160
-
161
-
162
-
163
-
164
-
165
-
166
-
167
-
168
-
169
-
170
-
171
-
172
-
173
-
174
-
175
-
176
-
177
-
178
-
179
-
180
-
181
-
182
-
183
-
184
-
185
-
186
-
187
-
188
-
189
-
190
-
191
-
192
-
193
-
194
-
195
-
196
-
197
-
198
-
199
-
200
-
201
-
202
-
203
-
204
-
205
-
206
-
207
-
208
-
209
-
210
-
211
-
212
-
213
-
214
-
215
-
216
-
217
-
218
-
219
-
220
-
221
-
222
-
223
-
224
-
225
-
226
-
227
-
228
-
229
-
230
-
231
-
232
-
233
-
234
-
235
-
236
-
237
-
238
-
239
-
240
-
241
-
242
-
243
-
244
-
245
-
246
-
247
-
248
-
249
-
250
-
251
-
252
 |
 |
•
For details on printing the configuration page, see p.45 "Test Printing".
Installing the SDRAM Module
•
Before touching the SDRAM module, ground yourself by touching something metal to discharge any
static electricity. Static electricity can damage the SDRAM module.
•
Do not subject the SDRAM module to physical shocks.
•
The printer comes equipped with 256 MB of memory. This can be expanded to a maximum of 512
MB.
1.
Turn off the power of the printer, and then unplug the power cable and interface cable.
2.
Remove the two screws holding the controller board in place.
CEE137
The removed screws are required to fasten the controller board.
3.
Pull out the handle of the controller board.
CEE078
3. Installing Options
60
3