| Section |
Page |
| Operating Instructions Software Guide |
1 |
| Introduction |
2 |
| Important |
2 |
| Caution: |
2 |
| Trademarks |
2 |
| Manuals for This Printer |
3 |
| Description for the Specified Model |
4 |
| How to Read This Manual |
5 |
| Symbols |
5 |
| TABLE OF CONTENTS |
6 |
| 1. Preparing for Printing |
13 |
| Quick Install |
13 |
| Confirming the Connection Method |
15 |
| Network Connection |
15 |
| Using this printer as the Windows printing port |
15 |
| Using as a network printer |
17 |
| Local Connection |
18 |
| Using the SmartDeviceMonitor Port |
19 |
| Installing DeskTopBinder-SmartDeviceMonitor for Client |
19 |
| Installing the PCL or RPCS Printer Driver (TCP/IP) |
20 |
| Installing the PCL or RPCS Printer Driver (IPP) |
21 |
| Installing the PostScript 3 Printer Driver (Windows 95/98/Me - TCP/IP) |
23 |
| Installing the PostScript 3 Printer Driver (Windows 95/98/Me - IPP) |
24 |
| Installing the PostScript 3 Printer Driver (Windows 2000 - TCP/IP) |
26 |
| Installing the PostScript 3 Printer Driver (Windows 2000 - IPP) |
27 |
| Installing the PostScript 3 Printer Driver (Windows XP, Windows Server 2003 - TCP/IP) |
29 |
| Installing the PostScript 3 Printer Driver (Windows XP, Windows Server 2003 - IPP) |
30 |
| Changing the Port Settings for |
31 |
| Windows 95/98: |
31 |
| Windows 2000/Windows NT 4.0: |
31 |
| Windows XP, Windows Server 2003: |
32 |
| Using the Standard TCP/IP Port |
33 |
| Installing the PCL or RPCS Printer Driver |
33 |
| Installing the PostScript 3 Printer Driver (Windows 2000) |
34 |
| Installing the PostScript 3 Printer Driver (Windows XP, Windows Server 2003) |
36 |
| Using the LPR Port |
38 |
| Installing the PCL or RPCS Printer Driver |
38 |
| Installing the PostScript 3 Printer Driver (Windows 2000) |
39 |
| Installing the PostScript 3 Printer Driver (Windows XP, Windows Server 2003) |
40 |
| Using as the Windows Network Printer |
42 |
| Installing the PCL or RPCS Printer Driver |
42 |
| Installing the PostScript 3 Printer Driver (Windows 95/98/Me) |
43 |
| Installing the PostScript 3 Printer Driver (Windows 2000) |
44 |
| Installing the PostScript 3 Printer Driver (Windows XP, Windows Server 2003) |
45 |
| Using as the NetWare Print Server/Remote Printer |
47 |
| When using the PostScript 3 Printer Driver |
49 |
| Form Feed |
49 |
| Banner Page |
49 |
| Printing after Resetting the Printer |
50 |
| Installing the Printer Driver Using USB |
51 |
| Windows Me - USB |
51 |
| Windows 2000 - USB |
53 |
| Windows XP, Windows Server 2003 - USB |
54 |
| Troubleshooting USB |
55 |
| Printing with Parallel Connection |
56 |
| Installing the PCL or RPCS Printer Driver |
56 |
| Installing the PostScript 3 Printer Driver (Windows 95/98/Me) |
57 |
| Installing the PostScript 3 Printer Driver (Windows 2000) |
58 |
| Installing the PostScript 3 Printer Driver (Windows XP, Windows Server 2003) |
59 |
| Printing with Bluetooth Connection |
60 |
| Supported Profiles |
60 |
| Printing with Bluetooth Connection |
60 |
| Configuring Security Mode Settings |
62 |
| Printing in the Security Mode |
62 |
| If a Message Appears during Installation |
63 |
| Making Option Settings for the Printer |
64 |
| Conditions for Bidirectional Communication |
64 |
| If Bidirectional Communication is Disabled |
66 |
| 2. Setting Up the Printer Driver |
67 |
| PCL - Accessing the Printer Properties |
67 |
| Windows 95/98/Me - Accessing the Printer Properties |
67 |
| Making Printer Default Settings |
67 |
| Making Printer Settings from an Application |
67 |
| Windows 2000 - Accessing the Printer Properties |
68 |
| Making Printer Default Settings - The Printer Properties |
68 |
| Making Printer Default Settings - Printing Preferences |
69 |
| Making Printer Settings from an Application |
69 |
| Windows XP, Windows Server 2003 - Accessing the Printer Properties |
70 |
| Making Printer Default Settings - The Printer Properties |
70 |
| Making Printer Default Settings - Printing Preferences |
70 |
| Making Printer Settings from an Application |
71 |
| Windows NT 4.0 - Accessing the Printer Properties |
71 |
| Making Printer Default Settings - The Printer Properties |
71 |
| Making Printer Default Settings - Default |
72 |
| Making Printer Settings from an Application |
72 |
| RPCS - Accessing the Printer Properties |
74 |
| Windows 95/98/Me - Accessing the Printer Properties |
74 |
| Making Printer Default Settings |
74 |
| Making Printer Settings from an Application |
75 |
| Windows 2000 - Accessing the Printer Properties |
75 |
| Making Printer Default Settings - The Printer Properties |
75 |
| Making Printer Default Settings - Printing Preferences |
76 |
| Making Printer Settings from an Application |
77 |
| Windows XP, Windows Server 2003 - Accessing the Printer Properties |
77 |
| Making Printer Default Settings - The Printer Properties |
77 |
| Making Printer Default Settings - Printing Preferences |
78 |
| Making Printer Settings from an Application |
78 |
| Windows NT 4.0 - Accessing the Printer Properties |
79 |
| Making Printer Default Settings - The Printer Properties |
79 |
| Making Printer Default Settings - Default |
80 |
| Making Printer Settings from an Application |
80 |
| PostScript 3 - Setting Up for Printing |
82 |
| Windows 95/98/Me - Accessing the Printer Properties |
82 |
| Making Printer Default Settings |
82 |
| Making Printer Settings from an Application |
82 |
| Windows 2000 - Accessing the Printer Properties |
83 |
| Making Printer Default Settings - The Printer Properties |
83 |
| Making Printer Default Settings - Printing Preferences |
84 |
| Making Printer Settings from an Application |
84 |
| Windows XP, Windows Server 2003 - Accessing the Printer Properties |
85 |
| Making Printer Default Settings - The Printer Properties |
85 |
| Making Printer Default Settings - Printing Preferences |
85 |
| Making Printer Settings from an Application |
86 |
| Windows NT 4.0 - Accessing the Printer Properties |
86 |
| Making Printer Default Settings - The Printer Properties |
86 |
| Making Printer Default Settings - Default |
87 |
| Making Printer Settings from an Application |
87 |
| Mac OS - Setting Up for Printing |
88 |
| Making Paper Settings from an Application |
88 |
| Setting up for Printing from an Application |
88 |
| 3. Other Print Operations |
89 |
| Printing a PDF File Directly |
89 |
| Printing Method |
89 |
| Using DeskTopBinder Lite |
89 |
| PDF Direct Print Properties |
92 |
| Using Commands |
92 |
| Unauthorized Copy Control |
93 |
| Using [Data security for copying] |
93 |
| Using [Mask type:] |
95 |
| Important Notice |
96 |
| Using the Print Job Function |
97 |
| Using Keys |
100 |
| Printing from the Print Job Screen |
101 |
| Sample Print |
101 |
| Printing a Sample Print File |
102 |
| Deleting Sample Print Files |
103 |
| Locked Print |
104 |
| Printing a Locked Print File |
105 |
| Deleting Locked Print Files |
106 |
| Hold Print |
107 |
| Printing a Hold Print File |
108 |
| Deleting Hold Print Files |
110 |
| Stored Print |
110 |
| Printing a Stored Print File |
111 |
| Deleting Stored Print Files |
113 |
| Printing from the User ID Screen |
115 |
| Printing the Selected Print Job |
115 |
| Printing All Print Jobs |
116 |
| Form Feed |
118 |
| Printing from a Selected Tray |
118 |
| Canceling a Print Job |
119 |
| Canceling a Print Job |
120 |
| Canceling a Print Job Using the Control Panel |
120 |
| Windows - Canceling a Print Job from the computer |
120 |
| Mac OS - Canceling a Print Job from the computer |
121 |
| Checking the Error Log |
122 |
| Collate |
124 |
| Spool Printing |
125 |
| Setting Spool Printing |
125 |
| Viewing or Deleting spooled jobs using Web Image Monitor |
126 |
| Cover |
127 |
| Memory Capacity and Paper Size |
128 |
| One-sided printing (600 x 600 dpi) |
128 |
| One-sided printing (1200 x 600 dpi) |
128 |
| One-sided printing (1200 x 1200 dpi) |
128 |
| Duplex printing (600 x 600 dpi) |
129 |
| Duplex printing (1200 x 600 dpi) |
129 |
| Duplex printing (1200 x 1200 dpi) |
129 |
| 4. Direct Printing from a Digital Camera (PictBridge) |
131 |
| What is PictBridge? |
131 |
| PictBridge Printing |
132 |
| What Can Be Done on This printer |
134 |
| Index Printing |
134 |
| Trimming |
135 |
| Date and File Name Printing |
135 |
| Paper Size |
135 |
| Image Print Size |
136 |
| Multi-Image-Layout |
137 |
| Printing Quality |
138 |
| Color Matching |
138 |
| Paper type Specification |
138 |
| Form Printing |
138 |
| Camera Memo Printing |
138 |
| Exiting PictBridge |
139 |
| When PictBridge Printing Does Not Work |
140 |
| Other Reference Information |
141 |
| 5. Making Printer Settings Using the Control Panel |
143 |
| Menu Chart |
143 |
| Memory Erase Status |
146 |
| Paper Input |
147 |
| Changing the Paper Input Menu |
147 |
| Auto Tray Select |
147 |
| Tray Priority |
148 |
| Paper Input menu parameters |
148 |
| Maintenance Menu |
152 |
| Changing the maintenance menu |
152 |
| Auto Delete Temporary Jobs - HD Management |
152 |
| Maintenance menu parameters |
153 |
| Quality Maintenance |
153 |
| General Settings |
154 |
| Timer Settings |
157 |
| HD Management |
157 |
| List/Test Print Menu |
159 |
| Printing a Configuration Page |
159 |
| Interpreting the configuration page |
160 |
| List/Test Print menu parameters |
162 |
| System Menu |
163 |
| Changing the system menu |
163 |
| System menu parameters |
164 |
| Print Settings Menu |
168 |
| Changing the Print Settings Menu |
168 |
| Print Settings menu parameters |
168 |
| Security Options Menu |
176 |
| Changing the Security Options menu |
176 |
| Security Options menu parameters |
176 |
| Host Interface Menu |
178 |
| Changing the Host Interface menu |
178 |
| Host Interface menu parameters |
179 |
| Language Menu |
184 |
| Changing the language menu |
184 |
| Language menu parameters |
184 |
| 6. Monitoring and Configuring the Printer |
185 |
| Using Web Image Monitor |
185 |
| Displaying Top Page |
187 |
| When user authentication is set |
188 |
| Login (using Web Image Monitor) |
188 |
| Log Off (using Web Image Monitor) |
188 |
| About Menu and Mode |
189 |
| Access in the Administrator Mode |
190 |
| Displaying Web Image Monitor Help |
191 |
| Downloading Help |
191 |
| Linking the URL of the Help File to the |
191 |
| Using SmartDeviceMonitor for Admin |
192 |
| Installing SmartDeviceMonitor for Admin |
193 |
| Changing the Network Interface Board Configuration |
194 |
| Locking the Menus on the Printer's Control Panel |
195 |
| Changing the Paper Type |
195 |
| Managing User Information |
196 |
| Starting User Management Tool |
196 |
| Displaying the Number of Sheets Printed |
197 |
| Exporting the information about the number of pages printed |
197 |
| Resetting the number of pages printed to 0. |
197 |
| Restricting Functions |
198 |
| Setting Applicable Functions to New Users |
198 |
| Configuring the Energy Saver Mode |
199 |
| Setting a Password |
199 |
| Checking the Printer Status |
200 |
| Changing Names and Comments |
201 |
| Viewing and Deleting Spool Print Jobs |
202 |
| Using |
203 |
| Monitoring Printers |
203 |
| Checking the Printer Status |
203 |
| When Using IPP with |
204 |
| Printer Status Notification by E-Mail |
205 |
| Auto E-mail Notification |
206 |
| On-demand E-mail Notification |
207 |
| Mail authentication |
207 |
| Sending On-demand E-mail |
208 |
| Remote Maintenance by telnet |
211 |
| Using telnet |
211 |
| access |
212 |
| appletalk |
213 |
| autonet |
213 |
| bonjour(rendezvous) |
214 |
| btconfig |
215 |
| devicename |
216 |
| dhcp |
216 |
| diprint |
217 |
| dns |
218 |
| domainname |
219 |
| help |
220 |
| hostname |
220 |
| ifconfig |
221 |
| info |
222 |
| ipp |
222 |
| ipv6 |
223 |
| lpr |
223 |
| netware |
223 |
| passwd |
225 |
| prnlog |
225 |
| route |
225 |
| set |
227 |
| show |
229 |
| slp |
229 |
| smb |
230 |
| snmp |
231 |
| sntp |
234 |
| spoolsw |
234 |
| ssdp |
235 |
| ssh |
235 |
| status |
236 |
| syslog |
236 |
| upnp |
237 |
| web |
237 |
| wiconfig |
238 |
| wins |
241 |
| SNMP |
242 |
| Getting Printer Information over the Network |
243 |
| Current Printer Status |
243 |
| Printer configuration |
249 |
| Understanding the Displayed Information |
250 |
| Print Job Information |
250 |
| Print Log Information |
250 |
| Configuring the Network Interface Board |
251 |
| Message List |
258 |
| System Log Information |
258 |
| 7. Using a Printer Server |
265 |
| Preparing Printer Server |
265 |
| Printing notification via SmartDeviceMonitor for Client |
265 |
| Setting the print server |
265 |
| Setting a Client |
266 |
| Using NetWare |
267 |
| Setting Up as a Print Server (NetWare 3.x) |
268 |
| Setting Up as a Print Server (NetWare 4.x, 5/5.1, 6/6.5) |
269 |
| Using Pure IP in the NetWare 5/5.1 or 6/6.5 Environment |
271 |
| Setting Up as a Remote Printer (NetWare 3.x) |
273 |
| Setting Up as a Remote Printer (NetWare 4.x, 5/5.1, 6/6.5) |
275 |
| 8. Special Operations under Windows |
279 |
| Printing Files Directly from Windows |
279 |
| Setup |
279 |
| Using a Host Name Instead of an IPv4 Address |
280 |
| When using DNS |
280 |
| When setting the IPv4 address of a printer using DHCP |
280 |
| In other cases |
280 |
| Printing Commands |
281 |
| lpr |
282 |
| rcp |
282 |
| ftp |
283 |
| sftp |
284 |
| 9. Mac OS Configuration |
285 |
| Mac OS |
285 |
| Installing the PostScript 3 Printer Driver and PPD File |
285 |
| Setting Up PPD Files |
286 |
| Creating a Desktop Printer Icon |
286 |
| Setting Up Options |
287 |
| Installing the ColorSync Profiles |
287 |
| Installing Adobe Type Manager |
288 |
| Installing Screen fonts |
289 |
| Changing to EtherTalk |
289 |
| Mac OS X |
290 |
| Installing the PPD Files |
290 |
| Setting Up the PPD File |
290 |
| Setting Up Options |
291 |
| Using USB Interface |
291 |
| Using Bonjour (Rendezvous) |
292 |
| Changing to EtherTalk |
293 |
| Configuring the Printer |
294 |
| Using PostScript 3 |
295 |
| Job Type |
295 |
| Using Sample Print |
297 |
| Using Locked Print |
299 |
| Using Hold Print |
301 |
| Using Stored Print |
303 |
| User Code |
305 |
| Paper Size |
305 |
| Fit to Paper |
306 |
| Input Slot |
306 |
| Resolution |
306 |
| Orientation Override |
307 |
| Duplex Printing |
307 |
| Color Mode |
308 |
| Gradation |
308 |
| Color Profile |
309 |
| Color Setting |
310 |
| Toner Saving/Level Color |
310 |
| Collate |
311 |
| Paper Type |
311 |
| Black Over Print |
311 |
| Image Smoothing |
312 |
| Separate into CMYK |
312 |
| CMYK Simulation Profile |
313 |
| Dithering |
313 |
| Gray Reproduction |
314 |
| Color Matching |
314 |
| Printer Utility for Mac |
315 |
| Installing Printer Utility for Mac |
315 |
| Starting Printer Utility for Mac |
316 |
| Mac OS |
316 |
| Mac OS X |
316 |
| Printer Utility for Mac |
317 |
| Downloading PS Fonts |
317 |
| Displaying Printer Fonts |
317 |
| Deleting Fonts |
318 |
| Initializing the Printer Disk |
318 |
| Page Setup |
318 |
| Printing Font Catalog |
319 |
| Printing Font Sample |
319 |
| Renaming the Printer |
319 |
| Restarting the Printer |
320 |
| Downloading PostScript Files |
320 |
| Selecting the Zone |
321 |
| Displaying the Printer Status |
322 |
| Launching the Dialogue Console |
322 |
| 10. Security Measures Provided by this Printer |
323 |
| Using Authentication and Managing Users |
323 |
| Preventing Information Leaks |
324 |
| Limiting and Controlling Access |
325 |
| Enhanced Network Security |
326 |
| Configuring SSL Encryption |
327 |
| 11. Appendix |
329 |
| Software and Utilities Included on the CD-ROM |
329 |
| Printer Drivers for This Printer |
330 |
| SmartDeviceMonitor for Admin |
331 |
| DeskTopBinder - SmartDeviceMonitor for Client |
332 |
| Cautions to Take When Using in a network |
334 |
| Connecting a Dial-up Router to a Network |
334 |
| Configuring the router |
334 |
| Configuring the printer with NetWare |
334 |
| Configuring the printer without NetWare |
334 |
| Using DHCP |
335 |
| Using AutoNet |
336 |
| Configuring the WINS Server |
336 |
| Using Web Image Monitor |
336 |
| Using telnet |
337 |
| Using the Dynamic DNS Function |
337 |
| Updating |
337 |
| DNS servers targeted for operation |
338 |
| DHCP servers targeted for operation |
338 |
| Setting the dynamic DNS function |
338 |
| Installing Font Manager 2000 |
339 |
| Using Adobe PageMaker Version 6.0, 6.5, or 7.0 |
340 |
| When Using Windows Terminal Service/ MetaFrame |
341 |
| Operating Environment |
341 |
| Supported Printer Drivers |
341 |
| Limitations |
341 |
| Cautions When Using Bluetooth Interface Unit |
343 |
| Copyright Information about Installed Applications |
344 |
| expat |
344 |
| JPEG LIBRARY |
344 |
| NetBSD |
345 |
| Authors Name List |
346 |
| Samba(Ver 2.2.2-1.1) |
347 |
| RSA BSAFE |
347 |
 1
1 147
147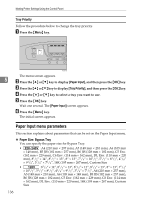 148
148 149
149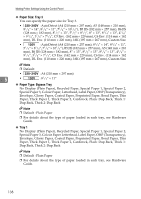 150
150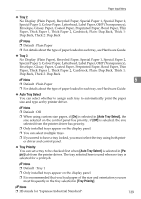 151
151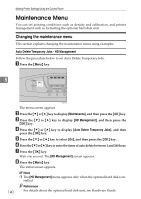 152
152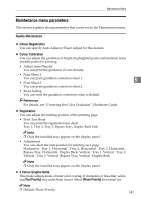 153
153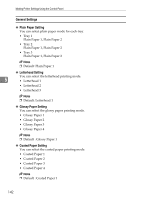 154
154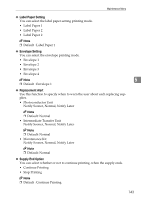 155
155 156
156 157
157

