Ricoh SP 201Nw User Guide - Page 18
Setting the machine to receive an IPv6 address automatically
 |
View all Ricoh SP 201Nw manuals
Add to My Manuals
Save this manual to your list of manuals |
Page 18 highlights
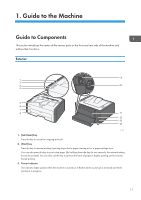
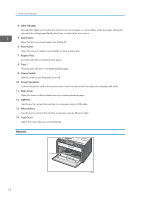
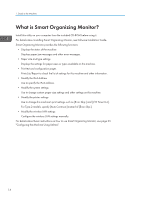
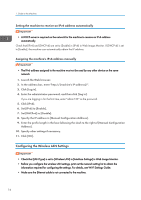
1. Guide to the Machine Setting the machine to receive an IPv6 address automatically • A DHCP server is required on the network for the machine to receive an IPv6 address automatically. Check that [IPv6] and [DHCPv6] are set to [Enable] in [IPv6] in Web Image Monitor. If [DHCPv6] is set to [Enable], the machine can automatically obtain the IP address. Assigning the machine's IPv6 address manually • The IPv6 address assigned to the machine must not be used by any other device on the same network. 1. Launch the Web browser. 2. In the address bar, enter "http://(machine's IP address)/". 3. Click [Log in]. 4. Enter the administrator password, and then click [Log in]. If you are logging in for the first time, enter "admin133" as the password. 5. Click [IPv6]. 6. Set [IPv6] to [Enable]. 7. Set [DHCPv6] to [Disable]. 8. Specify the IP address in [Manual Configuration Address]. 9. Enter the prefix length in the box following the slash to the right of [Manual Configuration Address]. 10. Specify other settings if necessary. 11. Click [OK]. Configuring the Wireless LAN Settings • Check that [LAN Type] is set to [Wireless LAN] in [Interface Settings] in Web Image Monitor. • Before you configure the wireless LAN settings, print out the network setting list to obtain the information required for configuring the settings. For details, see Wi-Fi Settings Guide. • Make sure the Ethernet cable is not connected to the machine. 16
-
 1
1 -
2
-
3
-
4
-
5
-
6
-
7
-
8
-
9
-
10
-
11
-
12
-
 13
13 -
 14
14 -
 15
15 -
 16
16 -
 17
17 -
 18
18 -
 19
19 -
 20
20 -
 21
21 -
 22
22 -
 23
23 -
24
-
25
-
26
-
27
-
28
-
29
-
30
-
31
-
32
-
33
-
34
-
35
-
36
-
37
-
38
-
39
-
40
-
41
-
42
-
43
-
44
-
45
-
46
-
47
-
48
-
49
-
50
-
51
-
52
-
53
-
54
-
55
-
56
-
57
-
58
-
59
-
60
-
61
-
62
-
63
-
64
-
65
-
66
-
67
-
68
-
69
-
70
-
71
-
72
-
73
-
74
-
75
-
76
-
77
-
78
-
79
-
80
-
81
-
82
-
83
-
84
 |
 |
