Samsung 570DX User Manual (user Manual) (ver.1.0) (English) - Page 8
Switching Your PDP Display On and Off
 |
UPC - 729507801155
View all Samsung 570DX manuals
Add to My Manuals
Save this manual to your list of manuals |
Page 8 highlights
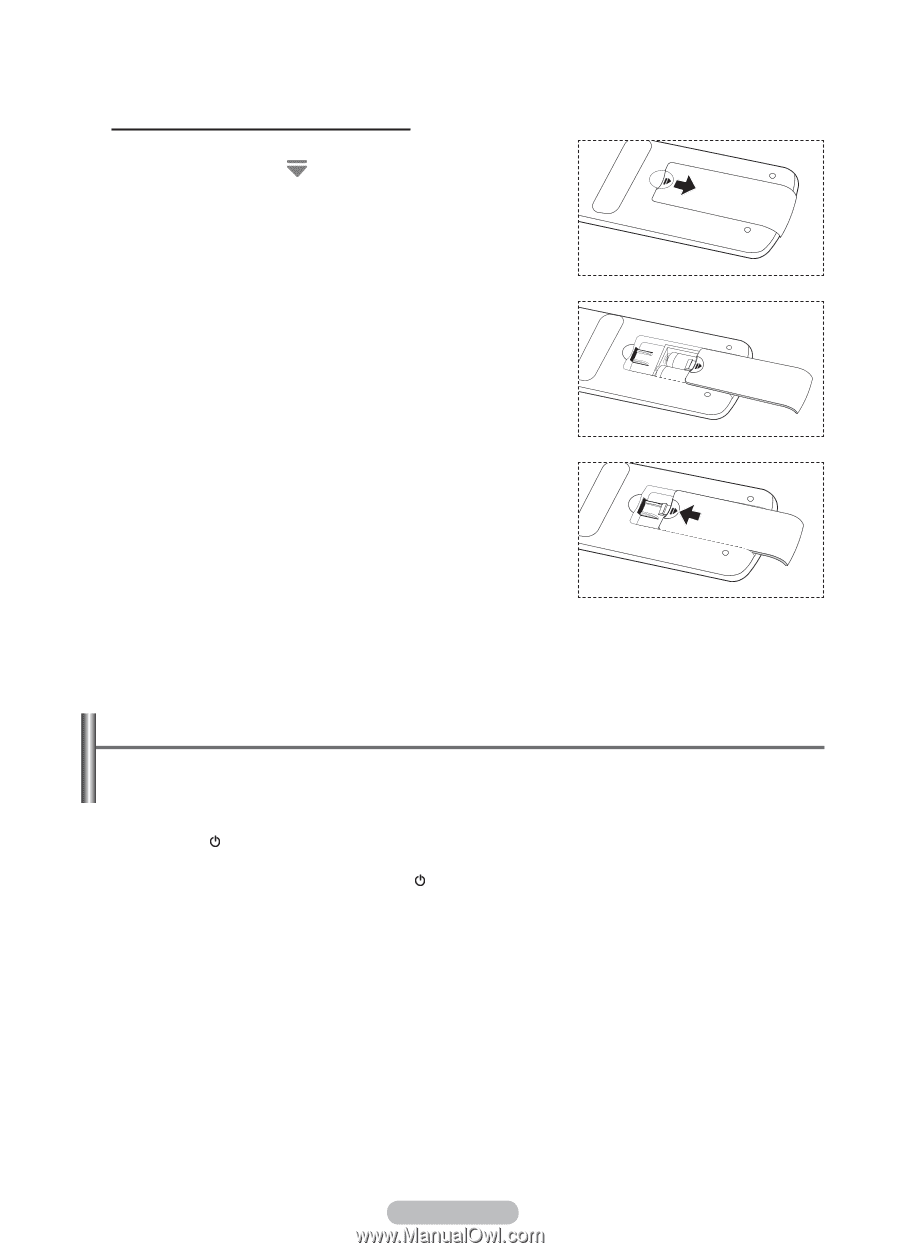
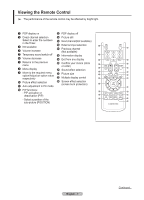
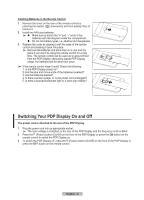
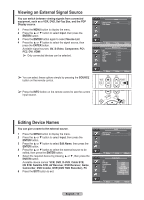
Installing Batteries in the Remote Control 1 Remove the cover on the rear of the remote control by pressing the symbol ( ) downwards and then pulling firmly to remove it. 2 Install two AAA size batteries. ➢ Make sure to match the "+" and "-" ends of the batteries with the diagram inside the compartment. Do not mix battery types, i.e. alkaline and manganese. 3 Replace the cover by aligning it with the base of the remote control and pressing it back into place. ➢ Remove the batteries and store them in a cool and dry place if you won't be using the remote control for a long time. The remote control can be used up to about 23 feet from the PDP Display. (Assuming typical PDP Display usage, the batteries last for about one year.) ➢ If the remote control doesn't work! Check the following: 1. Is the PDP Display power on? 2. Are the plus and minus ends of the batteries reversed? 3. Are the batteries drained? 4. Is there a power outage, or is the power cord unplugged? 5. Is there a special fluorescent light or a neon sign nearby? Switching Your PDP Display On and Off The power cord is attached to the rear of the PDP Display. 1 Plug the power cord into an appropriate socket. ➢ The main voltage is indicated on the rear of the PDP Display and the frequency is 50 or 60Hz. 2 Press the (Power) button (On/Off) on the front of the PDP Display or press the ON button on the remote control to switch the PDP Display on. 3 To switch the PDP Display off, press the (Power) button (On/Off) on the front of the PDP Display or press the OFF button on the remote control. English - 8
-
 1
1 -
2
-
 3
3 -
 4
4 -
 5
5 -
 6
6 -
 7
7 -
 8
8 -
 9
9 -
 10
10 -
 11
11 -
 12
12 -
 13
13 -
14
-
15
-
16
-
17
-
18
-
19
-
20
-
21
-
22
-
23
-
24
-
25
-
26
-
27
-
28
-
29
-
30
-
31
-
32
-
33
-
34
-
35
-
36
-
37
-
38
-
39
-
40
 |
 |