Samsung HZ50W User Manual (user Manual) (ver.1.0) (English) - Page 45
Shooting, Self-timer, Right button
 |
UPC - 044701014119
View all Samsung HZ50W manuals
Add to My Manuals
Save this manual to your list of manuals |
Page 45 highlights
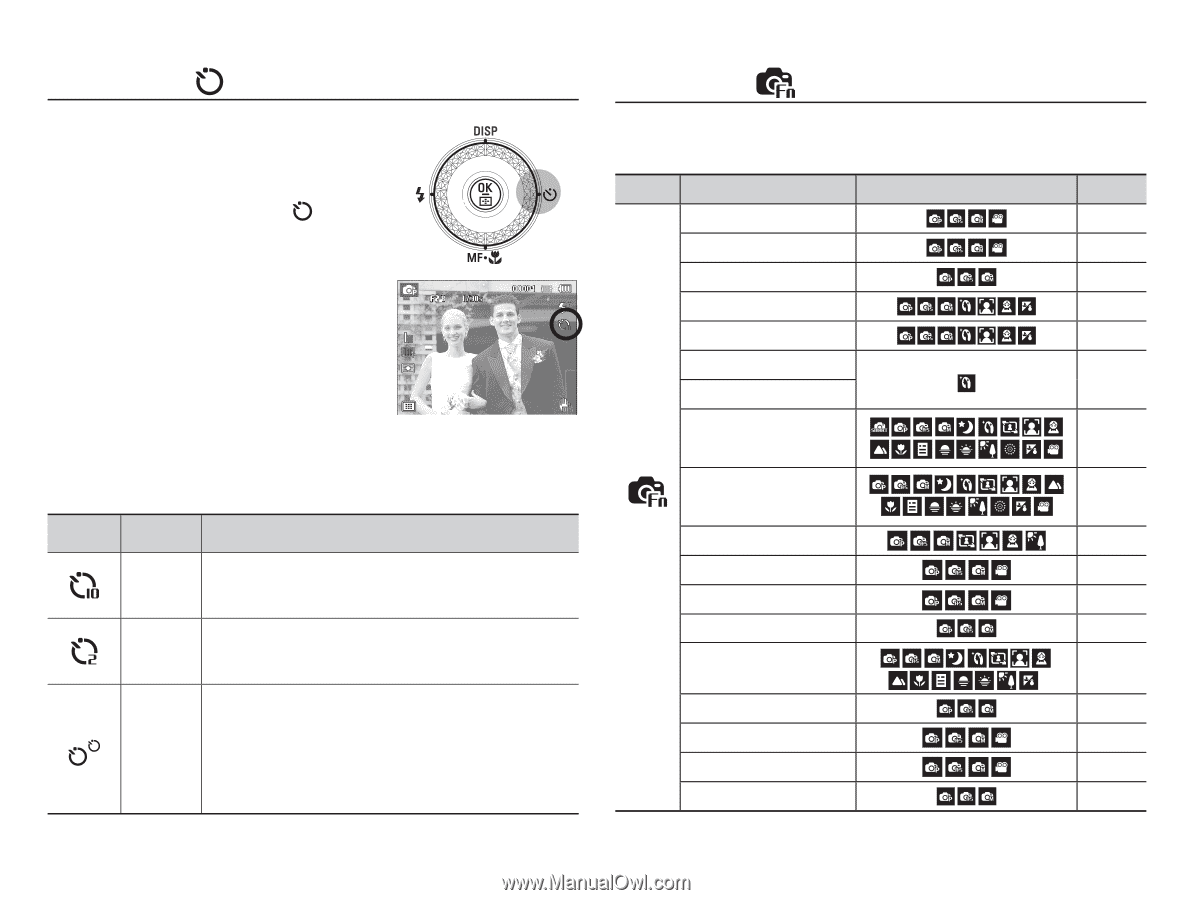
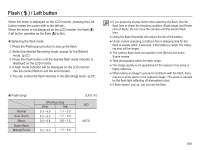
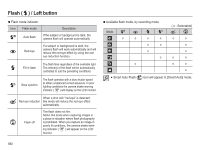
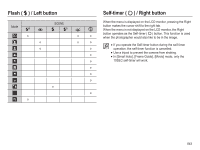
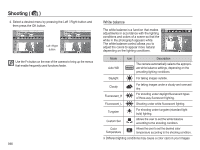
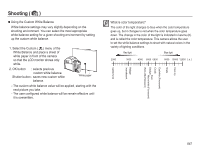
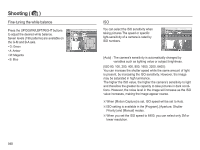
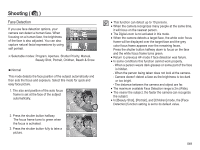
Self-timer ( ) / Right button Ê Selecting the self-timer 1. Select a Recording mode with the exception of Voice recording mode. (p.22) 2. Press the Self-timer / Right ( ) button until the desired mode indicator displays on the LCD monitor. A 10 second, 2 second or Double Selftimer icon appears on the LCD monitor. 3. When you press the shutter button, the picture will be taken after the specified time has elapsed. [Selecting the 10 SEC self-timer] Ê Self-timer mode indicator Icon Mode Description 10SEC Pressing the shutter button will allow an interval of self-timer 10 seconds before the image is taken. 2SEC Pressing the shutter button will allow an interval of self-timer 2 seconds before the image is taken. Double self-timer A picture will be taken after about 10 seconds and 2 seconds later a second picture will be taken. When using the flash, the 2-second self-timer may be delayed for longer than 2 seconds depending on the flash charging time. Shooting ( ) Use the menu that enables the functions, or the Fn button, to bring up the menus below: Mode Menu White Balance Available mode Page p.46 WB Fine-tuning p.48 ISO p.48 Face Detection p.49-51 Smart FR Edit p.52 Face Tone p.53 Face Retouch Photo Size / Movie Size p.53 Quality / Frame Rate p.54 (Shooting) Smart Range p.54 Metering p.55 Drive p.55 AEB Area p.56 Focus Area p.56 Flash EVC p.57 Photo Style Selector p.57 Smart Filter p.58 Image Adjust p.59 044
-
 1
1 -
2
-
3
-
4
-
5
-
6
-
7
-
8
-
9
-
10
-
11
-
12
-
13
-
14
-
15
-
16
-
17
-
18
-
19
-
20
-
21
-
22
-
23
-
24
-
25
-
26
-
27
-
28
-
29
-
30
-
31
-
32
-
33
-
34
-
35
-
36
-
37
-
38
-
39
-
 40
40 -
 41
41 -
 42
42 -
 43
43 -
 44
44 -
 45
45 -
 46
46 -
 47
47 -
 48
48 -
 49
49 -
 50
50 -
51
-
52
-
53
-
54
-
55
-
56
-
57
-
58
-
59
-
60
-
61
-
62
-
63
-
64
-
65
-
66
-
67
-
68
-
69
-
70
-
71
-
72
-
73
-
74
-
75
-
76
-
77
-
78
-
79
-
80
-
81
-
82
-
83
-
84
-
85
-
86
-
87
-
88
-
89
-
90
-
91
-
92
-
93
-
94
-
95
-
96
-
97
-
98
-
99
-
100
-
101
-
102
-
103
-
104
-
105
-
106
-
107
-
108
-
109
-
110
-
111
-
112
-
113
-
114
-
115
-
116
-
117
-
118
-
119
-
120
 |
 |