Samsung ML-1651N User Manual (user Manual) (ver.1.00) (English) - Page 82
File name, Overlay List, Overlays, C:\FORMOVER.
 |
View all Samsung ML-1651N manuals
Add to My Manuals
Save this manual to your list of manuals |
Page 82 highlights
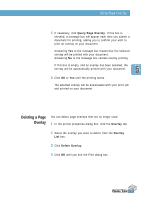
Using Page Overlay 4 In the Create Overlay dialog box, type a name of up to eight characters in the File name box. Select the destination path if necessary. (The default is C:\FORMOVER). 5 Click OK. You will see the name in the Overlay List box. 6 Click OK or Yes until you complete the creation. The file is not printed out. Instead it will be stored on your computer HDD disk. Note: The overlay document size must be the same as documents you will print with the overlay. Using Page Overlay After an overlay has been created, it is ready to be printed with your document. To print an overlay with a document: 1 Create or open the document you want to print. 2 When you change the print settings from your software application, access the printer properties. See page 5.2 to access the printer properties. 3 Click the Overlays tab, and select the desired overlay from the Overlay List box. PRINTING TASKS 5.25
-
 1
1 -
2
-
3
-
4
-
5
-
6
-
7
-
8
-
9
-
10
-
11
-
12
-
13
-
14
-
15
-
16
-
17
-
18
-
19
-
20
-
21
-
22
-
23
-
24
-
25
-
26
-
27
-
28
-
29
-
30
-
31
-
32
-
33
-
34
-
35
-
36
-
37
-
38
-
39
-
40
-
41
-
42
-
43
-
44
-
45
-
46
-
47
-
48
-
49
-
50
-
51
-
52
-
53
-
54
-
55
-
56
-
57
-
58
-
59
-
60
-
61
-
62
-
63
-
64
-
65
-
66
-
67
-
68
-
69
-
70
-
71
-
72
-
73
-
74
-
75
-
76
-
 77
77 -
 78
78 -
 79
79 -
 80
80 -
 81
81 -
 82
82 -
 83
83 -
 84
84 -
 85
85 -
 86
86 -
 87
87 -
88
-
89
-
90
-
91
-
92
-
93
-
94
-
95
-
96
-
97
-
98
-
99
-
100
-
101
-
102
-
103
-
104
-
105
-
106
-
107
-
108
-
109
-
110
-
111
-
112
-
113
-
114
-
115
-
116
-
117
-
118
-
119
-
120
-
121
-
122
-
123
-
124
-
125
-
126
-
127
-
128
-
129
-
130
-
131
-
132
-
133
-
134
-
135
-
136
-
137
-
138
-
139
-
140
-
141
-
142
-
143
-
144
-
145
-
146
-
147
-
148
-
149
-
150
-
151
-
152
-
153
-
154
-
155
-
156
-
157
-
158
-
159
-
160
-
161
-
162
-
163
-
164
-
165
-
166
-
167
-
168
-
169
-
170
-
171
-
172
-
173
-
174
-
175
-
176
-
177
-
178
-
179
 |
 |
