Samsung NV11 User Manual (ENGLISH) - Page 38
White balance
 |
UPC - 044701007838
View all Samsung NV11 manuals
Add to My Manuals
Save this manual to your list of manuals |
Page 38 highlights
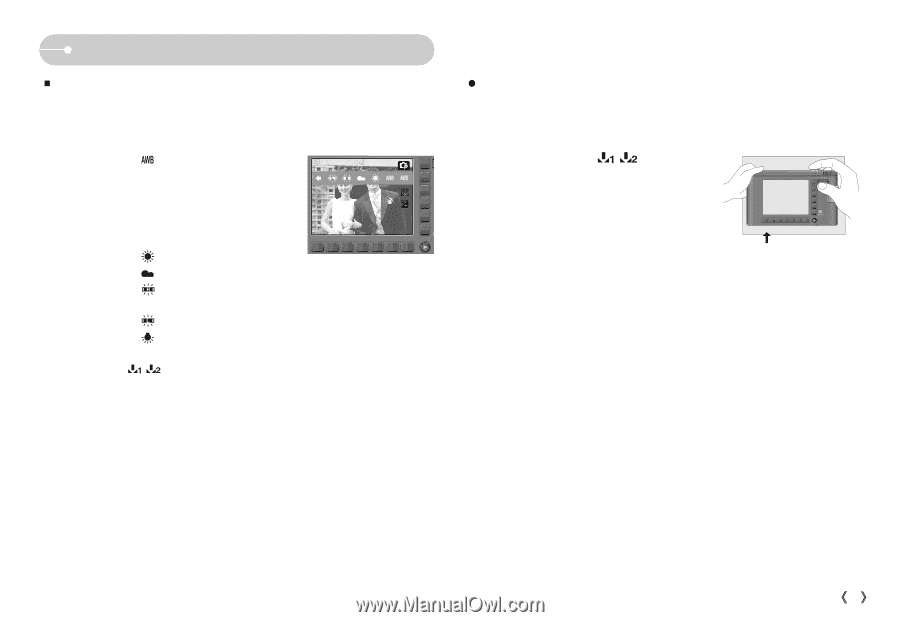
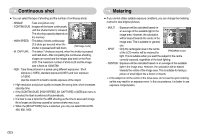
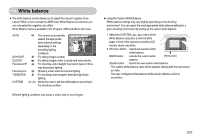
White balance ƈ The white balance control allows you to adjust the colours to appear more natural. When a menu except the AWB (Auto White Balance) is selected, you can only select the negative color effect. White Balance menu is available in the Program, ASM and Movie clip mode. AUTO DAYLIGHT CLOUDY Fluorescent H Fluorescent L TUNGSTEN CUSTOM : The camera automatically selects the appropriate white balance settings, depending on the prevailing lighting conditions. : For taking images outside. : For taking images under a cloudy and overcast sky. : For shooting under daylight fluorescent types of three way fluorescent lighting. : Shooting under white fluorescent lighting. : For shooting under tungsten (standard light bulb) lighting. : Allows the user to set the white balance according to the shooting condition. Different lighting conditions may cause a colour cast on your images. ƃ Using the Custom White Balance White balance settings may vary slightly depending on the shooting environment. You can select the most appropriate white balance setting for a given shooting environment by setting up the custom white balance. 1. Select the CUSTOM ( ) menu of the White Balance and place a sheet of white paper in front of the camera so that the LCD monitor shows only white. 2. OK menu button : selects pre-saved custom white balance. ٌ BACK button : cancels the custom white [White paper] balance. Shutter button : stored the new custom white balance. - The custom white balance value will be applied, starting with the next picture you take. - The user configured white balance will be remain effective until it is overwritten. ŝ37Ş
-
 1
1 -
2
-
3
-
4
-
5
-
6
-
7
-
8
-
9
-
10
-
11
-
12
-
13
-
14
-
15
-
16
-
17
-
18
-
19
-
20
-
21
-
22
-
23
-
24
-
25
-
26
-
27
-
28
-
29
-
30
-
31
-
32
-
 33
33 -
 34
34 -
 35
35 -
 36
36 -
 37
37 -
 38
38 -
 39
39 -
 40
40 -
 41
41 -
 42
42 -
 43
43 -
44
-
45
-
46
-
47
-
48
-
49
-
50
-
51
-
52
-
53
-
54
-
55
-
56
-
57
-
58
-
59
-
60
-
61
-
62
-
63
-
64
-
65
-
66
-
67
-
68
-
69
-
70
-
71
-
72
-
73
-
74
-
75
-
76
-
77
-
78
-
79
-
80
-
81
-
82
-
83
-
84
-
85
-
86
-
87
-
88
-
89
-
90
 |
 |