Samsung SCH-A630 User Manual (user Manual) (ver.f3) (English) - Page 98
left soft key, screen appears in the display showing
 |
View all Samsung SCH-A630 manuals
Add to My Manuals
Save this manual to your list of manuals |
Page 98 highlights
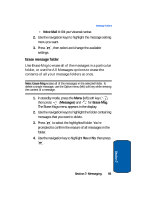
Section 8 5. When you're finished entering details for the event, press . You're prompted to enter the time and date for the event. 6. Enter the time and date for the event using the keypad. • Press • Press for A.M. when P is highlighted. for P.M. when A is highlighted. 7. When you're finished entering the time and date, use the navigation keys to highlight the Notification field. 8. Use the left and right navigation keys to select the amount of time that you want to be notified by an alert before the event occurs. 9. Press to store the event in your calendar. An alert will notify you prior to the event, if you set the notification alert. The Event n/m screen appears in the display showing the information about this event. 10. Press the Option (left) soft key ( ). A pop-up menu containing the following event handling options appears in the display: • Add New: Adds another event to the current day. • Edit: Returns you to the event input screen to make any desired changes. • Erase: Deletes this event from the current day. • Erase All: Erases all events for the current day. 11. Press to exit the pop-up menu. Press to return to the Planner menu. again 98
-
 1
1 -
2
-
3
-
4
-
5
-
6
-
7
-
8
-
9
-
10
-
11
-
12
-
13
-
14
-
15
-
16
-
17
-
18
-
19
-
20
-
21
-
22
-
23
-
24
-
25
-
26
-
27
-
28
-
29
-
30
-
31
-
32
-
33
-
34
-
35
-
36
-
37
-
38
-
39
-
40
-
41
-
42
-
43
-
44
-
45
-
46
-
47
-
48
-
49
-
50
-
51
-
52
-
53
-
54
-
55
-
56
-
57
-
58
-
59
-
60
-
61
-
62
-
63
-
64
-
65
-
66
-
67
-
68
-
69
-
70
-
71
-
72
-
73
-
74
-
75
-
76
-
77
-
78
-
79
-
80
-
81
-
82
-
83
-
84
-
85
-
86
-
87
-
88
-
89
-
90
-
91
-
92
-
 93
93 -
 94
94 -
 95
95 -
 96
96 -
 97
97 -
 98
98 -
 99
99 -
 100
100 -
 101
101 -
 102
102 -
 103
103 -
104
-
105
-
106
-
107
-
108
-
109
-
110
-
111
-
112
-
113
-
114
-
115
-
116
-
117
-
118
-
119
-
120
-
121
-
122
-
123
-
124
-
125
-
126
-
127
-
128
-
129
-
130
-
131
-
132
-
133
-
134
-
135
-
136
-
137
-
138
-
139
-
140
-
141
-
142
-
143
-
144
-
145
-
146
-
147
-
148
-
149
-
150
-
151
-
152
-
153
-
154
-
155
-
156
-
157
-
158
-
159
-
160
-
161
-
162
-
163
-
164
-
165
-
166
-
167
-
168
-
169
-
170
-
171
-
172
 |
 |