Samsung SCH-R631 User Manual (user Manual) (ver.f2) (English) - Page 43
Erasing a Contact, Groups, Managing Groups
 |
View all Samsung SCH-R631 manuals
Add to My Manuals
Save this manual to your list of manuals |
Page 43 highlights
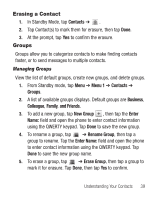
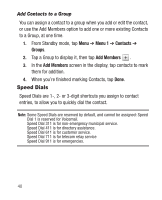
Erasing a Contact 1. In Standby Mode, tap Contacts ➔ . 2. Tap Contact(s) to mark them for erasure, then tap Done. 3. At the prompt, tap Yes to confirm the erasure. Groups Groups allow you to categorize contacts to make finding contacts faster, or to send messages to multiple contacts. Managing Groups View the list of default groups, create new groups, and delete groups. 1. From Standby mode, tap Menu ➔ Menu 1 ➔ Contacts ➔ Groups. 2. A list of available groups displays. Default groups are Business, Colleague, Family, and Friends. 3. To add a new group, tap New Group + , then tap the Enter Name: field and open the phone to enter contact information using the QWERTY keypad. Tap Done to save the new group. 4. To rename a group, tap ➔ Rename Group, then tap a group to rename. Tap the Enter Name: field and open the phone to enter contact information using the QWERTY keypad. Tap Done to save the new group name. 5. To erase a group, tap ➔ Erase Group, then tap a group to mark it for erasure. Tap Done, then tap Yes to confirm. Understanding Your Contacts 39
-
 1
1 -
2
-
3
-
4
-
5
-
6
-
7
-
8
-
9
-
10
-
11
-
12
-
13
-
14
-
15
-
16
-
17
-
18
-
19
-
20
-
21
-
22
-
23
-
24
-
25
-
26
-
27
-
28
-
29
-
30
-
31
-
32
-
33
-
34
-
35
-
36
-
37
-
 38
38 -
 39
39 -
 40
40 -
 41
41 -
 42
42 -
 43
43 -
 44
44 -
 45
45 -
 46
46 -
 47
47 -
 48
48 -
49
-
50
-
51
-
52
-
53
-
54
-
55
-
56
-
57
-
58
-
59
-
60
-
61
-
62
-
63
-
64
-
65
-
66
-
67
-
68
-
69
-
70
-
71
-
72
-
73
-
74
-
75
-
76
-
77
-
78
-
79
-
80
-
81
-
82
-
83
-
84
-
85
-
86
-
87
-
88
-
89
-
90
-
91
-
92
-
93
-
94
-
95
-
96
-
97
-
98
-
99
-
100
-
101
-
102
-
103
-
104
-
105
-
106
-
107
-
108
-
109
-
110
-
111
-
112
-
113
-
114
-
115
-
116
-
117
-
118
-
119
-
120
-
121
-
122
-
123
-
124
-
125
-
126
-
127
-
128
-
129
-
130
-
131
-
132
-
133
-
134
-
135
-
136
-
137
-
138
-
139
-
140
-
141
-
142
-
143
-
144
-
145
-
146
-
147
-
148
-
149
-
150
-
151
-
152
-
153
-
154
-
155
-
156
-
157
-
158
-
159
-
160
-
161
-
162
-
163
-
164
-
165
 |
 |