Samsung SGH-T309 User Manual (user Manual) (ver.f4) (English) - Page 59
Storing a Number in the Phone’s Memory, Cancel, after, Options, Send message, Copy
 |
View all Samsung SGH-T309 manuals
Add to My Manuals
Save this manual to your list of manuals |
Page 59 highlights
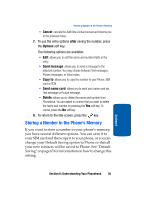
Storing a Number in the Phone's Memory • Cancel: cancels the Add New Contact screen and returns you to the previous menu. 7. To use the entry options after saving the number, press the Options soft key. The following options are available: • Edit: allows you to edit the name and number fields in the entry. • Send message: allows you to send a message to the selected number. You may choose between Text messages, Picture messages, or Voice notes. • Copy to: allows you to copy the number to your Phone, SIM card or FDN. • Send name card: allows you to send your name card via Text message or Picture message. • Delete: allows you to delete the name and number from Phonebook. You are asked to confirm that you wish to delete the name and number by pressing the Yes soft key. To cancel, press the No soft key. 8. To return to the Idle screen, press the key. Storing a Number in the Phone's Memory If you want to store a number in your phone's memory, you have several different options. You can save it to your SIM card and then copy it to your phone, or you can change your Default Saving option to Phone so that all your new contacts will be saved to Phone. See "Default Saving" on page 65 for information on how to change this setting. Section 6: Understanding Your Phonebook 55 Section 6
-
 1
1 -
2
-
3
-
4
-
5
-
6
-
7
-
8
-
9
-
10
-
11
-
12
-
13
-
14
-
15
-
16
-
17
-
18
-
19
-
20
-
21
-
22
-
23
-
24
-
25
-
26
-
27
-
28
-
29
-
30
-
31
-
32
-
33
-
34
-
35
-
36
-
37
-
38
-
39
-
40
-
41
-
42
-
43
-
44
-
45
-
46
-
47
-
48
-
49
-
50
-
51
-
52
-
53
-
 54
54 -
 55
55 -
 56
56 -
 57
57 -
 58
58 -
 59
59 -
 60
60 -
 61
61 -
 62
62 -
 63
63 -
 64
64 -
65
-
66
-
67
-
68
-
69
-
70
-
71
-
72
-
73
-
74
-
75
-
76
-
77
-
78
-
79
-
80
-
81
-
82
-
83
-
84
-
85
-
86
-
87
-
88
-
89
-
90
-
91
-
92
-
93
-
94
-
95
-
96
-
97
-
98
-
99
-
100
-
101
-
102
-
103
-
104
-
105
-
106
-
107
-
108
-
109
-
110
-
111
-
112
-
113
-
114
-
115
-
116
-
117
-
118
-
119
-
120
-
121
-
122
-
123
-
124
-
125
-
126
-
127
-
128
-
129
-
130
-
131
-
132
-
133
-
134
-
135
-
136
-
137
-
138
-
139
-
140
-
141
-
142
-
143
-
144
-
145
-
146
-
147
-
148
-
149
-
150
-
151
-
152
-
153
-
154
-
155
-
156
-
157
-
158
-
159
-
160
-
161
-
162
-
163
-
164
-
165
-
166
-
167
-
168
-
169
-
170
-
171
-
172
-
173
-
174
-
175
-
176
-
177
-
178
-
179
-
180
-
181
-
182
-
183
-
184
-
185
-
186
-
187
-
188
-
189
-
190
-
191
-
192
-
193
-
194
-
195
-
196
-
197
-
198
 |
 |
