Samsung SGH-T959 This Document Is For The T-mobile Sgh-t959 (vibrant) Only. ( - Page 81
Select Contacts to Sync, Sync Calendar - case
 |
UPC - 610214622631
View all Samsung SGH-T959 manuals
Add to My Manuals
Save this manual to your list of manuals |
Page 81 highlights
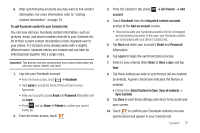
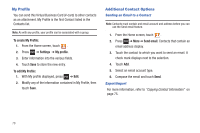
6. After synchronizing accounts you may want to link contact information. For more information, refer to "Joining Contact Information" on page 72. To add Facebook content to your Contacts list: You can now add your Facebook contact information, such as pictures, email, and phone numbers directly to your Contacts list. All of their current contact information is then migrated over to your phone. If a Contacts entry already exists with a slightly different name, separate entries are created and can later be linked (joined) together into a single entry. Important!: This process not only synchronizes your contact information but also your status, events, and more. 1. Log into your Facebook account: • From the Home screen, touch ➔ Facebook. • Tap I agree to accept the terms of the End-User License Agreement. • Enter your account's access Email and Password information and tap Login. • Press and tap Home ➔ Friends to confirm your current friends list. 2. From the Home screen, touch . 3. From the Contact's tab, press account. ➔ Get friends ➔ Add 4. Touch Facebook from the Integrated contact accounts section of the Add an account screen. • This process adds your Facebook account to the list of managed and synchronized accounts. In this case, your Facebook contacts are synchronized with your phone's Contacts list. 5. Tap Next and enter your account's Email and Password information. 6. Tap Log in to begin the synchronization process. 7. Select a sync interval (from None to Once a day) and tap Next. 8. Tap those setting you wish to synchronize (all are enabled by default). A green checkmark indicates the feature is enabled. • Choose from: Select Contacts to Sync, Sync all contacts, or Sync Calendar. 9. Tap Done to save these settings and return to Accounts and sync screen. 10. Touch to confirm your Facebook contacts are now synchronized and appear in your Contacts list. Contacts 77
-
 1
1 -
2
-
3
-
4
-
5
-
6
-
7
-
8
-
9
-
10
-
11
-
12
-
13
-
14
-
15
-
16
-
17
-
18
-
19
-
20
-
21
-
22
-
23
-
24
-
25
-
26
-
27
-
28
-
29
-
30
-
31
-
32
-
33
-
34
-
35
-
36
-
37
-
38
-
39
-
40
-
41
-
42
-
43
-
44
-
45
-
46
-
47
-
48
-
49
-
50
-
51
-
52
-
53
-
54
-
55
-
56
-
57
-
58
-
59
-
60
-
61
-
62
-
63
-
64
-
65
-
66
-
67
-
68
-
69
-
70
-
71
-
72
-
73
-
74
-
75
-
 76
76 -
 77
77 -
 78
78 -
 79
79 -
 80
80 -
 81
81 -
 82
82 -
 83
83 -
 84
84 -
 85
85 -
 86
86 -
87
-
88
-
89
-
90
-
91
-
92
-
93
-
94
-
95
-
96
-
97
-
98
-
99
-
100
-
101
-
102
-
103
-
104
-
105
-
106
-
107
-
108
-
109
-
110
-
111
-
112
-
113
-
114
-
115
-
116
-
117
-
118
-
119
-
120
-
121
-
122
-
123
-
124
-
125
-
126
-
127
-
128
-
129
-
130
-
131
-
132
-
133
-
134
-
135
-
136
-
137
-
138
-
139
-
140
-
141
-
142
-
143
-
144
-
145
-
146
-
147
-
148
-
149
-
150
-
151
-
152
-
153
-
154
-
155
-
156
-
157
-
158
-
159
-
160
-
161
-
162
-
163
-
164
-
165
-
166
-
167
-
168
-
169
-
170
-
171
-
172
-
173
-
174
-
175
-
176
-
177
-
178
-
179
-
180
-
181
-
182
-
183
-
184
-
185
-
186
-
187
-
188
-
189
-
190
-
191
-
192
-
193
-
194
-
195
-
196
-
197
-
198
-
199
-
200
-
201
-
202
-
203
-
204
-
205
-
206
-
207
-
208
-
209
-
210
-
211
-
212
-
213
-
214
-
215
-
216
-
217
-
218
 |
 |