Sharp HT-X1 HT-X1 Operation Manual - Page 62
To install the main unit on the wall
 |
UPC - 074000366138
View all Sharp HT-X1 manuals
Add to My Manuals
Save this manual to your list of manuals |
Page 62 highlights
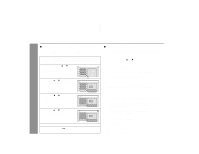
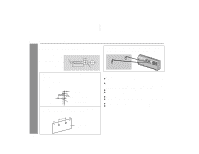
HT-X1 To install the main unit on the wall Preparation: Remove the stand from the main unit (perform steps 1 - 2 on page 18). Sharp has designed the main unit so you can hang it on the wall. Use appropriate screws (not supplied). See the illustration on the right for size and type. 1/8" (3.2 mm) 3/16" (5 mm) Min. 7/8" (22 mm) 3/8" (9 mm) 3 Tighten the screws and remove the paper. Hook the main unit on the screw heads and make sure it is secure. Wall surface Advanced Features 1 Drive two screws into the wall for main unit, as shown in the illustration. Make sure that both the screw and the wall can support a load of 4.9 lbs. (2.2 kg). Drive the screws, so the screw head extends about 7/32" (5.5 mm) out from the wall. 7/32" (5.5 mm) Wall mounting screw Wall surface Min. 21/32" (16.5 mm) 2 Fix the pattern paper and drive two screws into the wall with a distance of 5-3/25" (130 mm) in between. CAUTION: ! Make sure to prevent the main unit [4.9 lbs. (2.2 kg)] from falling when mounting it on the wall. ! Before mounting, check the wall strength. (Do not put on a veneer plaster or whitewashed wall. The main unit may fall.) If it is not clear, consult with a qualified service technician. ! Mounting screws are not supplied. Use appropriate ones. ! Check all mounting screws for looseness and that they are engaged in the main unit. ! Mount the main unit on the wall with 2 screws. ! Select a good location. If not, accidents may occur or the main unit may get damaged. ! Avoid placing on a bed, sofa, water tank, sink and hallway wall. ! SHARP is not responsible for accidents resulting from improper installation. 5-3/25" (130 mm) Pattern paper for main unit 62
-
 1
1 -
2
-
3
-
4
-
5
-
6
-
7
-
8
-
9
-
10
-
11
-
12
-
13
-
14
-
15
-
16
-
17
-
18
-
19
-
20
-
21
-
22
-
23
-
24
-
25
-
26
-
27
-
28
-
29
-
30
-
31
-
32
-
33
-
34
-
35
-
36
-
37
-
38
-
39
-
40
-
41
-
42
-
43
-
44
-
45
-
46
-
47
-
48
-
49
-
50
-
51
-
52
-
53
-
54
-
55
-
56
-
 57
57 -
 58
58 -
 59
59 -
 60
60 -
 61
61 -
 62
62 -
 63
63 -
 64
64 -
 65
65 -
 66
66 -
 67
67 -
68
 |
 |
