Sony DCR-DVD108 Operating Instructions - Page 64
MOVIE SETTINGS, (Items for recording movies), REC MODE Recording, NIGHTSHOT LIGHT, WIDE SELECT DCR - change hq
 |
UPC - 027242701786
View all Sony DCR-DVD108 manuals
Add to My Manuals
Save this manual to your list of manuals |
Page 64 highlights
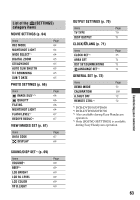
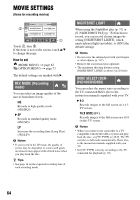
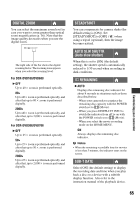
MOVIE SETTINGS (Items for recording movies) Touch 1, then 2. If the item is not on the screen, touch v/V to change the page. How to set (HOME MENU) t page 62 (OPTION MENU) t page 73 The default settings are marked with B. REC MODE (Recording mode) You can select an image quality of the movie from three levels. HQ Records in high quality mode. (9M (HQ)) B SP Records in standard quality mode. (6M (SP)) LP Increases the recording time (Long Play). (3M (LP)) b Notes • If you record in the LP mode, the quality of scenes may be degraded, or scenes with quick movements may appear with a block noise when you play back the disc. z Tips • See page 14 on the expected recording time of each recording mode. NIGHTSHOT LIGHT When using the NightShot plus (p. 37) or [S. NIGHTSHOT PLS] (p. 78) function to record, you can record clearer images by setting [NIGHTSHOT LIGHT], which emits infrared light (invisible), to [ON] (the default setting). b Notes • Do not cover the infrared port with your fingers or other objects (p. 112). • Remove the conversion lens (optional). • The maximum shooting distance using [NIGHTSHOT LIGHT] is about 3 m (10 feet). WIDE SELECT (DCRDVD108/DVD608) You can select the aspect ratio according to the TV connected.Refer also to the instruction manuals supplied with your TV. B 4:3 Records images to the full screen on a 4:3 TV screen. 16:9 WIDE ( ) Records images to the full screen on a 16:9 (wide) TV screen. b Notes • When you connect your camcorder to a TV compatible with the ID-1/ID-2 system and play back the disc, set [TV TYPE] to [16:9]. The TV switches to full mode automatically. Refer also to the instruction manuals supplied with your TV. • Set [TV TYPE] correctly according to the TV connected for playback (p. 70). 64
-
 1
1 -
2
-
3
-
4
-
5
-
6
-
7
-
8
-
9
-
10
-
11
-
12
-
13
-
14
-
15
-
16
-
17
-
18
-
19
-
20
-
21
-
22
-
23
-
24
-
25
-
26
-
27
-
28
-
29
-
30
-
31
-
32
-
33
-
34
-
35
-
36
-
37
-
38
-
39
-
40
-
41
-
42
-
43
-
44
-
45
-
46
-
47
-
48
-
49
-
50
-
51
-
52
-
53
-
54
-
55
-
56
-
57
-
58
-
 59
59 -
 60
60 -
 61
61 -
 62
62 -
 63
63 -
 64
64 -
 65
65 -
 66
66 -
 67
67 -
 68
68 -
 69
69 -
70
-
71
-
72
-
73
-
74
-
75
-
76
-
77
-
78
-
79
-
80
-
81
-
82
-
83
-
84
-
85
-
86
-
87
-
88
-
89
-
90
-
91
-
92
-
93
-
94
-
95
-
96
-
97
-
98
-
99
-
100
-
101
-
102
-
103
-
104
-
105
-
106
-
107
-
108
-
109
-
110
-
111
-
112
-
113
-
114
-
115
-
116
-
117
-
118
-
119
-
120
-
121
-
122
-
123
-
124
-
125
-
126
-
127
-
128
-
129
-
130
-
131
-
132
-
133
-
134
-
135
-
136
-
137
-
138
-
139
 |
 |
