Sony DCR-IP220 MovieShaker v3.1 Operating Instructions - Page 24
When the end point to be captured is displayed, click the Stop
 |
View all Sony DCR-IP220 manuals
Add to My Manuals
Save this manual to your list of manuals |
Page 24 highlights
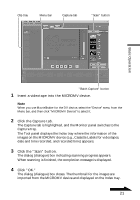
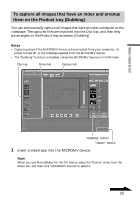
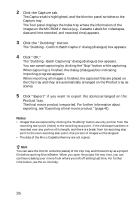
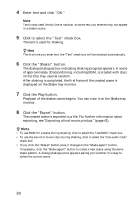
3 Stop playing the videotape just before the point you want to start capturing. Note If the MICROMV device is in CAMERA mode, steps 3 and 4 are not necessary. 4 Click the Play button. The image recorded in the videotape is played back on the monitor. 5 When the start point to be captured is displayed, click the "Capture" button. Capturing starts. Observe the HDD remaining space indicator. Its color (colour) changes to red when the remaining free space on the hard disk becomes insufficient. Note If available free space on the hard disk becomes less than 50MB, capturing will cease instantly. For this reason, beware if the indicator turns red. 6 When the end point to be captured is displayed, click the "Stop Capture" button. When capturing is finished, the dialog (dialogue) box indicating importing progress appears. When importing is finished, the captured file is placed on the Clip tray. To capture other images back to back, repeat steps 3 through 6. Note You cannot capture images while they are displayed on the Full screen monitor. 24
-
 1
1 -
2
-
3
-
4
-
5
-
6
-
7
-
8
-
9
-
10
-
11
-
12
-
13
-
14
-
15
-
16
-
17
-
18
-
 19
19 -
 20
20 -
 21
21 -
 22
22 -
 23
23 -
 24
24 -
 25
25 -
 26
26 -
 27
27 -
 28
28 -
 29
29 -
30
-
31
-
32
-
33
-
34
-
35
-
36
-
37
-
38
-
39
-
40
-
41
-
42
-
43
-
44
-
45
-
46
-
47
-
48
 |
 |