Sony DCR-IP220 MovieShaker v3.1 Operating Instructions - Page 26
Click the Capture tab., Click the Dubbing button., Click OK.
 |
View all Sony DCR-IP220 manuals
Add to My Manuals
Save this manual to your list of manuals |
Page 26 highlights
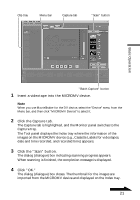
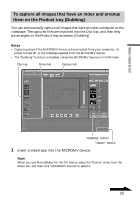
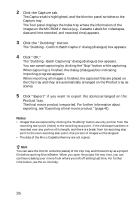
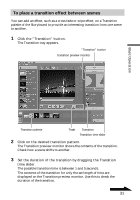
2 Click the Capture tab. The Capture tab is highlighted, and the Monitor panel switches to the Capture tray. The Tool panel displays the Index tray where the information of the images on the MICROMV device (e.g., Cassette Labels for videotapes, date and time recorded, and recorded time) appears. 3 Click the "Dubbing" button. The "Dubbing - Confirm Batch Capture" dialog (dialogue) box appears. 4 Click "OK." The "Dubbing - Batch Capturing" dialog (dialogue) box appears. You can cancel capturing by clicking the "Stop" button while capturing. When capturing is finished, the dialog (dialogue) box indicating importing progress appears. When importing all images is finished, the captured files are placed on the Clip tray and they are automatically arranged on the Product tray as scenes. 5 Click "Export" if you want to export the scenes arranged on the Product tray. The final movie product is exported. For further information about exporting, see "Exporting a final movie product." (page 41) Notes • Images that are captured by clicking the "Dubbing" button are only portion from the recording start point (index) to the recording stop point. If the videotape has been rerecorded over any portion of its length, and there is a break from its recording stop point to the next recording start point, that portion of images will be skipped. • The data of the Micro Cassette Memory are not copied. z Hint You can save the interim contents (status) of the Clip tray and Product tray as a project file before quitting MovieShaker. When you open the project file next time, you can continue creating your movie from where you left off editing last time. For further information, see the on-line help. 26
-
 1
1 -
2
-
3
-
4
-
5
-
6
-
7
-
8
-
9
-
10
-
11
-
12
-
13
-
14
-
15
-
16
-
17
-
18
-
19
-
20
-
 21
21 -
 22
22 -
 23
23 -
 24
24 -
 25
25 -
 26
26 -
 27
27 -
 28
28 -
 29
29 -
 30
30 -
 31
31 -
32
-
33
-
34
-
35
-
36
-
37
-
38
-
39
-
40
-
41
-
42
-
43
-
44
-
45
-
46
-
47
-
48
 |
 |