Sony DCR-IP220 MovieShaker v3.1 Operating Instructions - Page 29
Placing clips to make a movie, To place a clip (on the Storyboard
 |
View all Sony DCR-IP220 manuals
Add to My Manuals
Save this manual to your list of manuals |
Page 29 highlights
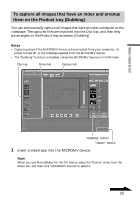
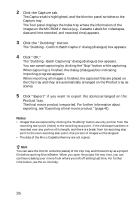
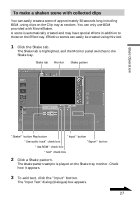
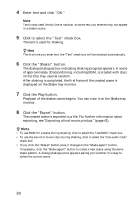
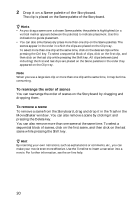
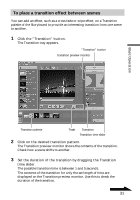
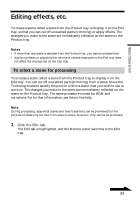
Basic Operation Placing clips to make a movie Select clips from the Clip tray and place them onto the Product tray to create your own movie. The clip placed on the Product tray is called a "scene." You can add an effect (transition) between scenes placed on the Product tray. On the Product tray, you will find the Storyboard Display and the Timeline Display. The steps below describe how to place clips onto the Storyboard. For further information about placing clips onto the Timeline, see the on-line help. z Hint Sound clips can only be placed onto the Timeline. The sound clip placed on the Timeline is called "BGM." For further information, see the on-line help. To place a clip (on the Storyboard) Select clips from the Clip tray and place them onto the Scene palettes of the Storyboard. 1 Drag a thumbnail image from the Clip tray. Clip tray Monitor Trash Storyboard (Product tray) Scene palette Continued 29
-
 1
1 -
2
-
3
-
4
-
5
-
6
-
7
-
8
-
9
-
10
-
11
-
12
-
13
-
14
-
15
-
16
-
17
-
18
-
19
-
20
-
21
-
22
-
23
-
 24
24 -
 25
25 -
 26
26 -
 27
27 -
 28
28 -
 29
29 -
 30
30 -
 31
31 -
 32
32 -
 33
33 -
 34
34 -
35
-
36
-
37
-
38
-
39
-
40
-
41
-
42
-
43
-
44
-
45
-
46
-
47
-
48
 |
 |
