Sony DCR-IP220 MovieShaker v3.1 Operating Instructions - Page 34
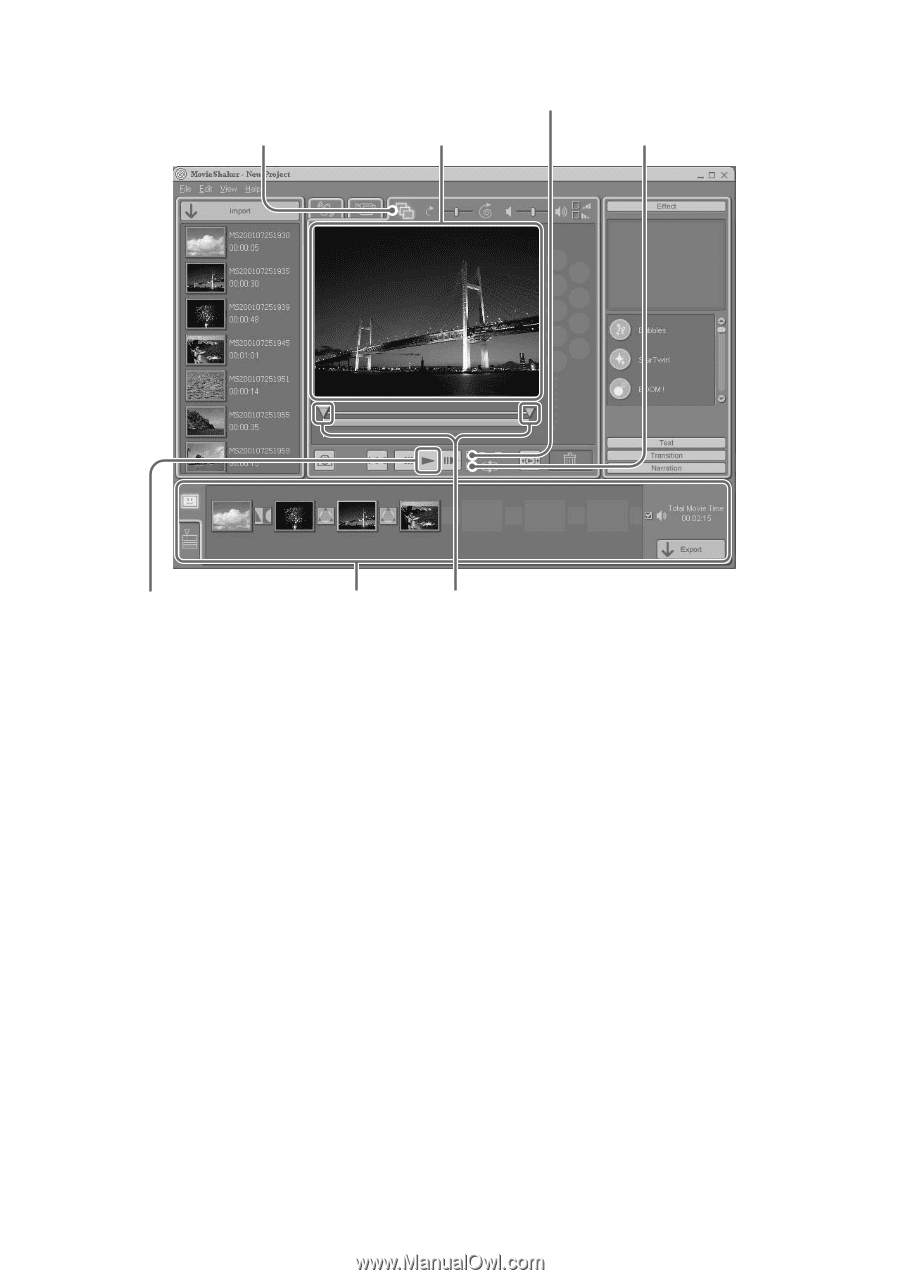
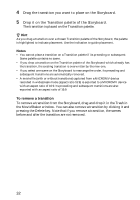
Click a scene displayed on the Storyboard., Click the Play button.
 |
View all Sony DCR-IP220 manuals
Add to My Manuals
Save this manual to your list of manuals |
Page 34 highlights
Edit tab Play trimming range check box Monitor Repeat-Play check box Play button Storyboard Trimming knobs 2 Click a scene displayed on the Storyboard. The first frame of the selected scene is displayed on the Edit tray. 3 Drag the Trimming knobs to specify the starting or ending point. The image displayed on the monitor also changes as the knob is dragged. 4 Click the Play trimming range check box to select it. 5 Click the Play button. Only the portion you specified for a movie using the Trimming knobs is played. z Hint By clicking the Save as still image button, you can save a movie file displayed on the monitor as a still image. The saved still image is imported to the Clip tray as a clip to be used in MovieShaker. For further information, see the on-line help. 34
-
 1
1 -
2
-
3
-
4
-
5
-
6
-
7
-
8
-
9
-
10
-
11
-
12
-
13
-
14
-
15
-
16
-
17
-
18
-
19
-
20
-
21
-
22
-
23
-
24
-
25
-
26
-
27
-
28
-
 29
29 -
 30
30 -
 31
31 -
 32
32 -
 33
33 -
 34
34 -
 35
35 -
 36
36 -
 37
37 -
 38
38 -
 39
39 -
40
-
41
-
42
-
43
-
44
-
45
-
46
-
47
-
48
 |
 |