Sony HDR UX1 Operating Guide - Page 35
Step 5: Setting the date and time, Viewfinder
 |
UPC - 027242698918
View all Sony HDR UX1 manuals
Add to My Manuals
Save this manual to your list of manuals |
Page 35 highlights
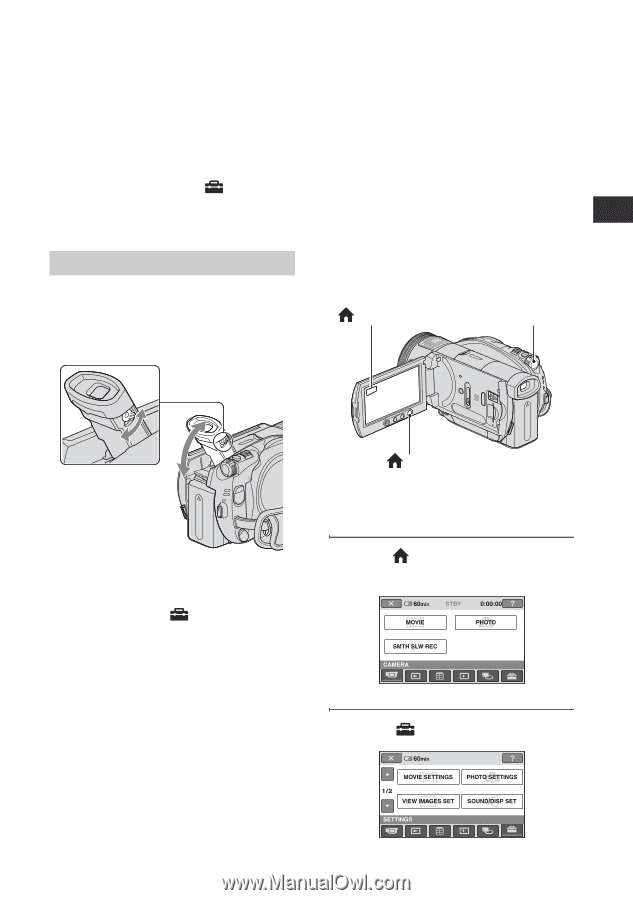
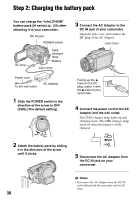
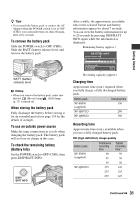
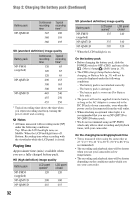
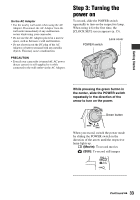
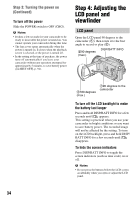
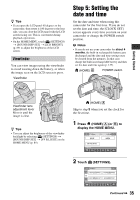
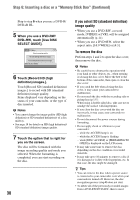
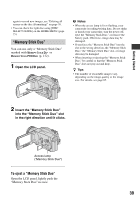
Getting Started z Tips • If you open the LCD panel 90 degrees to the camcorder, then rotate it 180 degrees to the lens side, you can close the LCD panel with the LCD screen facing out. This is convenient during playback operations. • On the HOME MENU, touch (SETTINGS) t [SOUND/DISP SET] t [LCD BRIGHT] (p. 89) to adjust the brightness of the LCD screen. Viewfinder You can view images using the viewfinder to avoid wearing down the battery, or when the image seen on the LCD screen is poor. Viewfinder Step 5: Setting the date and time Set the date and time when using this camcorder for the first time. If you do not set the date and time, the [CLOCK SET] screen appears every time you turn on your camcorder or change the POWER switch position. b Notes • If you do not use your camcorder for about 4 months, the built-in rechargeable battery gets discharged and the date and time settings may be cleared from the memory. In that case, charge the built-in rechargeable battery and then set the date and time again (p. 137). (HOME) B POWER switch Viewfinder lens adjustment lever Move it until the image is clear. z Tips • You can adjust the brightness of the viewfinder backlight by selecting (SETTINGS) t [SOUND/DISP SET] t [VF B.LIGHT] on the HOME MENU (p. 89). (HOME) A Skip to step 5 when you set the clock for the first time. 1 Press (HOME) A (or B) to display the HOME MENU. 2 Touch (SETTINGS). Continued , 35
-
 1
1 -
2
-
3
-
4
-
5
-
6
-
7
-
8
-
9
-
10
-
11
-
12
-
13
-
14
-
15
-
16
-
17
-
18
-
19
-
20
-
21
-
22
-
23
-
24
-
25
-
26
-
27
-
28
-
29
-
 30
30 -
 31
31 -
 32
32 -
 33
33 -
 34
34 -
 35
35 -
 36
36 -
 37
37 -
 38
38 -
 39
39 -
 40
40 -
41
-
42
-
43
-
44
-
45
-
46
-
47
-
48
-
49
-
50
-
51
-
52
-
53
-
54
-
55
-
56
-
57
-
58
-
59
-
60
-
61
-
62
-
63
-
64
-
65
-
66
-
67
-
68
-
69
-
70
-
71
-
72
-
73
-
74
-
75
-
76
-
77
-
78
-
79
-
80
-
81
-
82
-
83
-
84
-
85
-
86
-
87
-
88
-
89
-
90
-
91
-
92
-
93
-
94
-
95
-
96
-
97
-
98
-
99
-
100
-
101
-
102
-
103
-
104
-
105
-
106
-
107
-
108
-
109
-
110
-
111
-
112
-
113
-
114
-
115
-
116
-
117
-
118
-
119
-
120
-
121
-
122
-
123
-
124
-
125
-
126
-
127
-
128
-
129
-
130
-
131
-
132
-
133
-
134
-
135
-
136
-
137
-
138
-
139
-
140
-
141
-
142
-
143
-
144
-
145
-
146
-
147
-
148
-
149
-
150
-
151
-
152
-
153
-
154
-
155
 |
 |