Sony HDR UX1 Operating Guide - Page 95
EXPOSURE, SPOT METER Flexible, spot meter, PROGRAM AE, Customizing your camcorder, SPOTLIGHT
 |
UPC - 027242698918
View all Sony HDR UX1 manuals
Add to My Manuals
Save this manual to your list of manuals |
Page 95 highlights
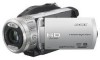
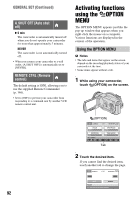
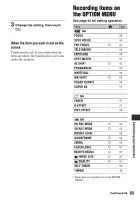
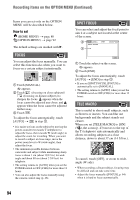
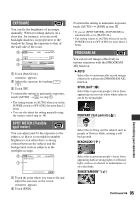
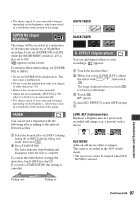
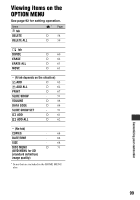
EXPOSURE You can fix the brightness of an image manually. When recording indoors on a clear day, for instance, you can avoid backlight shadows on people next to the window by fixing the exposure to that of the wall side of the room. 1 Touch [MANUAL]. appears. 2 Adjust the exposure by touching / . 3 Touch . To return the setting to automatic exposure, touch [AUTO] t in step 1. • The setting returns to [AUTO] when you set the POWER switch to OFF (CHG) for more than 12 hours. • You can also adjust the setting manually using the camera control ring (p. 46). SPOT METER (Flexible spot meter) You can adjust and fix the exposure to the subject, so that it is recorded in suitable brightness even when there is strong contrast between the subject and the background, such as subjects in the spotlight on stage. 1 Touch the point where you want to fix and adjust the exposure on the screen. appears. 2 Touch [END]. To return the setting to automatic exposure, touch [AUTO] t [END] in step 1. • If you set [SPOT METER], [EXPOSURE] is automatically set to [MANUAL]. • The setting returns to [AUTO] when you set the POWER switch to OFF (CHG) for more than 12 hours. PROGRAM AE You can record images effectively in various situations with the [PROGRAM AE] function. B AUTO Select this to automatically record images effectively without the [PROGRAM AE] function. SPOTLIGHT*( ) Select this to prevent people's faces from appearing excessively white when subjects are lit by strong light. PORTRAIT (Soft portrait) ( ) Select this to bring out the subject such as people or flowers while creating a soft background. BEACH&SKI*( ) Select this to prevent people's faces from appearing dark in strong light or reflected light, such as at a beach in midsummer or on a ski slope. SUNSET&MOON**( ) Continued , 95 Customizing your camcorder
-
 1
1 -
2
-
3
-
4
-
5
-
6
-
7
-
8
-
9
-
10
-
11
-
12
-
13
-
14
-
15
-
16
-
17
-
18
-
19
-
20
-
21
-
22
-
23
-
24
-
25
-
26
-
27
-
28
-
29
-
30
-
31
-
32
-
33
-
34
-
35
-
36
-
37
-
38
-
39
-
40
-
41
-
42
-
43
-
44
-
45
-
46
-
47
-
48
-
49
-
50
-
51
-
52
-
53
-
54
-
55
-
56
-
57
-
58
-
59
-
60
-
61
-
62
-
63
-
64
-
65
-
66
-
67
-
68
-
69
-
70
-
71
-
72
-
73
-
74
-
75
-
76
-
77
-
78
-
79
-
80
-
81
-
82
-
83
-
84
-
85
-
86
-
87
-
88
-
89
-
 90
90 -
 91
91 -
 92
92 -
 93
93 -
 94
94 -
 95
95 -
 96
96 -
 97
97 -
 98
98 -
 99
99 -
 100
100 -
101
-
102
-
103
-
104
-
105
-
106
-
107
-
108
-
109
-
110
-
111
-
112
-
113
-
114
-
115
-
116
-
117
-
118
-
119
-
120
-
121
-
122
-
123
-
124
-
125
-
126
-
127
-
128
-
129
-
130
-
131
-
132
-
133
-
134
-
135
-
136
-
137
-
138
-
139
-
140
-
141
-
142
-
143
-
144
-
145
-
146
-
147
-
148
-
149
-
150
-
151
-
152
-
153
-
154
-
155
 |
 |