Sony HDR-XR160 Handycam® Handbook - Page 46
Touch [Project]., Move the power zoom lever - battery life
 |
UPC - 027242820081
View all Sony HDR-XR160 manuals
Add to My Manuals
Save this manual to your list of manuals |
Page 46 highlights
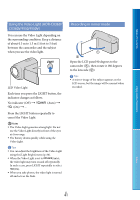
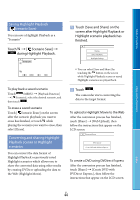
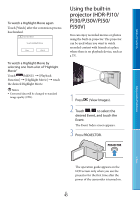
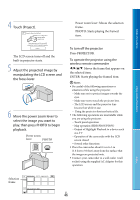
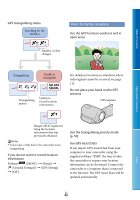
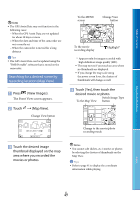
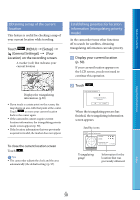
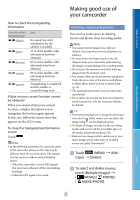
Table of Contents Enjoy Useful Functions 4 Touch [Project]. Power zoom lever: Moves the selection frame. PHOTO: Starts playing the framed item. The LCD screen turns off and the built-in projector starts. 5 Adjust the projected image by manipulating the LCD screen and the focus lever. 6 Move the power zoom lever to select the image you want to play, then press PHOTO to begin playback. Power zoom lever PHOTO To turn off the projector Press PROJECTOR. To operate the projector using the wireless remote commander Moves the frame that appears on the selected item. ENTER: Starts playing the framed item. Notes Be careful of the following operations or situations while using the projector. Make sure not to project images towards the eyes. Make sure not to touch the projector lens. The LCD screen and the projector lens become hot while in use. Using the projector shortens battery life. The following operations are unavailable while you are using the projector. Touch panel operation Map operation (HDR-PJ30V/PJ50V) Output of Highlight Playback to a device such as a TV Operation of the camcorder with the LCD screen closed Several other functions Place the camcorder about 0.5 m to 3 m (1.6 feet to 9.8 feet) away from the surface that the images are projected onto. Connect your camcorder to a wall outlet (wall socket) using the supplied AC Adaptor for this operation. Index Selection frame US 46
-
 1
1 -
2
-
3
-
4
-
5
-
6
-
7
-
8
-
9
-
10
-
11
-
12
-
13
-
14
-
15
-
16
-
17
-
18
-
19
-
20
-
21
-
22
-
23
-
24
-
25
-
26
-
27
-
28
-
29
-
30
-
31
-
32
-
33
-
34
-
35
-
36
-
37
-
38
-
39
-
40
-
 41
41 -
 42
42 -
 43
43 -
 44
44 -
 45
45 -
 46
46 -
 47
47 -
 48
48 -
 49
49 -
 50
50 -
 51
51 -
52
-
53
-
54
-
55
-
56
-
57
-
58
-
59
-
60
-
61
-
62
-
63
-
64
-
65
-
66
-
67
-
68
-
69
-
70
-
71
-
72
-
73
-
74
-
75
-
76
-
77
-
78
-
79
-
80
-
81
-
82
-
83
-
84
-
85
-
86
-
87
-
88
-
89
-
90
-
91
-
92
-
93
-
94
-
95
-
96
-
97
-
98
-
99
-
100
-
101
-
102
-
103
-
104
-
105
-
106
-
107
-
108
-
109
-
110
-
111
-
112
-
113
-
114
-
115
-
116
-
117
-
118
-
119
-
120
-
121
-
122
-
123
-
124
-
125
-
126
-
127
-
128
-
129
 |
 |
