Sony HDR-XR160 Handycam® Handbook - Page 86
Guide Frame, Display Setting, Light Bright HDR-CX360, CX360V/PJ30/PJ30V, Audio Level Display, Standard
 |
UPC - 027242820081
View all Sony HDR-XR160 manuals
Add to My Manuals
Save this manual to your list of manuals |
Page 86 highlights
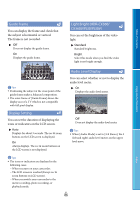
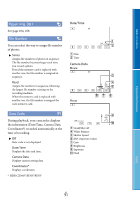
Table of Contents Guide Frame You can display the frame and check that the subject is horizontal or vertical. The frame is not recorded. Off Does not display the guide frame. On Displays the guide frame. Light Bright (HDR-CX360/ CX360V/PJ30/PJ30V) You can set the brightness of the video light. Standard Standard brightness. Bright Select this mode when you find the video light is not bright enough. Enjoy Useful Functions Tips Positioning the subject at the cross point of the guide frame makes a balanced composition. The outer frame of [Guide Frame] shows the display area of a TV which is not compatible with full pixel display. Display Setting You can set the duration of displaying the icons or indicators on the LCD screen. Auto Displays for about 3 seconds. The rec & zoom buttons on the LCD screen is displayed. On Always displays. The rec & zoom buttons on the LCD screen is not displayed. Audio Level Display You can select whether or not to display the audio level meter. On Displays the audio level meter. Off Does not display the audio level meter. Tips When [Audio Mode] is set to [2ch Stereo], the 2 (left and right) audio level meters on the upper level move. Tips The icons or indicators are displayed in the following cases. When you turn on your camcorder. The LCD screen is touched (Except rec & zoom buttons on LCD screen). When you switch your camcorder to the movie recording, photo recording, or playback mode. US 86 Index
-
 1
1 -
2
-
3
-
4
-
5
-
6
-
7
-
8
-
9
-
10
-
11
-
12
-
13
-
14
-
15
-
16
-
17
-
18
-
19
-
20
-
21
-
22
-
23
-
24
-
25
-
26
-
27
-
28
-
29
-
30
-
31
-
32
-
33
-
34
-
35
-
36
-
37
-
38
-
39
-
40
-
41
-
42
-
43
-
44
-
45
-
46
-
47
-
48
-
49
-
50
-
51
-
52
-
53
-
54
-
55
-
56
-
57
-
58
-
59
-
60
-
61
-
62
-
63
-
64
-
65
-
66
-
67
-
68
-
69
-
70
-
71
-
72
-
73
-
74
-
75
-
76
-
77
-
78
-
79
-
80
-
 81
81 -
 82
82 -
 83
83 -
 84
84 -
 85
85 -
 86
86 -
 87
87 -
 88
88 -
 89
89 -
 90
90 -
 91
91 -
92
-
93
-
94
-
95
-
96
-
97
-
98
-
99
-
100
-
101
-
102
-
103
-
104
-
105
-
106
-
107
-
108
-
109
-
110
-
111
-
112
-
113
-
114
-
115
-
116
-
117
-
118
-
119
-
120
-
121
-
122
-
123
-
124
-
125
-
126
-
127
-
128
-
129
 |
 |
