Sony MVC-CD500 Operating Instructions - Page 28
To reduce the red-eye, phenomenon when shooting, live subjects, m
 |
View all Sony MVC-CD500 manuals
Add to My Manuals
Save this manual to your list of manuals |
Page 28 highlights
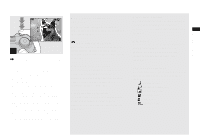
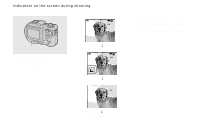
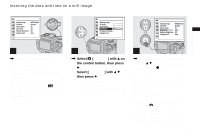
No indicator (Auto): The flash automatically pops up and strobes when the surroundings are dark. r (Forced flash): The flash strobes regardless of the surrounding brightness. r SL (Slow synchro): The flash strobes regardless of the surrounding brightness. The shutter speed is slow in a dark place, so you can clearly shoot the background that is out of flash light. r (No flash): The flash does not strobe. • If the menu is currently displayed, press MENU first so that the menu disappears. • You can also carry out this operation when the mode dial is set to P, S, A, M, SCN ( (Portrait mode)) or (Clip Motion). • The recommended shooting distance using the flash is approximately 0.5 m to 5.0 m (19 3/4 inches to 196 7/8 inches) (when [ISO] is set to [Auto]). • You can change the brightness of the flash with [Flash Level] in the menu settings (page 113). (You cannot change the brightness of the flash while the mode dial is set to .) • When using the SL (Slow synchro) or (No flash) mode, the shutter speed becomes slower in dark places, so using a tripod is recommended. • While charging the flash, the /CHG lamp flashes. After the charging is complete, the lamp goes out. • When you press the shutter button halfway down while the flash is strobing, the /CHG lamp turns on. • You can mount an external flash on this camera (page 67). • Attaching a conversion lens (not supplied) may block the light from the built-in flash or cause the lens shadow to appear. • This setting is maintained even when the power is turned off. To reduce the red-eye phenomenon when shooting live subjects Set [Red Eye Reduction] to [On] in the SET UP settings (page 116). indicator appears on the LCD screen, and the flash pre-strobes before shooting to reduce the red-eye phenomenon. m • Red-eye reduction may not produce the desired effects depending on individual differences, the distance to the subject, if the subject does not see the pre-strobe, or other conditions. 28
-
 1
1 -
2
-
3
-
4
-
5
-
6
-
7
-
8
-
9
-
10
-
11
-
12
-
13
-
14
-
15
-
16
-
17
-
18
-
19
-
20
-
21
-
22
-
 23
23 -
 24
24 -
 25
25 -
 26
26 -
 27
27 -
 28
28 -
 29
29 -
 30
30 -
 31
31 -
 32
32 -
 33
33 -
34
-
35
-
36
-
37
-
38
-
39
-
40
-
41
-
42
-
43
-
44
-
45
-
46
-
47
-
48
-
49
-
50
-
51
-
52
-
53
-
54
-
55
-
56
-
57
-
58
-
59
-
60
-
61
-
62
-
63
-
64
-
65
-
66
-
67
-
68
-
69
-
70
-
71
-
72
-
73
-
74
-
75
-
76
-
77
-
78
-
79
-
80
-
81
-
82
-
83
-
84
-
85
-
86
-
87
-
88
-
89
-
90
-
91
-
92
-
93
-
94
-
95
-
96
-
97
-
98
-
99
-
100
-
101
-
102
-
103
-
104
-
105
-
106
-
107
-
108
-
109
-
110
-
111
-
112
-
113
-
114
-
115
-
116
-
117
-
118
-
119
-
120
-
121
-
122
-
123
-
124
-
125
-
126
-
127
-
128
-
129
-
130
-
131
-
132
 |
 |