Sony MVC-CD500 Operating Instructions - Page 85
Viewing images using CD-ROM drive, Finalizing a disc, What is finalization?
 |
View all Sony MVC-CD500 manuals
Add to My Manuals
Save this manual to your list of manuals |
Page 85 highlights
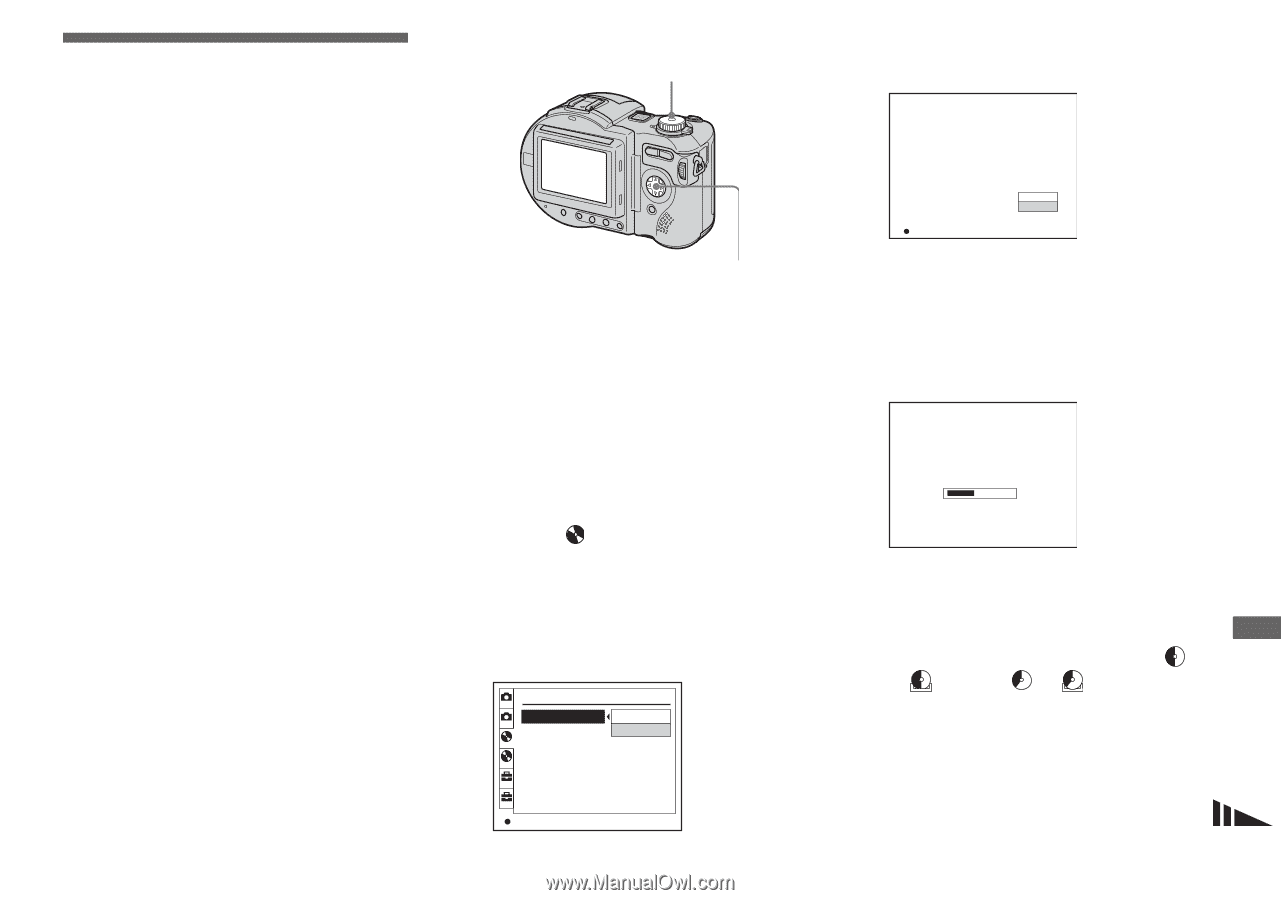
Viewing images using CD-ROM drive Mode dial Finalizing a disc You must execute finalization before viewing images recorded with your camera through a CD-ROM drive. Discs that have not been finalized cannot be read with a CD-ROM drive. What is finalization? • Finalization is required to view images recorded with your camera through a CDROM drive. • You can record new images on a finalized disc by initializing it again. Initialization is automatically performed when a disc is finalized using the camera. You must execute finalization to view new images through a CD-ROM drive. However, each time you execute finalization, the disc remaining space will decrease by approximately 13 MB. Therefore, we recommend that you execute finalization for multiple images at a time. • You can finalize a disc later, even if you remove it from the camera. • The CD-ROM drive must support MultiRead in order to read discs that have been finalized. Control button a Set the mode dial to SET UP, and turn on the power. The SET UP screen appears on the LCD screen. • During finalization, we recommend using the AC Adaptor to prevent the power from turning off partway. b Select (Disc Tool 1) with v/ 1 V on the control button, then press B. Select [Finalize] with v, then press B. Disc Tool 1 1 Finalize : 2 Format : 1 Initialize : Unfinalize : 2 1 2 OK OK Cancel c Select [OK] with v on the control button, then press z. Finalize Place on level surface Ready? O K Cancel OK "Finalize Place on level surface" appears on the LCD screen. d Select [OK] again with v on the control button, then press z. Finalize Avoid any vibration Finalize in progress When "Finalize in progress" disappears, finalization has been completed. Finalization starts and the disc remaining indicator changes from to , or from to . RW RW Finalization may take some time. Place the camera on a stable surface, and do not shake or strike the camera during finalization. 85 Enjoying images on your computer
-
 1
1 -
2
-
3
-
4
-
5
-
6
-
7
-
8
-
9
-
10
-
11
-
12
-
13
-
14
-
15
-
16
-
17
-
18
-
19
-
20
-
21
-
22
-
23
-
24
-
25
-
26
-
27
-
28
-
29
-
30
-
31
-
32
-
33
-
34
-
35
-
36
-
37
-
38
-
39
-
40
-
41
-
42
-
43
-
44
-
45
-
46
-
47
-
48
-
49
-
50
-
51
-
52
-
53
-
54
-
55
-
56
-
57
-
58
-
59
-
60
-
61
-
62
-
63
-
64
-
65
-
66
-
67
-
68
-
69
-
70
-
71
-
72
-
73
-
74
-
75
-
76
-
77
-
78
-
79
-
 80
80 -
 81
81 -
 82
82 -
 83
83 -
 84
84 -
 85
85 -
 86
86 -
 87
87 -
 88
88 -
 89
89 -
 90
90 -
91
-
92
-
93
-
94
-
95
-
96
-
97
-
98
-
99
-
100
-
101
-
102
-
103
-
104
-
105
-
106
-
107
-
108
-
109
-
110
-
111
-
112
-
113
-
114
-
115
-
116
-
117
-
118
-
119
-
120
-
121
-
122
-
123
-
124
-
125
-
126
-
127
-
128
-
129
-
130
-
131
-
132
 |
 |