Sony MVC-CD500 Operating Instructions - Page 87
Using the supplied 8cm CD adapter, disc will be held firmly - cd mavica
 |
View all Sony MVC-CD500 manuals
Add to My Manuals
Save this manual to your list of manuals |
Page 87 highlights
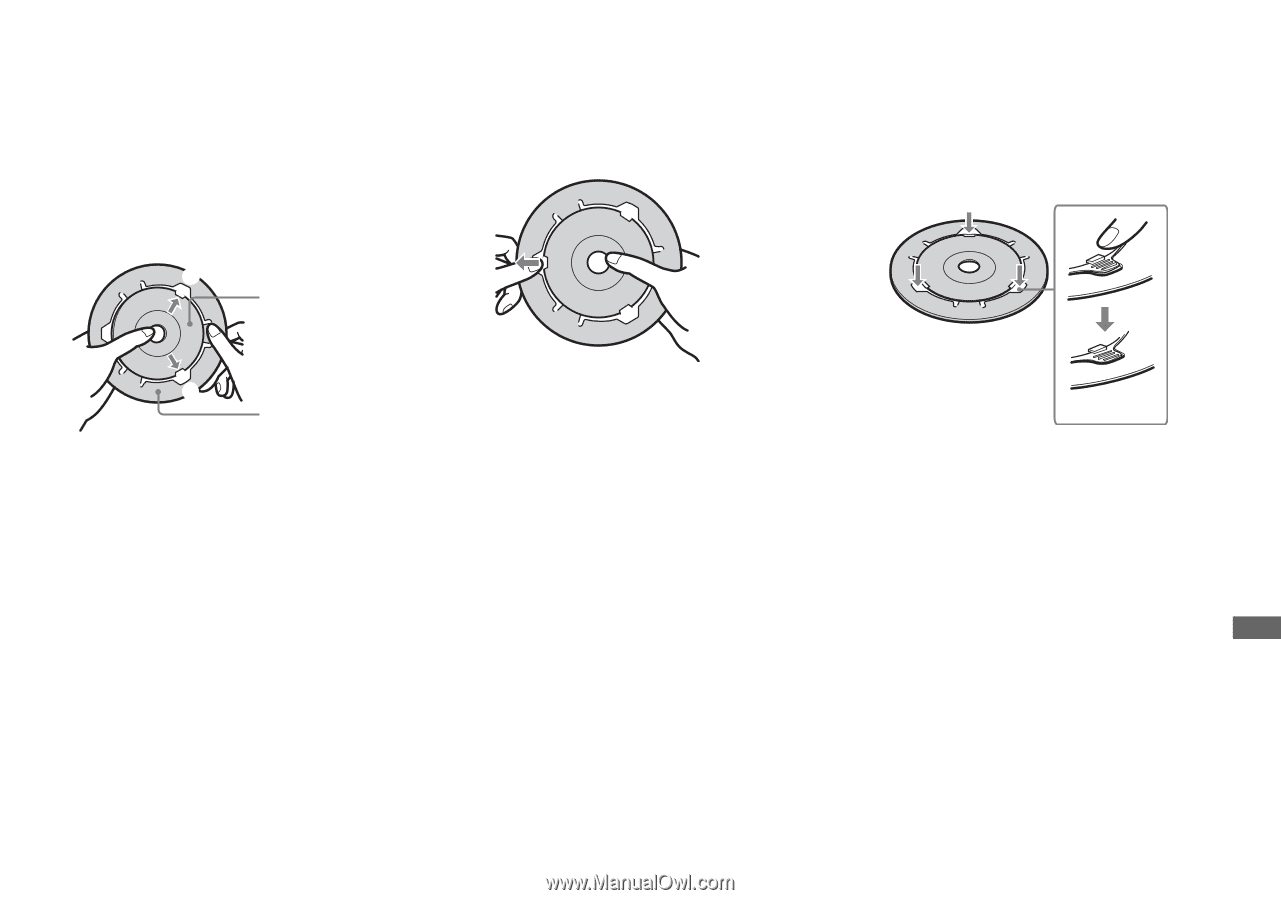
Enjoying images on your computer Using the supplied 8cm CD adapter a Slide the disc into the inner groove and under two of the tabs on the inner circle of the adaptor in the order shown by the numbers. 1 Printed side of the disc b Pull the third tab to the outside and slip the disc into place. Release the third tab and the disc will be held firmly in place. c Check that the disc is set correctly in the grooves of the adaptor, all the tabs are even with the surface of the adaptor, and the disc does not protrude from the adaptor. 2 Printed side of the adaptor If your CD-ROM drive does not support 8 cm CD, use the supplied 8 cm CD adaptor. • The supplied adaptor may not be compatible with your CD-ROM drive. For details, see the operating instructions for the CD-ROM drive. • The reverse side of the disc is the recordable surface. • "SONY" is printed on the reverse side of the adaptor and the surface is lustrous. • Do not expose the adaptor to direct sunlight or heat sources. • The adaptor can be used only with Mavica discs. It cannot be used with other 8 cm CD-R/ CD-RW. • If the tabs protrude, press them into place, as this may cause your CD-ROM drive to malfunction. 87
-
 1
1 -
2
-
3
-
4
-
5
-
6
-
7
-
8
-
9
-
10
-
11
-
12
-
13
-
14
-
15
-
16
-
17
-
18
-
19
-
20
-
21
-
22
-
23
-
24
-
25
-
26
-
27
-
28
-
29
-
30
-
31
-
32
-
33
-
34
-
35
-
36
-
37
-
38
-
39
-
40
-
41
-
42
-
43
-
44
-
45
-
46
-
47
-
48
-
49
-
50
-
51
-
52
-
53
-
54
-
55
-
56
-
57
-
58
-
59
-
60
-
61
-
62
-
63
-
64
-
65
-
66
-
67
-
68
-
69
-
70
-
71
-
72
-
73
-
74
-
75
-
76
-
77
-
78
-
79
-
80
-
81
-
 82
82 -
 83
83 -
 84
84 -
 85
85 -
 86
86 -
 87
87 -
 88
88 -
 89
89 -
 90
90 -
 91
91 -
 92
92 -
93
-
94
-
95
-
96
-
97
-
98
-
99
-
100
-
101
-
102
-
103
-
104
-
105
-
106
-
107
-
108
-
109
-
110
-
111
-
112
-
113
-
114
-
115
-
116
-
117
-
118
-
119
-
120
-
121
-
122
-
123
-
124
-
125
-
126
-
127
-
128
-
129
-
130
-
131
-
132
 |
 |