Sony MVCCD300 Operating Instructions - Page 38
Installing the USB driver, E.g., for Windows Me users, Do not connect the camera to the computer yet.
 |
UPC - 027242589223
View all Sony MVCCD300 manuals
Add to My Manuals
Save this manual to your list of manuals |
Page 38 highlights
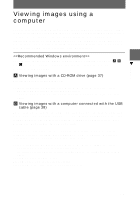
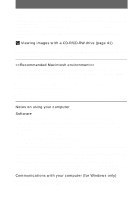
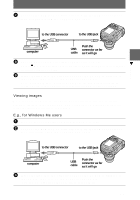
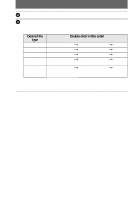
B Viewing images with a computer connected with the USB cable Once you install DirectCD included in the supplied CD-ROM, you do not need to finalize the disc to view images on the disc. You can exchange data between the camera and a computer using the supplied USB cable and CD-ROMs. Installing the USB driver Do not connect the camera to the computer yet. Before connecting your camera to your computer, install the USB driver to the computer. The USB driver is contained in the supplied CD-ROM (SPVD-006). If the drive is not recognized, see "Troubleshooting" on page 93. E.g., for Windows Me users 1 Turn on your computer and allow Windows to load. Do not connect the USB cable in this step. 2 Insert the supplied CD-ROM (SPVD-006) in the CD-ROM drive of your computer If the setup screen of DirectCD appears, click [Finish] on the screen. 3 Open [ My Computer] on Windows and right-click the CD-ROM drive (Example: CD-ROM (D:)), then select [Open (O)]. The file list of the CD-ROM appears. If other application software works, quit the application software. 4 Double-click the [SONY USB] folder in the file list, and then double- click [ SET UP]. The installer of device driver starts and the necessary files are automatically copied to the computer. 5 Restart the computer. If the message appears after the installation to verify that you restart the computer, restart the computer. In other cases, restart it manually. 6 Prepare the camera before connecting the computer. • Connect the AC power adaptor to the camera. • Turn on the camera. 38
-
 1
1 -
2
-
3
-
4
-
5
-
6
-
7
-
8
-
9
-
10
-
11
-
12
-
13
-
14
-
15
-
16
-
17
-
18
-
19
-
20
-
21
-
22
-
23
-
24
-
25
-
26
-
27
-
28
-
29
-
30
-
31
-
32
-
 33
33 -
 34
34 -
 35
35 -
 36
36 -
 37
37 -
 38
38 -
 39
39 -
 40
40 -
 41
41 -
 42
42 -
 43
43 -
44
-
45
-
46
-
47
-
48
-
49
-
50
-
51
-
52
-
53
-
54
-
55
-
56
-
57
-
58
-
59
-
60
-
61
-
62
-
63
-
64
-
65
-
66
-
67
-
68
-
69
-
70
-
71
-
72
-
73
-
74
-
75
-
76
-
77
-
78
-
79
-
80
-
81
-
82
-
83
-
84
-
85
-
86
-
87
-
88
-
89
-
90
-
91
-
92
-
93
-
94
-
95
-
96
-
97
-
98
-
99
-
100
-
101
-
102
-
103
-
104
-
105
-
106
-
107
-
108
 |
 |