Sony MVCCD300 Operating Instructions - Page 64
Creating Clip Motion Files
 |
UPC - 027242589223
View all Sony MVCCD300 manuals
Add to My Manuals
Save this manual to your list of manuals |
Page 64 highlights
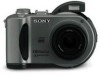
To return to normal recording mode Select [NORMAL] with v/V in step 6. Notes • You cannot use the flash in this mode. • During recording, the image is not displayed on the LCD screen. Make the composition before pressing the shutter button. • Focus and white balance are adjusted against the first image and this setting is also used for the other images. • When the exposure is manually adjusted, the adjusted value is used for the center value. • The recording interval is approximate 0.6 second. Creating Clip Motion Files Mode dial: Clip Motion is an animation function that plays back still images in succession. The images are stored in GIF format, which is convenient for creating home pages or attaching images to an e-mail. 6, 7 1, 3 2, 5, 8 4 1 Set the mode dial to SET UP. The setup screen appears. 2 Select [ ] (CAMERA) with v/V, [MOVING IMAGE] with B/ v/V, [CLIP MOTION] with v/V, then press z. 3 Set the mode dial to . 4 Press MENU. The menu appears. 5 Select the desired mode from [ ] (IMAGE SIZE) with v/V. NORMAL (160×120) Clip Motion of up to 10 frames can be recorded. This is suitable for use on home pages, etc. MOBILE (80×72) Clip Motion of up to 2 frames can be recorded. This is suitable for use with portable data terminals. 64
-
 1
1 -
2
-
3
-
4
-
5
-
6
-
7
-
8
-
9
-
10
-
11
-
12
-
13
-
14
-
15
-
16
-
17
-
18
-
19
-
20
-
21
-
22
-
23
-
24
-
25
-
26
-
27
-
28
-
29
-
30
-
31
-
32
-
33
-
34
-
35
-
36
-
37
-
38
-
39
-
40
-
41
-
42
-
43
-
44
-
45
-
46
-
47
-
48
-
49
-
50
-
51
-
52
-
53
-
54
-
55
-
56
-
57
-
58
-
 59
59 -
 60
60 -
 61
61 -
 62
62 -
 63
63 -
 64
64 -
 65
65 -
 66
66 -
 67
67 -
 68
68 -
 69
69 -
70
-
71
-
72
-
73
-
74
-
75
-
76
-
77
-
78
-
79
-
80
-
81
-
82
-
83
-
84
-
85
-
86
-
87
-
88
-
89
-
90
-
91
-
92
-
93
-
94
-
95
-
96
-
97
-
98
-
99
-
100
-
101
-
102
-
103
-
104
-
105
-
106
-
107
-
108
 |
 |
