Sony MVCCD300 Operating Instructions - Page 39
Viewing images, E.g., for Windows Me users - usb driver
 |
UPC - 027242589223
View all Sony MVCCD300 manuals
Add to My Manuals
Save this manual to your list of manuals |
Page 39 highlights
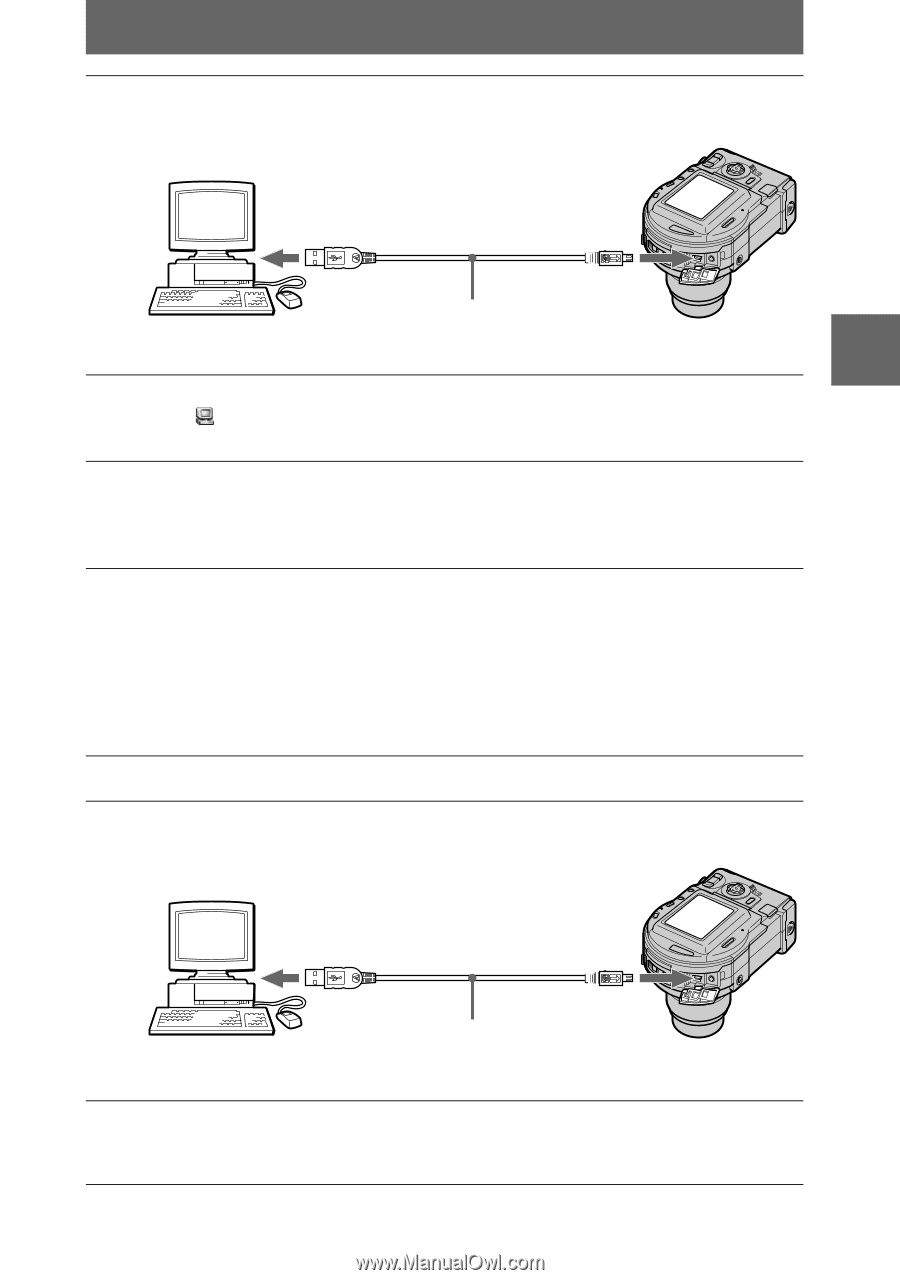
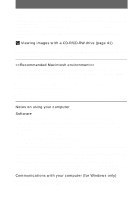
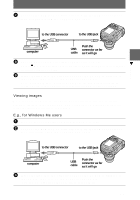
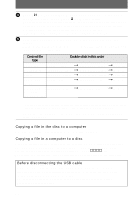
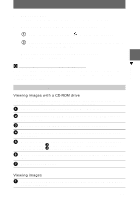
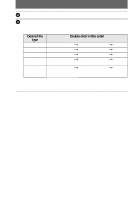
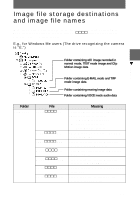
7 Connect the USB jack on your camera with the USB connector on your computer using the supplied USB cable. B Playback to the USB connector to the USB jack computer Push the USB connector as far cable as it will go 8 The computer automatically recognizes the camera. Open [ My Computer], the newly recognized drive (Example: (E:)) is added. Installing driver is complete. 9 Insert the disc into the camera, connect the AC power adaptor to the camera, then turn on the power of the camera. Go to "Viewing images" below. If you remove the disc without viewing an image, be sure to read "Before disconnecting the USB cable" on page 40. Viewing images When you view images on the disc which was not finalized, you have to install DirectCD included in the supplied CD-ROM. For details on DirectCD, refer to the software operating instructions of DirectCD. E.g., for Windows Me users 1 Turn on your computer and allow Windows to load. 2 Connect the USB jack on your camera with the USB connector on your computer using the supplied USB cable. to the USB connector to the USB jack computer USB cable Push the connector as far as it will go 3 Insert the disc into the camera, connect the AC power adaptor to the camera, then turn on the power of the camera. "USB MODE" appears on the LCD screen of the camera. 39
-
 1
1 -
2
-
3
-
4
-
5
-
6
-
7
-
8
-
9
-
10
-
11
-
12
-
13
-
14
-
15
-
16
-
17
-
18
-
19
-
20
-
21
-
22
-
23
-
24
-
25
-
26
-
27
-
28
-
29
-
30
-
31
-
32
-
33
-
 34
34 -
 35
35 -
 36
36 -
 37
37 -
 38
38 -
 39
39 -
 40
40 -
 41
41 -
 42
42 -
 43
43 -
 44
44 -
45
-
46
-
47
-
48
-
49
-
50
-
51
-
52
-
53
-
54
-
55
-
56
-
57
-
58
-
59
-
60
-
61
-
62
-
63
-
64
-
65
-
66
-
67
-
68
-
69
-
70
-
71
-
72
-
73
-
74
-
75
-
76
-
77
-
78
-
79
-
80
-
81
-
82
-
83
-
84
-
85
-
86
-
87
-
88
-
89
-
90
-
91
-
92
-
93
-
94
-
95
-
96
-
97
-
98
-
99
-
100
-
101
-
102
-
103
-
104
-
105
-
106
-
107
-
108
 |
 |