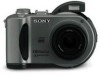
Sony MVCCD300 Operating Instructions - Page 93
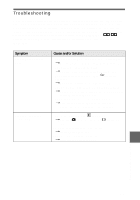
Troubleshooting, Symptom, Cause and/or Solution
 |
UPC - 027242589223
View all Sony MVCCD300 manuals
Add to My Manuals
Save this manual to your list of manuals |
Page 93 highlights
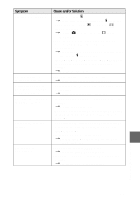
Troubleshooting If you experience trouble with your camera, first check the following items. Should your camera still not operate properly after you have made these checks, press the reset button located on the bottom. (If you press the reset button, the date and time setting is cleared.) Should your camera still not operate properly, consult your Sony dealer or local authorized Sony service facility. If code displays (C:ss:ss) appear on the LCD screen, the self-diagnosis display function is working (page 102). Symptom Your camera does not work. Your camera cannot record images. Cause and/or Solution • You are not using an "InfoLITHIUM" battery pack. tUse an "InfoLITHIUM" battery pack (page 9). • The disc is not inserted properly. tEject the disc, and insert it again (page 16). • The battery level is too low. (The E indicator appears.) tCharge the battery pack fully (page 10). • The AC power adaptor is not connected securely. tConnect it securely to the DC IN jack and a wall outlet (mains) (page 10, 13). • The malfunction occurs inside the camera. tTurn off the power, and turn on after one minute, then check that the camera works properly. • The mode dial is set to or SET UP. tSet it to , S, A, M, SCN, or (pages 20, 26). • No disc is inserted into your camera. tInsert a disc (page 16). • The disc has not been initialized. tInitialize the disc (page 18). Additional information 93
-
 1
1 -
2
-
3
-
4
-
5
-
6
-
7
-
8
-
9
-
10
-
11
-
12
-
13
-
14
-
15
-
16
-
17
-
18
-
19
-
20
-
21
-
22
-
23
-
24
-
25
-
26
-
27
-
28
-
29
-
30
-
31
-
32
-
33
-
34
-
35
-
36
-
37
-
38
-
39
-
40
-
41
-
42
-
43
-
44
-
45
-
46
-
47
-
48
-
49
-
50
-
51
-
52
-
53
-
54
-
55
-
56
-
57
-
58
-
59
-
60
-
61
-
62
-
63
-
64
-
65
-
66
-
67
-
68
-
69
-
70
-
71
-
72
-
73
-
74
-
75
-
76
-
77
-
78
-
79
-
80
-
81
-
82
-
83
-
84
-
85
-
86
-
87
-
 88
88 -
 89
89 -
 90
90 -
 91
91 -
 92
92 -
 93
93 -
 94
94 -
 95
95 -
 96
96 -
 97
97 -
 98
98 -
99
-
100
-
101
-
102
-
103
-
104
-
105
-
106
-
107
-
108
 |
 |
