Sony SA-NS500 Operating Instructions - Page 18
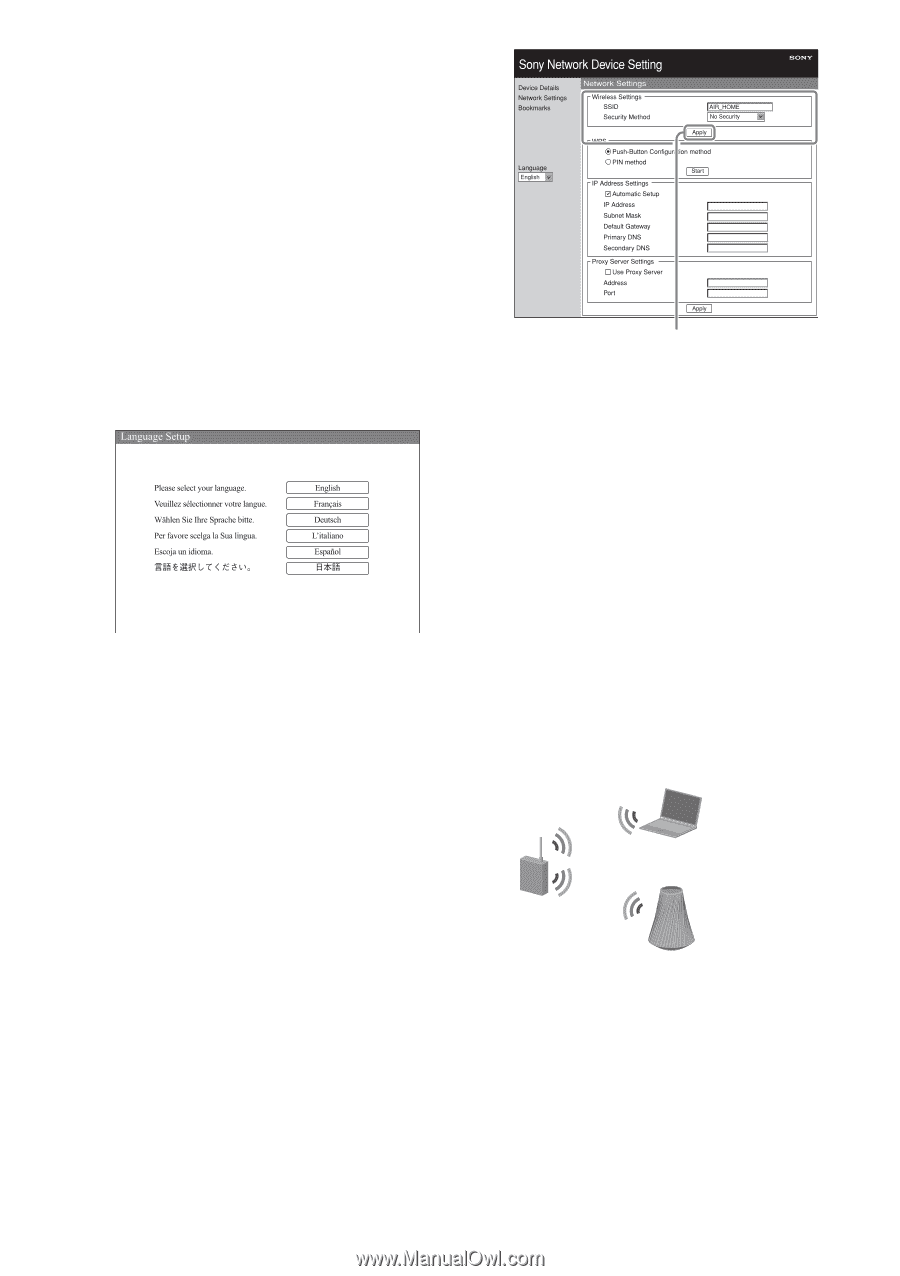
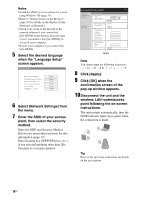
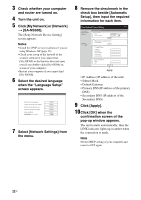
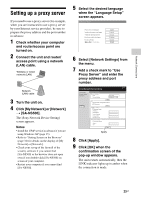
Select [Network Settings] from, Click [Apply].
 |
View all Sony SA-NS500 manuals
Add to My Manuals
Save this manual to your list of manuals |
Page 18 highlights
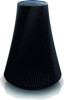
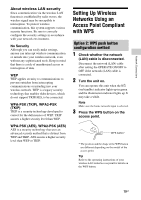
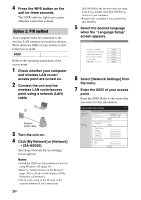
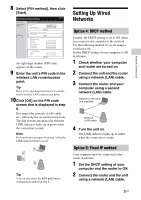
Notes • Install the UPnP service in advance if you are using Windows XP (page 35). • Refer to "Setting Screen on the Browser" (page 34) for details on the display of [My Network] or [Network]. • Check your set-up of the firewall of the security software if you cannot find [SA-NS500] or the browser does not open even if you double-click [SA-NS500] on screen of your computer. • Restart your computer if you cannot find [SA-NS500]. 5 Select the desired language when the "Language Setup" screen appears. 6 Select [Network Settings] from the menu. 7 Enter the SSID of your access point, then select the security method. Enter the SSID and Security Method. Refer to the memo that you wrote for this information (page 17). Enter Security key (WEP/WPA key, etc.) if you selected anything other than [No Security] as a security method. Apply Note You cannot input the following characters 8 Click [Apply]. 9 Click [OK] when the confirmation screen of the pop-up window appears. 10Disconnect the unit and the wireless LAN router/access point following the on-screen instructions. The unit restarts automatically, then the LINK indicator lights up in green when the connection is made. Tip Refer to the operating instructions for details on the access point. 18GB
-
 1
1 -
2
-
3
-
4
-
5
-
6
-
7
-
8
-
9
-
10
-
11
-
12
-
 13
13 -
 14
14 -
 15
15 -
 16
16 -
 17
17 -
 18
18 -
 19
19 -
 20
20 -
 21
21 -
 22
22 -
 23
23 -
24
-
25
-
26
-
27
-
28
-
29
-
30
-
31
-
32
-
33
-
34
-
35
-
36
-
37
-
38
-
39
-
40
-
41
-
42
-
43
-
44
-
45
-
46
-
47
-
48
-
49
-
50
-
51
-
52
 |
 |