Sony SA-NS500 Operating Instructions - Page 22
Click [My Network] or [Network
 |
View all Sony SA-NS500 manuals
Add to My Manuals
Save this manual to your list of manuals |
Page 22 highlights
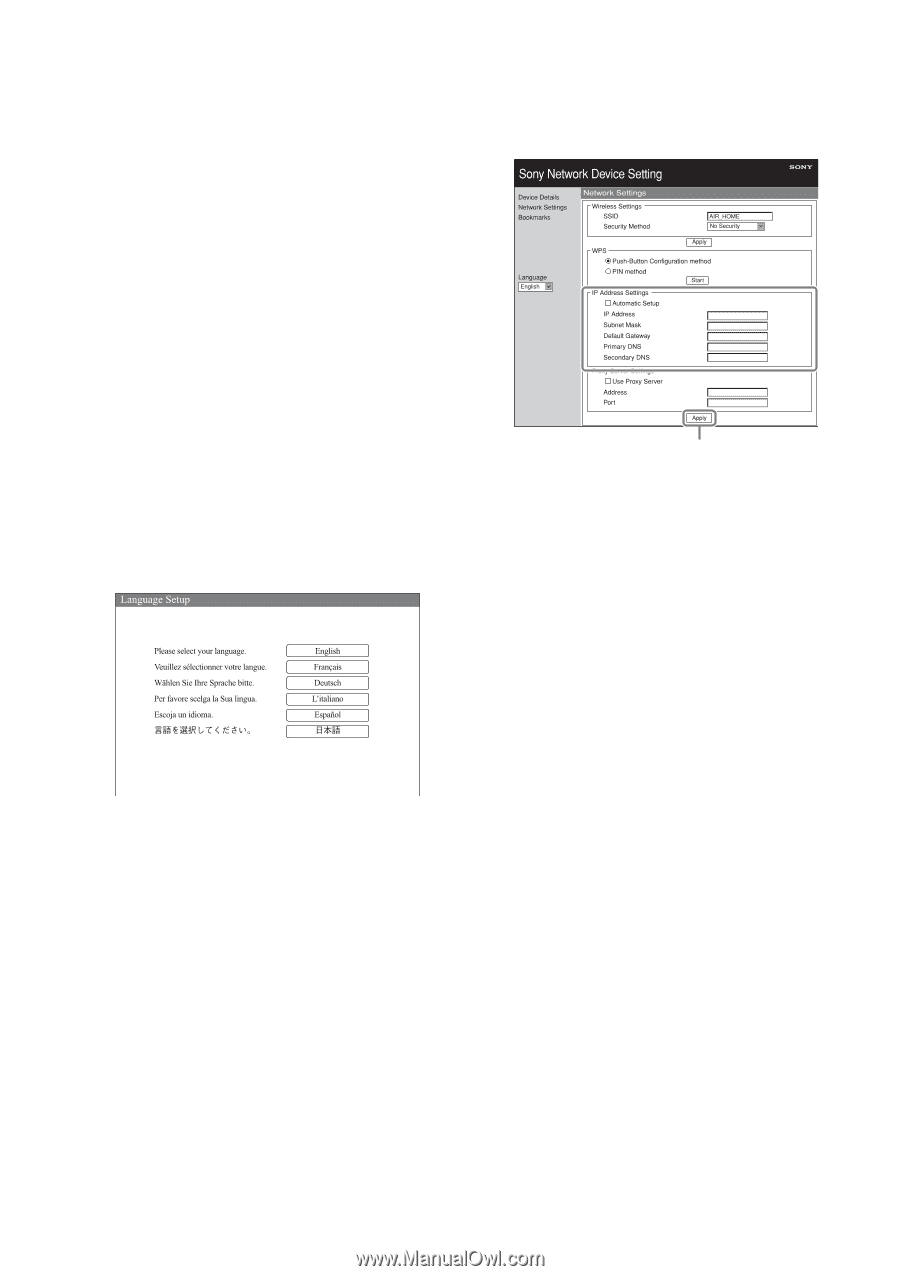
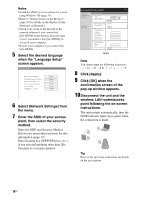
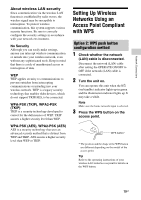
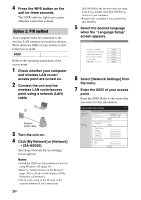
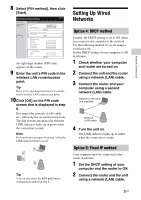
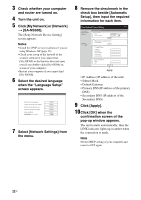
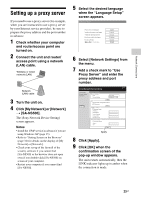
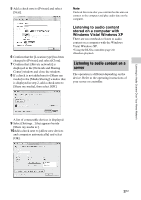
3 Check whether your computer and router are turned on. 4 Turn the unit on. 5 Click [My Network] or [Network] t [SA-NS500]. The [Sony Network Device Setting] screen appears. Notes • Install the UPnP service in advance if you are using Windows XP (page 35). • Check your set-up of the firewall of the security software if you cannot find [SA-NS500] or the browser does not open even if you double-click [SA-NS500] on screen of your computer. • Restart your computer if you cannot find [SA-NS500]. 6 Select the desired language when the "Language Setup" screen appears. 7 Select [Network Settings] from the menu. 8 Remove the checkmark in the check box beside [Automatic Setup], then input the required information for each item. Apply • IP Address (IP address of the unit) • Subnet Mask • Default Gateway • Primary DNS (IP address of the primary DNS) • Secondary DNS (IP address of the Secondary DNS) 9 Click [Apply]. 10Click [OK] when the confirmation screen of the pop-up window appears. The unit restarts automatically, then the LINK indicator lights up in amber when the connection is made. Note Set the DHCP setting of your computer and router to OFF again. 22GB
-
 1
1 -
2
-
3
-
4
-
5
-
6
-
7
-
8
-
9
-
10
-
11
-
12
-
13
-
14
-
15
-
16
-
 17
17 -
 18
18 -
 19
19 -
 20
20 -
 21
21 -
 22
22 -
 23
23 -
 24
24 -
 25
25 -
 26
26 -
 27
27 -
28
-
29
-
30
-
31
-
32
-
33
-
34
-
35
-
36
-
37
-
38
-
39
-
40
-
41
-
42
-
43
-
44
-
45
-
46
-
47
-
48
-
49
-
50
-
51
-
52
 |
 |