Sony SA-NS500 Operating Instructions - Page 21
Setting Up Wired Networks, Option 4: DHCP method
 |
View all Sony SA-NS500 manuals
Add to My Manuals
Save this manual to your list of manuals |
Page 21 highlights
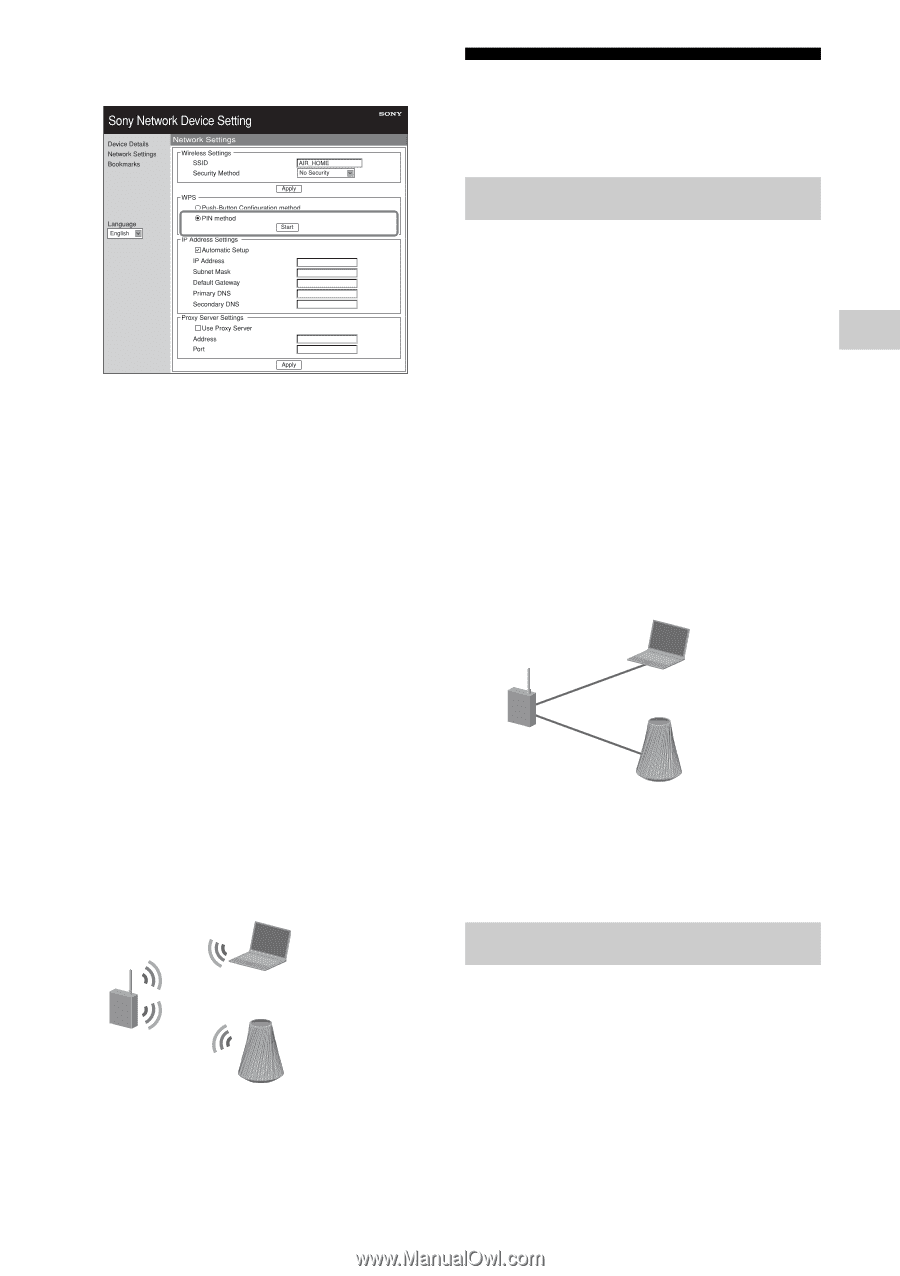
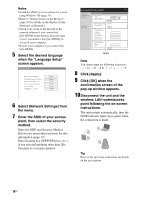
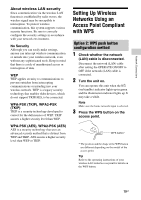
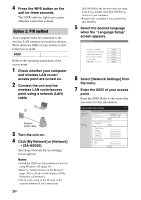
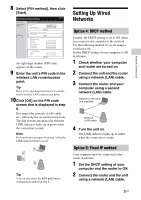
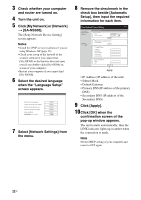
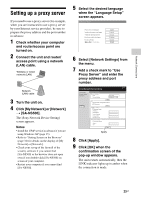
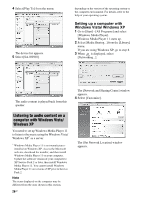
8 Select [PIN method], then click [Start]. Setting Up Wired Networks Network Connections An eight-digit number (PIN code) appears on the screen. 9 Enter the unit's PIN code in the wireless LAN router/access point. Tip Refer to the operating instructions for details on the wireless LAN router/access point. 10Click [OK] on the PIN code screen that is displayed in step 8. Disconnect the network (LAN) cable, etc., following the on-screen instructions. The unit restarts automatically, then the LINK indicator lights up in green when the connection is made. Note Perform the process again from step 1 when the LINK indicator flashes in red. Tip You can also select the WPS push button configuration method in step 8. Option 4: DHCP method Usually, the DHCP setting is set to ON when you connect your computer to the network. Try the following method if you are using a wired network. Set the DHCP setting of your computer to ON in advance. 1 Check whether your computer and router are turned on. 2 Connect the unit and the router using a network (LAN) cable. 3 Connect the router and your computer using a second network (LAN) cable. Network (LAN) cable (not supplied) Network (LAN) cable 4 Turn the unit on. The LINK indicator lights up in amber when the connection is made. Option 5: Fixed IP method Your computer must be connected to the router in advance. 1 Set the DHCP setting of your computer and the router to ON. 2 Connect the router and the unit using a network (LAN) cable. 21GB
-
 1
1 -
2
-
3
-
4
-
5
-
6
-
7
-
8
-
9
-
10
-
11
-
12
-
13
-
14
-
15
-
 16
16 -
 17
17 -
 18
18 -
 19
19 -
 20
20 -
 21
21 -
 22
22 -
 23
23 -
 24
24 -
 25
25 -
 26
26 -
27
-
28
-
29
-
30
-
31
-
32
-
33
-
34
-
35
-
36
-
37
-
38
-
39
-
40
-
41
-
42
-
43
-
44
-
45
-
46
-
47
-
48
-
49
-
50
-
51
-
52
 |
 |