Sony STR-DH710 Operating Instructions - Page 36
To cancel Auto Calibration, Confirming/saving the, measurement results - no sound from subwoofer
 |
UPC - 027242779976
View all Sony STR-DH710 manuals
Add to My Manuals
Save this manual to your list of manuals |
Page 36 highlights
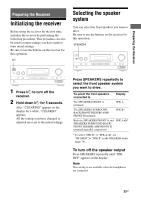
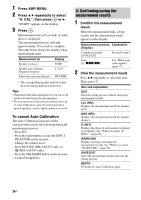
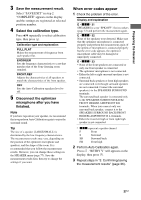
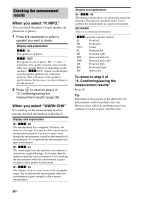
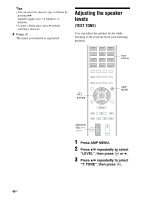
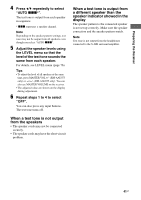
1 Press AMP MENU. 2 Press V/v repeatedly to select "A. CAL", then press or b. "START" appears on the display. 3 Press . Measurement starts in 5 seconds. A count down is displayed. The measurement process will take approximately 30 seconds to complete. The table below shows the display when measurement starts. Measurement for Speaker existence Speaker gain, distance, frequency response Subwoofer gain and distance Display TONE T. S. P.* WOOFER* * The corresponding speaker indicator lights up in the display during measurement. Tips • Operations other than turning the receiver on or off are deactivated during the measurement. • The measurements may not be performed correctly or Auto Calibration cannot be performed when special speakers, such as dipole speakers are used. To cancel Auto Calibration The Auto Calibration function will be canceled when you do the following during the measurement process: - Press ?/1. - Press the input buttons or turn the INPUT SELECTOR on the receiver. - Change the volume level. - Press MUTING (RM-AAU073 only) or (RM-AAU075 only). - Press the SPEAKERS button on the receiver. - Connect headphones. 3: Confirming/saving the measurement results 1 Confirm the measurement result. When the measurement ends, a beep sounds and the measurement result appears on the display. Measurement process Explanation [Display] Completes properly [SAVE.EXIT] Proceed to step 2. Fails [E - xxx xx] See "When error codes appear" (page 37). 2 View the measurement result. Press V/v repeatedly to select the item. Then, press . Item and explanation EXIT Exits the setting process without saving the measurement results. LVL INFO. Displays the measurement result for speaker level. DIST.INFO. Displays the measurement result for speaker distance. P. INFO. Displays the phase of each speaker (in phase/ out of phase). See "When you select "P. INFO."" (page 38). WARN CHK Displays warning concerning the measurement results. See "When you select "WARN CHK"" (page 38). SAVE.EXIT Saves the measurement results and exits the setting process. RETRY Performs the Auto Calibration again. 36GB
-
 1
1 -
2
-
3
-
4
-
5
-
6
-
7
-
8
-
9
-
10
-
11
-
12
-
13
-
14
-
15
-
16
-
17
-
18
-
19
-
20
-
21
-
22
-
23
-
24
-
25
-
26
-
27
-
28
-
29
-
30
-
 31
31 -
 32
32 -
 33
33 -
 34
34 -
 35
35 -
 36
36 -
 37
37 -
 38
38 -
 39
39 -
 40
40 -
 41
41 -
42
-
43
-
44
-
45
-
46
-
47
-
48
-
49
-
50
-
51
-
52
-
53
-
54
-
55
-
56
-
57
-
58
-
59
-
60
-
61
-
62
-
63
-
64
-
65
-
66
-
67
-
68
-
69
-
70
-
71
-
72
-
73
-
74
-
75
-
76
-
77
-
78
-
79
-
80
-
81
-
82
-
83
-
84
-
85
-
86
-
87
-
88
-
89
-
90
-
91
-
92
-
93
-
94
-
95
-
96
-
97
-
98
-
99
-
100
 |
 |