Sony STR-DH710 Operating Instructions - Page 39
AUTO CAL menu, To register more than one set of, settings for the listening, environment - amplifier
 |
UPC - 027242779976
View all Sony STR-DH710 manuals
Add to My Manuals
Save this manual to your list of manuals |
Page 39 highlights
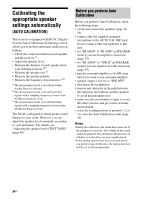
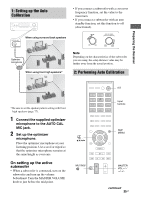
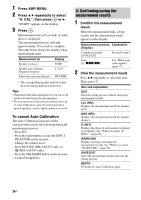
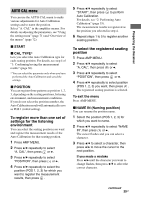
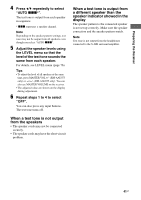
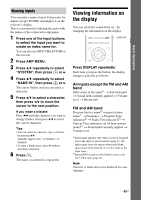
Preparing the Receiver AUTO CAL menu You can use the AUTO CAL menu to make various adjustments for Auto Calibration settings and to name the position. Select "A. CAL" in the amplifier menus. For details on adjusting the parameters, see "Using the setting menu" (page 71) and "Overview of the menus" (page 72). x START x CAL TYPE* Lets you select the Auto Calibration type for each seating position. For details, see step 4 of "3: Confirming/saving the measurement results" (page 36). * You can select this parameter only when you have performed the Auto Calibration and saved the settings. x POSITION You can register three patterns as position 1, 2, 3, depending on the seating positions, listening environment, and measurement conditions. If you do not select the position number, the Auto Calibration result will automatically save as POS 1 (initial setting). To register more than one set of settings for the listening environment You can select the seating position you want and register the measurement results of the Auto Calibration for that seating position. 1 Press AMP MENU. 2 Press V/v repeatedly to select "A. CAL", then press or b. 3 Press V/v repeatedly to select "POSITION", then press or b. 4 Press V/v repeatedly to select the position (POS 1, 2, 3) for which you want to register the measurement results, then press . 5 Press V/v repeatedly to select "START", then press to perform Auto Calibration. For details, see "2: Performing Auto Calibration" (page 35). The measurement results is registered as the position you selected in step 4. 6 Repeat steps 1 to 5 to register another seating position. To select the registered seating position 1 Press AMP MENU. 2 Press V/v repeatedly to select "A. CAL", then press or b. 3 Press V/v repeatedly to select "POSITION", then press or b. 4 Press V/v repeatedly to select position (POS 1, 2, 3) you want, then press . The registered seating position is selected. To exit the menu Press AMP MENU. x NAME IN (Naming position) You can rename the position name. 1 Select the position (POS 1, 2, 3) for which you want to name. 2 Press V/v repeatedly to select "NAME IN", then press or b. The cursor flashes and you can select a character. 3 Press V/v to select a character, then press B/b to move the cursor to the next position. If you made a mistake Press B/b until the character you want to change flashes, then press V/v to select the correct character. continued 39GB
-
 1
1 -
2
-
3
-
4
-
5
-
6
-
7
-
8
-
9
-
10
-
11
-
12
-
13
-
14
-
15
-
16
-
17
-
18
-
19
-
20
-
21
-
22
-
23
-
24
-
25
-
26
-
27
-
28
-
29
-
30
-
31
-
32
-
33
-
 34
34 -
 35
35 -
 36
36 -
 37
37 -
 38
38 -
 39
39 -
 40
40 -
 41
41 -
 42
42 -
 43
43 -
 44
44 -
45
-
46
-
47
-
48
-
49
-
50
-
51
-
52
-
53
-
54
-
55
-
56
-
57
-
58
-
59
-
60
-
61
-
62
-
63
-
64
-
65
-
66
-
67
-
68
-
69
-
70
-
71
-
72
-
73
-
74
-
75
-
76
-
77
-
78
-
79
-
80
-
81
-
82
-
83
-
84
-
85
-
86
-
87
-
88
-
89
-
90
-
91
-
92
-
93
-
94
-
95
-
96
-
97
-
98
-
99
-
100
 |
 |