Sony XAVW1 Operating Instructions - Page 47
Setting the security code, Setting the clock, Activating the security function
 |
UPC - 027242706484
View all Sony XAVW1 manuals
Add to My Manuals
Save this manual to your list of manuals |
Page 47 highlights
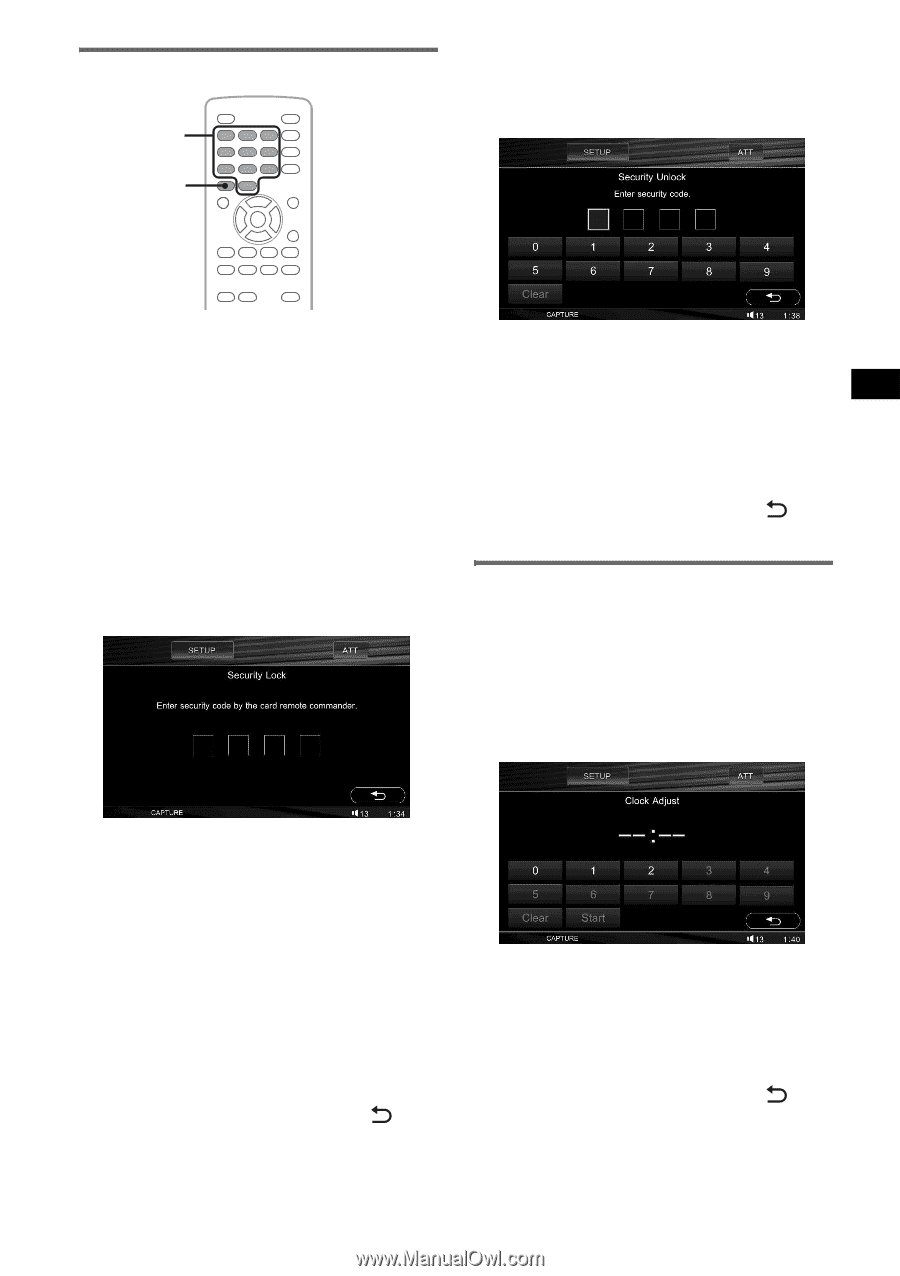
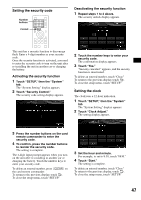
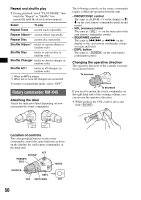
Setting the security code Number buttons CLEAR Deactivating the security function 1 Repeat steps 1 to 2 above. The security unlock display appears. This unit has a security function to discourage theft. Enter a 4-digit number as your security code. Once the security function is activated, you need to enter the security code to turn on the unit after re-installing the unit in another car or charging the battery. Activating the security function 1 Touch "SETUP," then the "System" tab. The "System Setting" display appears. 2 Touch "Security Control." The security code setting display appears. 2 Touch the number keys to enter your security code. The confirmation display appears. 3 Touch "Yes." "Security canceled." appears, and the security function is deactivated. To delete an entered number, touch "Clear." To return to the previous display, touch . To close the setup menu, touch "SETUP." Setting the clock The clock uses a 12-hour indication. 1 Touch "SETUP," then the "System" tab. The "System Setting" display appears. 2 Touch "Clock Adjust." The setting display appears. 3 Press the number buttons on the card remote commander to enter the security code. 4 To confirm, press the number buttons to reenter the security code. The setting is complete. The 4-digit input prompt appears when you turn on the unit after re-installing in another car or charging the battery. Touch the number keys to enter your security code. To delete an entered number, press (CLEAR) on the card remote commander. To return to the previous display, touch . To close the setup menu, touch "SETUP." 3 Set the hour and minute. For example, to set to 8:30, touch "0830." 4 Touch "Start." The setting is complete. To delete an entered number, touch "Clear." To return to the previous display, touch . To close the setup menu, touch "SETUP." 47
-
 1
1 -
2
-
3
-
4
-
5
-
6
-
7
-
8
-
9
-
10
-
11
-
12
-
13
-
14
-
15
-
16
-
17
-
18
-
19
-
20
-
21
-
22
-
23
-
24
-
25
-
26
-
27
-
28
-
29
-
30
-
31
-
32
-
33
-
34
-
35
-
36
-
37
-
38
-
39
-
40
-
41
-
 42
42 -
 43
43 -
 44
44 -
 45
45 -
 46
46 -
 47
47 -
 48
48 -
 49
49 -
 50
50 -
 51
51 -
 52
52 -
53
-
54
-
55
-
56
-
57
-
58
-
59
-
60
-
61
-
62
-
63
-
64
-
65
-
66
-
67
-
68
-
69
-
70
-
71
-
72
-
73
-
74
-
75
-
76
-
77
-
78
-
79
-
80
-
81
-
82
-
83
-
84
-
85
-
86
-
87
-
88
-
89
-
90
-
91
-
92
-
93
-
94
-
95
-
96
-
97
-
98
-
99
-
100
-
101
-
102
-
103
-
104
-
105
-
106
-
107
-
108
-
109
-
110
-
111
-
112
-
113
-
114
-
115
-
116
-
117
-
118
-
119
-
120
-
121
-
122
-
123
-
124
-
125
-
126
-
127
-
128
-
129
-
130
-
131
-
132
-
133
-
134
-
135
-
136
-
137
-
138
-
139
-
140
-
141
-
142
-
143
-
144
-
145
-
146
-
147
-
148
-
149
-
150
-
151
-
152
-
153
-
154
-
155
-
156
-
157
-
158
-
159
-
160
-
161
-
162
-
163
-
164
-
165
-
166
-
167
-
168
-
169
-
170
-
171
-
172
-
173
-
174
-
175
-
176
-
177
-
178
-
179
-
180
-
181
-
182
-
183
-
184
-
185
-
186
-
187
-
188
-
189
-
190
-
191
-
192
-
193
-
194
-
195
-
196
 |
 |