TP-Link Archer VR900v Archer VR900vDE V2 User Guide - Page 55
Access the USB Device Remotely, Smart, device
 |
View all TP-Link Archer VR900v manuals
Add to My Manuals
Save this manual to your list of manuals |
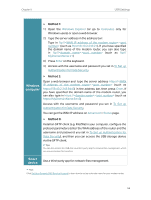
Page 55 highlights
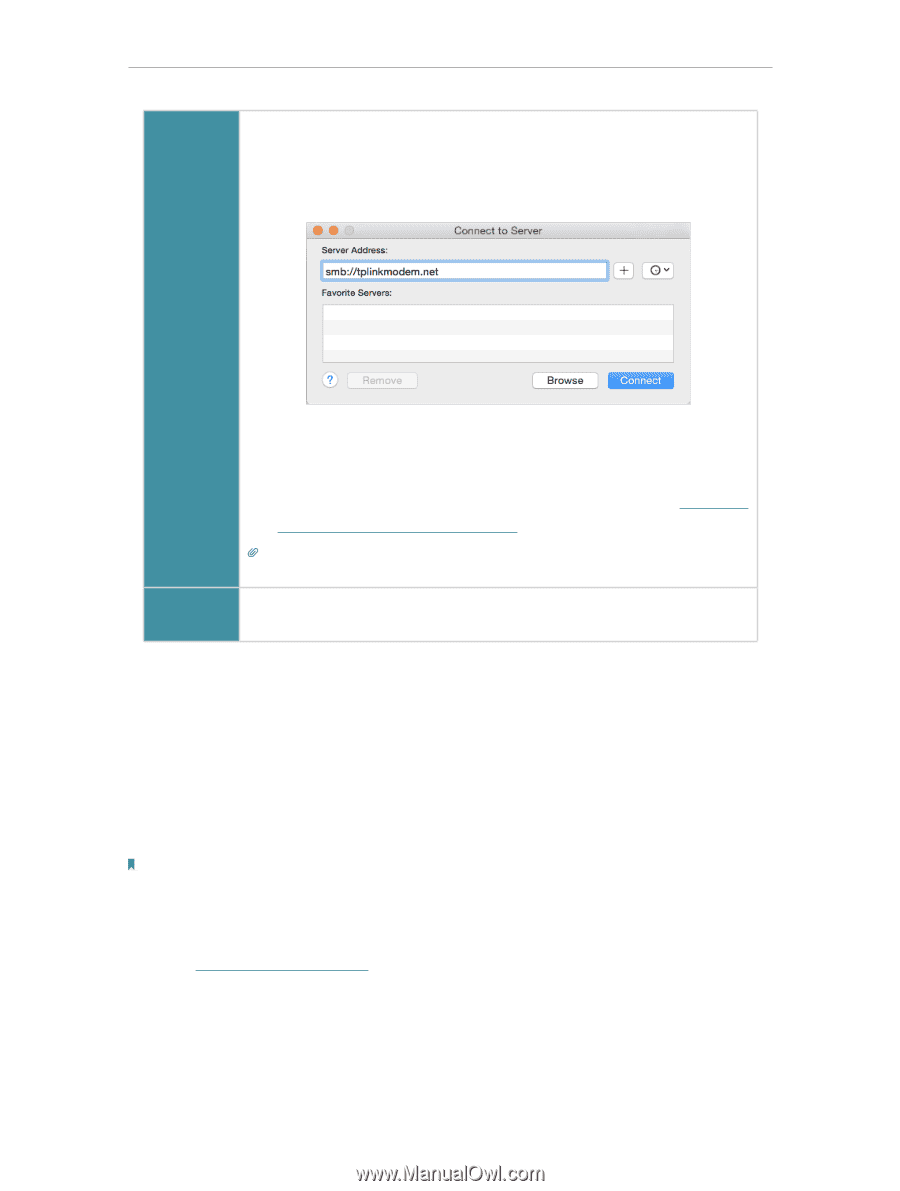
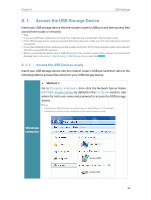
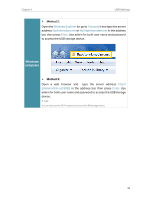
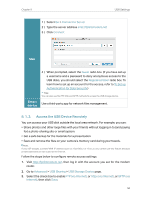
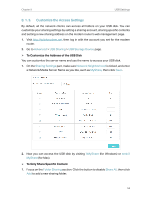
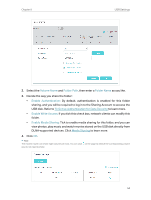
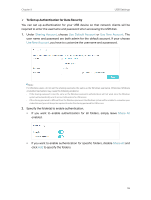
Chapter 8 USB Settings 1 ) Select Go > Connect to Server 2 ) Type the server address smb://tplinkmodem.net 3 ) Click Connect Mac Smart device 4 ) When prompted, select the Guest radio box. (If you have set up a username and a password to deny anonymous access to the USB disks, you should select the Registered User radio box. To learn how to set up an account for the access, refer to To Set up Authentication for Data Security.) Tips: You can also use the FTP, http and SFTP methods to access the USB storage device. Use a third-party app for network files management. 8. 1. 2. Access the USB Device Remotely You can access your USB disk outside the local area network. For example, you can: • Share photos and other large files with your friends without logging in to (and paying for) a photo-sharing site or email system. • Get a safe backup for the materials for a presentation. • Save and remove the files on your camera's memory card during your travels. Note: If your ISP assigns a private WAN IP address (such as 192.168.x.x or 10.x.x.x), you cannot use this feature because private addresses are not routed on the internet. Follow the steps below to configure remote access settings. 1. Visit http://tplinkmodem.net, then log in with the account you set for the modem router. 2. Go to Advanced > USB Sharing > USB Storage Device page. 3. Select the check box to enable FTP (via Internet), or https (via Internet), or SFTP (via Internet), then click Save. 50
-
 1
1 -
2
-
3
-
4
-
5
-
6
-
7
-
8
-
9
-
10
-
11
-
12
-
13
-
14
-
15
-
16
-
17
-
18
-
19
-
20
-
21
-
22
-
23
-
24
-
25
-
26
-
27
-
28
-
29
-
30
-
31
-
32
-
33
-
34
-
35
-
36
-
37
-
38
-
39
-
40
-
41
-
42
-
43
-
44
-
45
-
46
-
47
-
48
-
49
-
 50
50 -
 51
51 -
 52
52 -
 53
53 -
 54
54 -
 55
55 -
 56
56 -
 57
57 -
 58
58 -
 59
59 -
 60
60 -
61
-
62
-
63
-
64
-
65
-
66
-
67
-
68
-
69
-
70
-
71
-
72
-
73
-
74
-
75
-
76
-
77
-
78
-
79
-
80
-
81
-
82
-
83
-
84
-
85
-
86
-
87
-
88
-
89
-
90
-
91
-
92
-
93
-
94
-
95
-
96
-
97
-
98
-
99
-
100
-
101
-
102
-
103
-
104
-
105
-
106
-
107
-
108
-
109
-
110
-
111
-
112
-
113
-
114
-
115
-
116
-
117
-
118
-
119
-
120
-
121
-
122
-
123
-
124
-
125
-
126
-
127
-
128
-
129
-
130
-
131
-
132
-
133
-
134
-
135
-
136
-
137
-
138
-
139
-
140
-
141
 |
 |