TP-Link EAP110 EAP Controller Software V1 User Guide - Page 15
Place APs onto the Map
 |
View all TP-Link EAP110 manuals
Add to My Manuals
Save this manual to your list of manuals |
Page 15 highlights
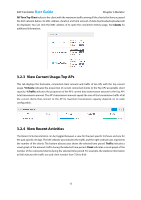
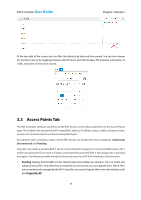
EAP Controller User Guide Chapter 3 Monitor Step 3: Click . Then draw a line on the map by clicking and dragging the mouse. If you need to redraw the line, just click and draw the mouse again to draw a new line. Once you are satisfied with the line, click Next. Step 4: Enter the distance that the line represents in the Distance field to set the scale of this map. The distance is specified in meters by default but you can switch to feet using the drop-down selection menu on the right. Click Confirm. 3.1.3 Place APs onto the Map Place APs onto the Map Drag the unplaced APs from the Unplaced APs list to the appropriate location on the map according to its actual location. 11
-
 1
1 -
2
-
3
-
4
-
5
-
6
-
7
-
8
-
9
-
 10
10 -
 11
11 -
 12
12 -
 13
13 -
 14
14 -
 15
15 -
 16
16 -
 17
17 -
 18
18 -
 19
19 -
 20
20 -
21
-
22
-
23
-
24
-
25
-
26
-
27
-
28
-
29
-
30
-
31
-
32
-
33
-
34
-
35
-
36
-
37
-
38
-
39
-
40
-
41
-
42
-
43
-
44
-
45
-
46
-
47
-
48
-
49
-
50
-
51
-
52
-
53
-
54
-
55
-
56
-
57
-
58
-
59
-
60
-
61
-
62
-
63
 |
 |
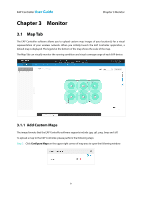
EAP Controller
User Guide
Chapter 3 Monitor
11
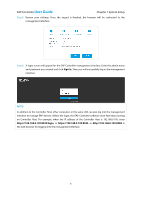
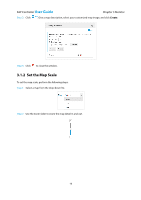
Step 3:
Click
. Then draw a line on the map by clicking and dragging the mouse. If you need to redraw
the line, just click and draw the mouse again to draw a new line. Once you are satisfied with the
line, click
Next
.
Step 4:
Enter the distance that the line represents in the Distance field to set the scale of this map. The
distance is specified in meters by default but you can switch to feet using the drop-down
selection menu on the right. Click
Confirm
.
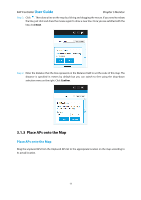
3.1.3
Place APs onto the Map
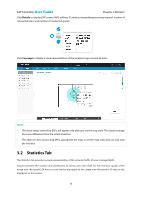
Place APs onto the Map
Drag the unplaced APs from the Unplaced APs list to the appropriate location on the map according to
its actual location.