TP-Link RE350 RE350EU V1 User Guide - Page 22
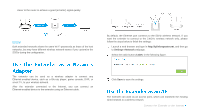
Method Two: Enter the client’s PIN code on the AP
 |
View all TP-Link RE350 manuals
Add to My Manuals
Save this manual to your list of manuals |
Page 22 highlights
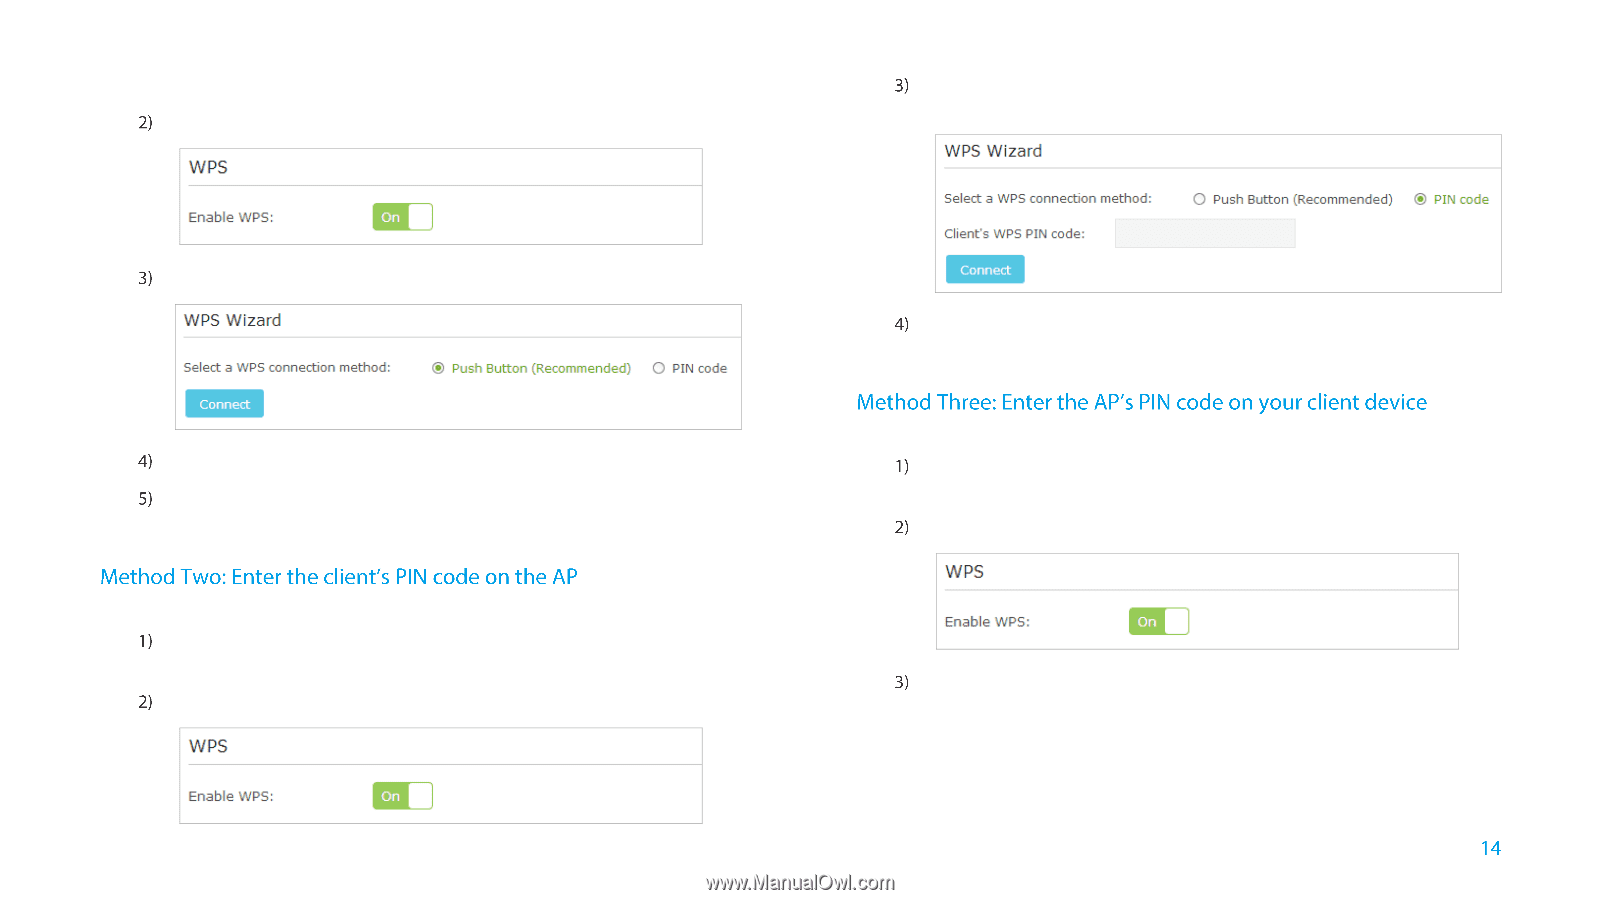
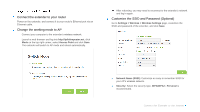
go to Settings > Wireless > WPS page. Enable the WPS function of the AP. Select Push Button at WPS Wizard section, and click Connect. Enable the WPS function on your client device within 2 minutes. "Connect successfully" will appear on the WPS page, which means that your client device has connected to the AP by WPS. Use this method if your client device has a WPS PIN code. Launch a web browser, log into http://tplinkrepeater.net, and then go to Settings > Wireless > WPS page. Enable the WPS function of the AP. Select PIN code at WPS Wizard section, enter the client's WPS PIN code and click Connect. "Connect successfully" will appear on this page, which means that your client device has connected to the AP by WPS. Use this method if your client device requires the AP's PIN code. Launch a web browser, log into http://tplinkrepeater.net, and then go to Settings > Wireless > WPS page. Enable the WPS function of the AP. Enable the AP's PIN. The current PIN code of the AP will be displayed on this page, you can also click Generate to get a new one. Connect the Extender to the Internet
-
 1
1 -
2
-
3
-
4
-
5
-
6
-
7
-
8
-
9
-
10
-
11
-
12
-
13
-
14
-
15
-
16
-
 17
17 -
 18
18 -
 19
19 -
 20
20 -
 21
21 -
 22
22 -
 23
23 -
 24
24 -
 25
25 -
 26
26 -
 27
27 -
28
-
29
-
30
-
31
-
32
-
33
-
34
-
35
-
36
-
37
-
38
-
39
-
40
-
41
-
42
-
43
 |
 |