TRENDnet TV-IP672WI User's Guide - Page 14
Setup Wizard
 |
View all TRENDnet TV-IP672WI manuals
Add to My Manuals
Save this manual to your list of manuals |
Page 14 highlights
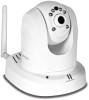
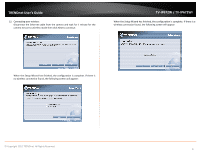
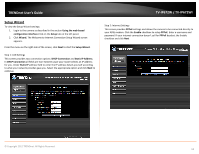
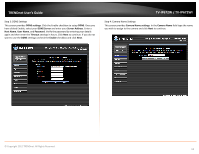
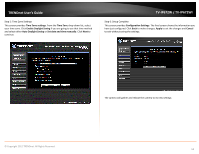
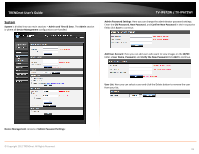
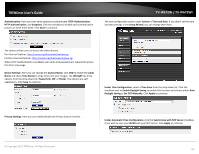
TRENDnet User's Guide Setup Wizard To view the Setup Wizard settings: 1. Login to the camera as described in the section Using the web-based configuration interface.Click on the Setup tab on the left panel. 2. Click Wizard. The Welcome to Internet Connection Setup Wizard screen appears. From the menu on the right side of the screen, click Next to start the Setup Wizard. Step 1: LAN Settings This screen provides two connection options: DHCP Connection and Static IP Address. In DHCP Connection all fields are non-existent cause your router selects an IP address for you. Under Static IP address field to enter the IP address details yourself according to what your network provider gave you. Select the appropriate option and click Next to continue. TV-IP672W / TV-IP672WI Step 2: Internet Settings This screen provides PPPoE settings and allows the camera to be connected directly to your ADSL modem. Click the Enable checkbox to setup PPPoE. Enter a username and password. If your internet connection doesn't call for PPPoE deselect the Enable checkbox and click Next © Copyright 2012 TRENDnet. All Rights Reserved. 12
-
 1
1 -
2
-
3
-
4
-
5
-
6
-
7
-
8
-
 9
9 -
 10
10 -
 11
11 -
 12
12 -
 13
13 -
 14
14 -
 15
15 -
 16
16 -
 17
17 -
 18
18 -
 19
19 -
20
-
21
-
22
-
23
-
24
-
25
-
26
-
27
-
28
-
29
-
30
-
31
-
32
-
33
-
34
-
35
-
36
-
37
-
38
-
39
-
40
-
41
-
42
-
43
 |
 |