TRENDnet TV-IP672WI User's Guide - Page 25
Video Clip Type - linux
 |
View all TRENDnet TV-IP672WI manuals
Add to My Manuals
Save this manual to your list of manuals |
Page 25 highlights
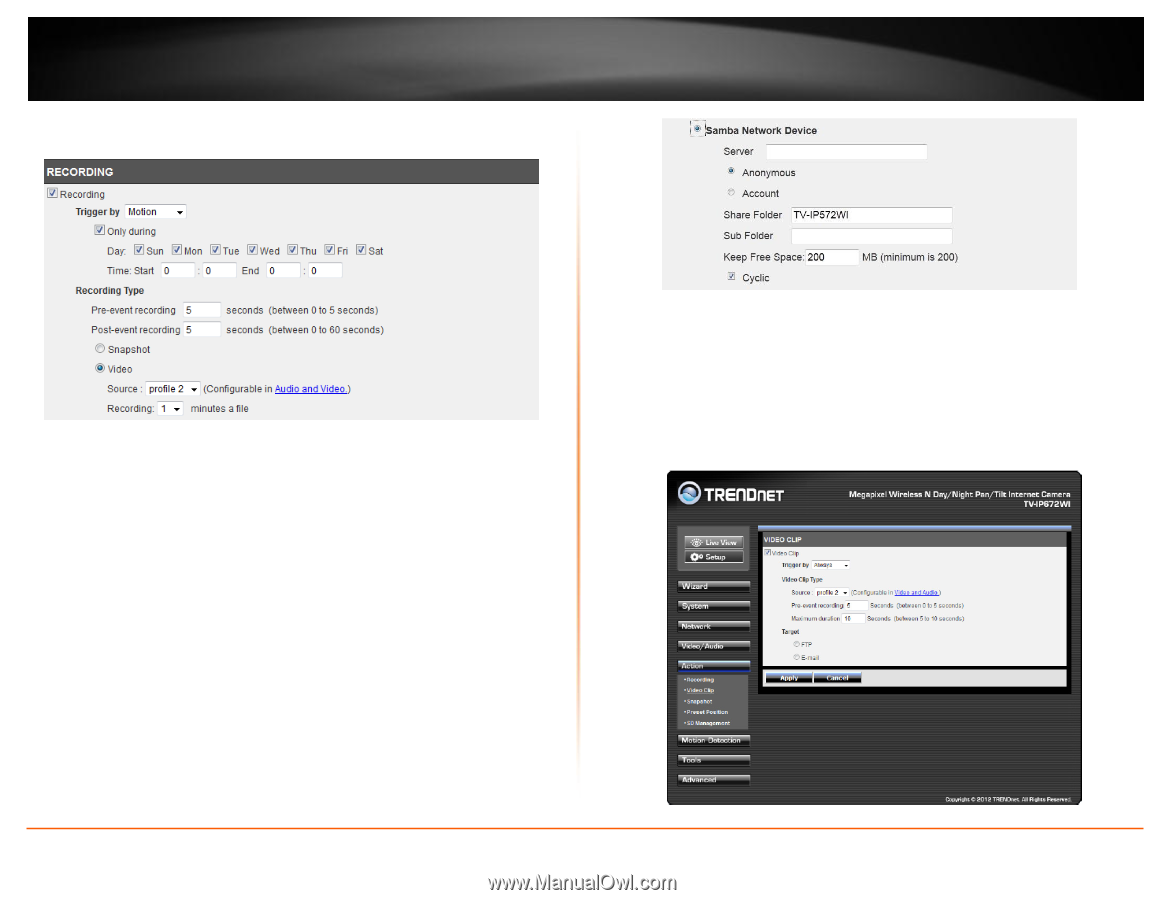
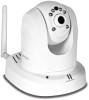
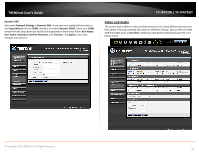
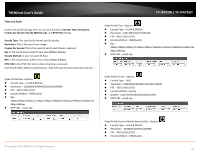
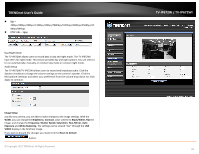
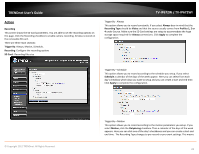
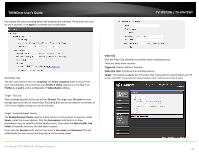
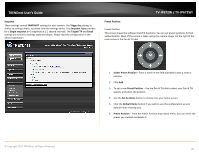
TRENDnet User's Guide the camera will start recording before the allotted time schedule. These times can only be set in seconds. Click Apply to complete the configuration. TV-IP672W / TV-IP672WI Recording Type The two main sections here are Snapshot and Video. Snapshot takes a picture from your recorded data and only works with Profile 3. Video captures source data from Profiles 1, 2, and 4. and is configurable in Video/Audio settings. Target - SD Card These settings depend on the size of your SD card. The larger your SD card the more storage space you have to record data. Recording data can be recorded in increments of 1-6 minutes. Cyclic settings can also be checked. Target - Samba Network Device The Samba Network Device requires a NAS server or a Linux server to operate. Under Server, enter the server address. Click the Anonymous radio button to allow anonymous users to send files to the Samba server. Then enter the Share Folder, Sub Folder (if needed) and enter the disk space needed. If you click the Account radio button then enter a Username and Password. This will authenticate the user every time they log on to the samba server. Video Clip Click the Video Clip checkbox to activate video recording events. There are three main sections: Trigger By: Always, Motion, Schedule, Video Clip Type: Configure the recording options Target: The targets available are FTP and E-mail. If you want to record data to an FTP server, click FTP. If you want to record data to an E-mail account click E-mail. © Copyright 2012 TRENDnet. All Rights Reserved. 23
-
 1
1 -
2
-
3
-
4
-
5
-
6
-
7
-
8
-
9
-
10
-
11
-
12
-
13
-
14
-
15
-
16
-
17
-
18
-
19
-
 20
20 -
 21
21 -
 22
22 -
 23
23 -
 24
24 -
 25
25 -
 26
26 -
 27
27 -
 28
28 -
 29
29 -
 30
30 -
31
-
32
-
33
-
34
-
35
-
36
-
37
-
38
-
39
-
40
-
41
-
42
-
43
 |
 |