TRENDnet TV-IP672WI User's Guide - Page 16
Time Zone settings, Time Zon, Enable Daylight Saving, Auto Daylight Saving, Set date and time - manual
 |
View all TRENDnet TV-IP672WI manuals
Add to My Manuals
Save this manual to your list of manuals |
Page 16 highlights
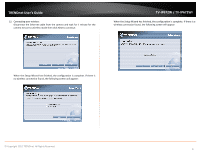
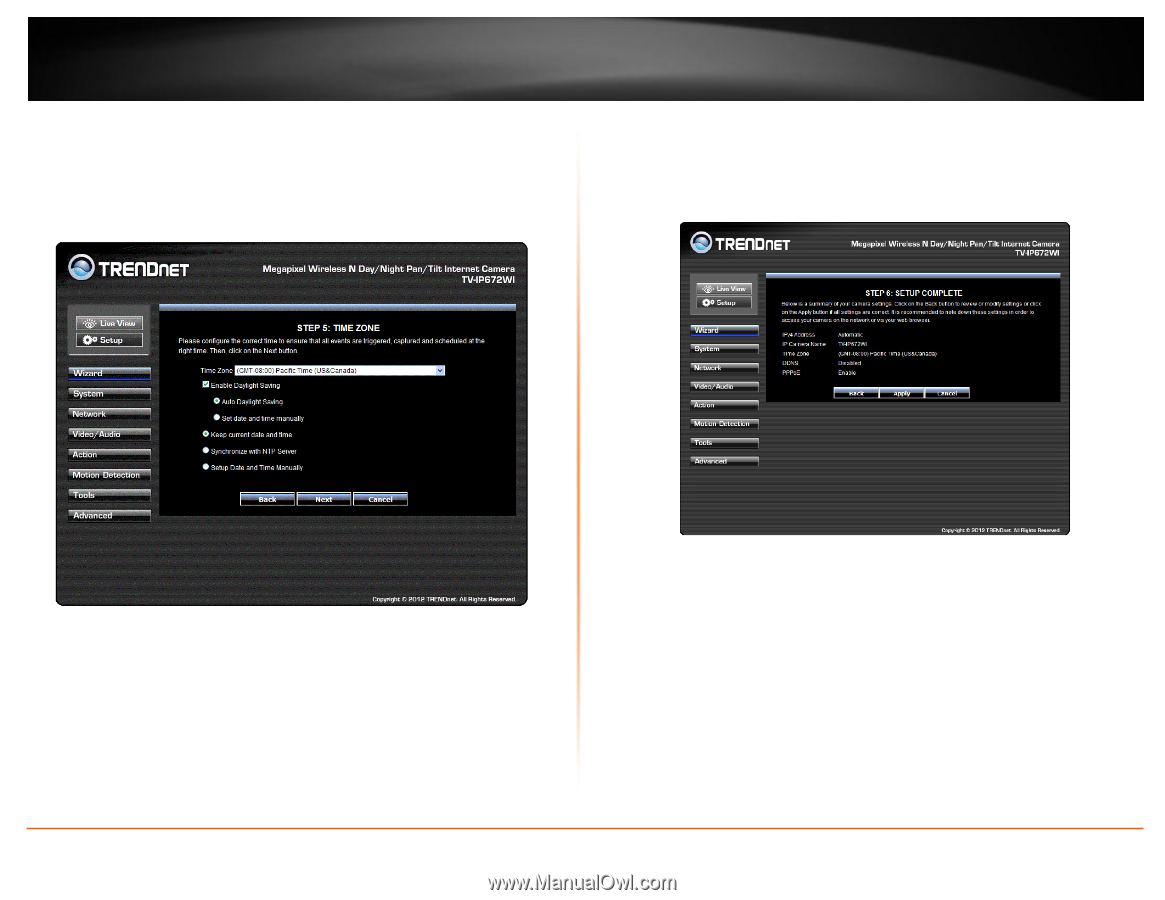
TRENDnet User's Guide Step 5: Time Zone Settings This screen provides Time Zone settings. From the Time Zone drop-down list, select your time zone. Click Enable Daylight Saving if you are going to use that time method and select either Auto Daylight Saving or Set date and time manually. Click Next to continue. TV-IP672W / TV-IP672WI Step 6: Setup Complete This screen provides Configuration Settings. The final screen shows the information you have just configured. Click Back to make changes, Apply to set the changes and Cancel to exit without saving the settings. © Copyright 2012 TRENDnet. All Rights Reserved. The camera will gather and reboot the camera to its new settings 14
-
 1
1 -
2
-
3
-
4
-
5
-
6
-
7
-
8
-
9
-
10
-
 11
11 -
 12
12 -
 13
13 -
 14
14 -
 15
15 -
 16
16 -
 17
17 -
 18
18 -
 19
19 -
 20
20 -
 21
21 -
22
-
23
-
24
-
25
-
26
-
27
-
28
-
29
-
30
-
31
-
32
-
33
-
34
-
35
-
36
-
37
-
38
-
39
-
40
-
41
-
42
-
43
 |
 |
© Copyright 2012 TRENDnet. All Rights Reserved.
TRENDnet User’s Guide
TV-IP672W / TV-IP672WI
14
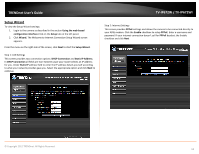
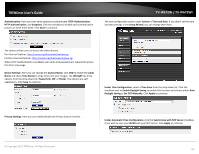
Step 5: Time Zone Settings
This screen provides
Time Zone settings
. From the
Time Zon
e drop-down list, select
your time zone. Click
Enable Daylight Saving
if you are going to use that time method
and select either
Auto Daylight Saving
or
Set date and time manually
. Click
Next
to
continue.
Step 6: Setup Complete
This screen provides
Configuration Settings
. The final screen shows the information you
have just configured. Click
Back
to make changes,
Apply
to set the changes and
Cancel
to exit without saving the settings.
The camera will gather and reboot the camera to its new settings